*Alternate Energy - My Start*
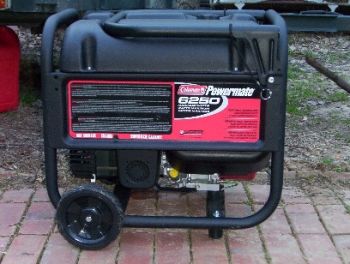
I finally saved up some money and decided to use it on an alternate energy system. The problem is that I don't have a lot of money to spend all at once, so where do I start? Well, after reading a lot of the articles in here about solar power and alternate energy, I decided that the best place for me to start is with a generator. I know that a generator is not the optimum choice, but as long as I can provide fuel for it, I can have some power. The generator I bought does not have enough power to run my entire house, but at 5Kw, it's enough that I can wire it directly into my breaker box and just shut off the breakers that it can't handle. This also allows me to pick and choose. For example, I can run my well pump with nothing else running, then when my water supply is back up to par I can switch over to my Hot water Heater, which will hold hot water for a couple of hours, then I can switch over to the computer, etc. I chose the Coleman Powermate generator. Mine has a Briggs & Stratton 10hp engine. I chose this one for a couple of reasons, one of the primary being that I had used one before (borrowed after Hurricane Isabel, Isabel Debrief) and had liked the way that one performed. I also chose it because it was a decent price, higher than in the past, but still not too bad. The newer model that I got has some features that the borrowed one did not. Mine comes with 2 wheels and a folding handle that locks into the open position, it replaces the need for this article Making A Generator Cart. It also has a muffler already installed (maybe Coleman has been reading the Rubicon's articles: Quieten That Generator). Anyway, here's my generator.

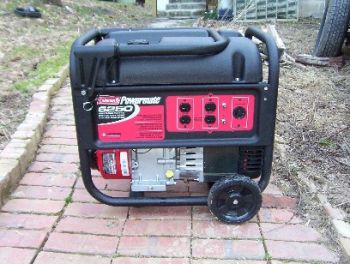
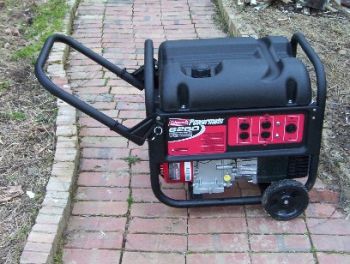
I assembled it this evening, and that was rather easy to do, I just needed (2) 9/16" wrenches and (2) 1/2" wrenches (or the equivalent). Once it was put together completely I filled the oil and the gas and started her up. It took a couple of sputtering tries because it had to get the fluids throughout, but after the 5th pull or so it just kept on running. I let it run for about half an hour and I was working right next to it. I'm not sure how the volume compares to War's modified genny, but I know that it is a whole lot quieter than the genny we used after Hurricane Isabel (that was actually War's genny before the muffler addition). I haven't got it wired into my breaker box yet because I want to consult with an electrician first, and also because this weekend I will be taking the genset with me to my uncles cabin in the middle of nowhere. I plan on running the genset under load until it runs through a full tank of gas, after which time I'll only run it when we actually need it. This is for a couple of reasons. First, it's brand new, I want to make sure it runs good under load for extended periods of time (I only have so many days to return it) and secondly, I want to know how long it will run on one tank of gas under load (about 5.5 gallons).
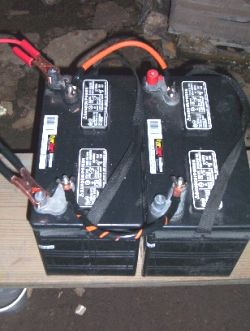
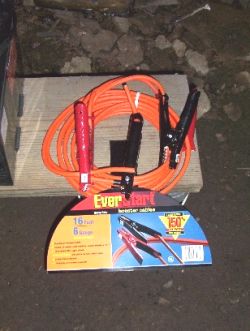
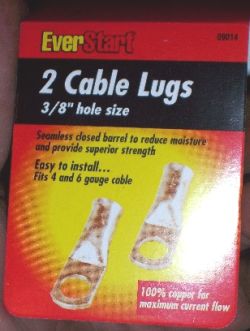
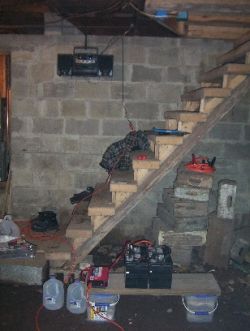
After I bought the genny, I realized I still had some "preps money" left, so I read some more articles and decided that the next thing I needed were some deep cell batteries and an inverter. I drove by Wally World after work today and got (2) 27DC-6 deep cell marine batteries (recommended in more articles than I should link to here) and I also got a 750 watt continuous, 1500 watt peak inverter. While there I figured out what I needed to hook the batteries together (a recommendation about using jumper cables and cutting them down to hook your batteries together by War in a recent post helped), but I needed some way to connect those wires to the batteries, I chose to use lugs that would fit onto the threaded posts on the batteries (tightened with wing nuts) because they would be easier to disconnect if I had to for some reason. Here's what all that stuff looks like:

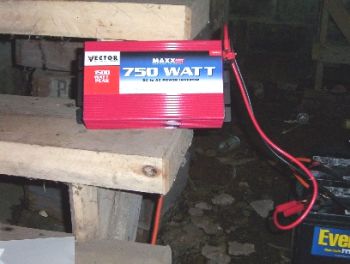
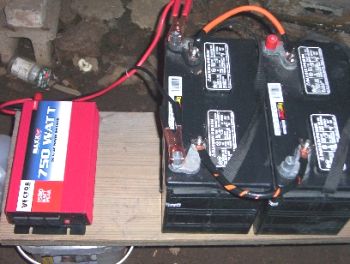

I realize that I still have to test my charging capabilities from the genny, but everything else works as advertised (I had the charger hooked to the batteries running off grid power earlier, but only because my generater is loaded on a trailer and ready to go to the mountain). this article is only meant to help illustrate that it's a lot easier to get started than it appears to an "outsider". And I was completely an outsider yesterday morning. The first step to alternate power really isn't as big as it seems. I hope this helps someone else that is trying to decide how to start, because no matter what you get first, It's a start.
Skid600
www.alpharubicon.com
All materials at this site not otherwise credited are Copyright © 1996 - 2005 Trip Williams. All rights reserved. May be reproduced for personal use only. Use of any material contained herein is subject to stated terms or written permission.