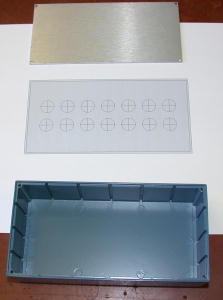
Got my project box ready to go. Printed out a layout drawing of where I want the holes to be. Note that I put crosshairs in each of the circles. This makes finding the center when drilling easy. The layout is printed on regular paper.
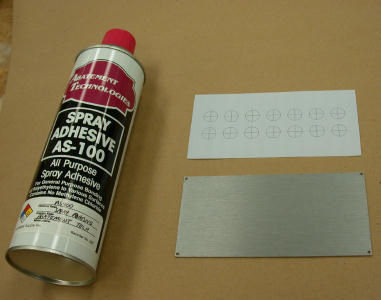
Cut the layout sheet to size. With a can of spray adhesive, spray the back of the layout sheet, then apply it to the panel of the project box. If you do this with the adhesive still wet, you can move it around some.
This adhesive goes everywhere. I use some butcher paper on the workbench, and give the sheet a spritz. Don't get too carried away, or it will saturate the paper, and be harder to remove later
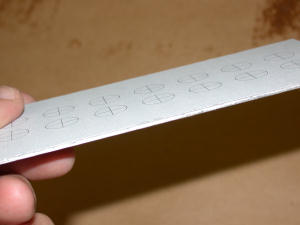
Lift the layout sheet off the butcher paper, and apply it adhesive side down to the top side of your panel. Press firmly to get out any bubbles. Allow the adhesive to set for a few minutes.
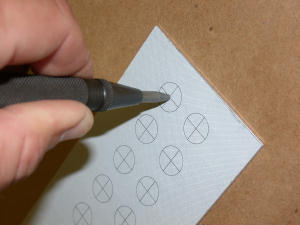
Using an automatic center punch, I mark the centers of all the holes.
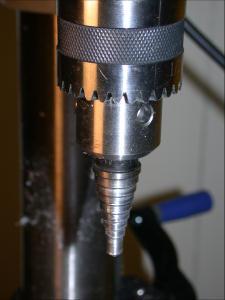
A Unibit drill bit mounted in a drill press does a nice job of drilling the holes squarely, and accurately. Tends to have all the common sizes, so one bit usually will take care of an entire project with multiple size holes.
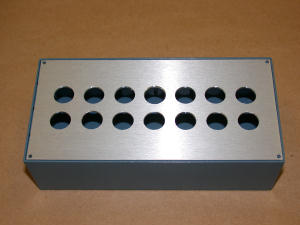
The holes are all drilled in nice even rows.
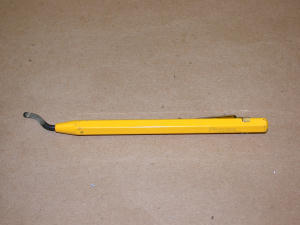
On some softer aluminum, the metal can blow out a bit on the backside of the panel when drilled. A deburring tool can quickly clean off the flashing. Pomona brand project boxes have a harder grade of aluminum, and this step isn't required.
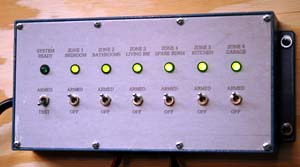
An optional step for a finished project.
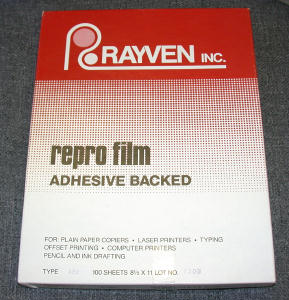
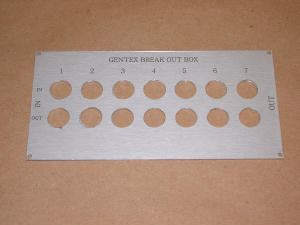
Once the holes are all drilled and cleaned up, peel off your layout sheet. Use isopropyl alcohol to remove any residue. Print out a second layout sheet. Get a piece of adhesive backed repro film (translucent), and put this into the sheet feed of a copier. Put your layout sheet into the copier, and press the button. The idea here is to copy your layout sheet onto the top side of the repro film.
Cut the layout that was printed onto the repro film. Peel the backing, and carefully apply to the panel. This sheet must be put on straight as there's no moving it around once applied. When you're satisfied with the placement, take a sharp X-Acto knife, trim the edges, and remove the material from the holes.
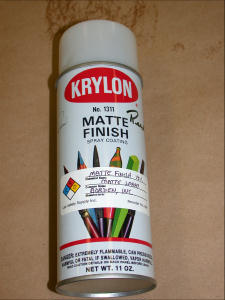
I use Krylon #1311 Matte Finish spray to seal the printing on the film. Several very light coats will do. If you put it on heavy, it can dissolve the print from the photocopier. Allow this to fully dry (hour or two).
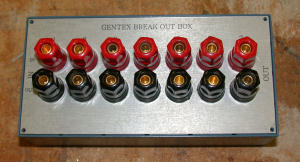
Now you can apply all the components to your panel. Switches typically have a nut on the face side, and backside of the panel. The one on the top is to set the depth, the one on the back is used to tighten it in place. If you tighten the one on the face side of the panel, you'll tear the film, and scratch the aluminum.
Wire it up, you're done.