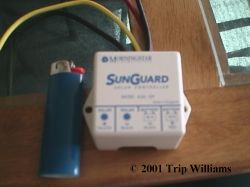
(The "SunGuard" charge controllers by Morning Star cost about 28 bux and will handle up to 4.5 amps. They are very small and portable)
*Solely Solar*
In my last solar article, ABC's of Solar, I covered using one solar panel to charge one battery. This article will carry you a step further, and finish giving you the basics of your solar system (Not the universe, your house ;).
As with the other articles, I'm basing the additions to our Solar plans on the 21 Watt "Thin Film" Models by UniSolar available at Northern Arizona Wind and Sun. Since we're moving up to several panels now, we will also need a charge controller. Since we want our unit to be modular AND portable, I went with the 4.5 amp "SunGuard" unit made by Morning Star, also available at Arizona Wind and Sun.
What does a charge controller do?
When you start getting above 2 amps of charging capability, or over 14 volts of DC voltage, you start running the risk of burning up batteries if you simply leave them charging all the time. This can actually turn into an explosive situation if you put too much current into a battery at once. A charge controller allows your batteries to "peak" (we discussed this in the last article) and then shut off charging until more charge is needed. It also keeps the voltage down to a level that won't toast your batteries.
Someone ask me a very good question about "Peaking Batteries" from my last article. As you know, a battery reaches a "peak Charge" and then you can watch the voltage scroll backwards one digit at a time on a multimeter... but what happens if you aren't around to take it off charge at that time? Well, the number keep rolling backwards for a while and then they start going forward again. This means your battery is damaged now, and every volt it rolls forward from that point on is doing more damage... it'll keep this up until the battery melts or explodes... it'll get too hot to touch and even melt through plastic or ignite wood if it's sitting on either.
When charging with one panel of about 2 amps, this is not a problem since 2 amps isn't enough to damage a big deep cycle battery... but when you add one more panel you have the potential to do SERIOUS damage. Our charge controller stops this from happening. It doesn't let the Battery over charge, but it always keeps the battery at it's maximum charge... your battery is always ready for use.
So how do you add a charge controller to your panels? It's very simple, but you have to know what you plan on using your panels for. If you plan to leave your panels in place, you simply hook your solar panel wires to the input wires of the charge controller and solder them in place, then hook the output wires from the controller to your battery(s). Our situation is a bit different, as I suspect your's will be also... We plan to use our panels here at the house, we plan to use them when camping, and we plan to charge individual Batteries from time to time. In the last article I showed how to hook up your panels for use individually... adding a charge controller to this setup is simple also and basically the same as for a permanently affixed setup.
Hooking it up
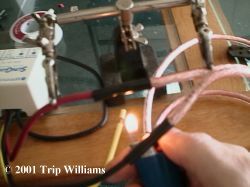
In the picture of the charge controller below, notice that there are 4 wires, Red, Yellow and two black wires. In this model of controller, the red wire and one black wire go to the batteries being charged, so I put large alligator clips on these two wires. The Yellow and last black wire go to the solar panel. Remember that we already have alligator clips on our solar panels, so I put "rings" on the yellow and black wire to allow me to hook the solar panel alligator clips to the rings.
With the red and black wire, you may want to add about 2 feet of heavy gauge, insulated wire. This gives you a little room to move the controller around to a suitable location before you clamp it down... to this wire extension, add two heavy Alligator clips that will hook to the charging posts of the batteries you are using. BE SURE to solder ALL connections.. as I have said many times before, "Twisting the wires together and taping them DOES NOT cut it with DC, you're asking for trouble"... Always solder and head shrink!
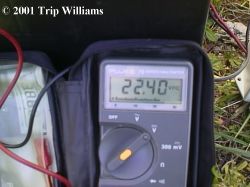
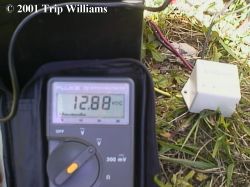
Believe it or not, at this point you are Done! Simply hook all the positive wires from your solar panels to the input wire to your charge controller... then hook all the negative wires from your solar panels to the black input wire. Hook your two Alligator clips from the output of your charge controller to the correct battery terminals (Positive to positive, Negative to negative). I recommend watching the charge process for a while with a multimeter to be sure your controller is working properly. These units are simple and reliable, but manufacturing accidents happen... best to be safe till you're sure it's working right.
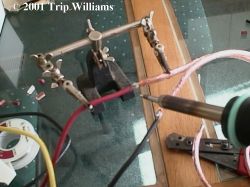
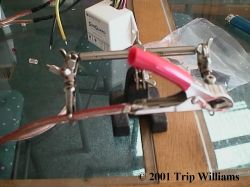
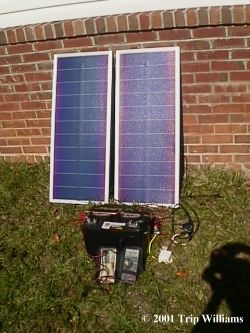
Congratulations! You're solar! Your finished Panels will look something like this:
If you plan to use your panels in a permanent place and keep adding to them, you'll probably want to buy a larger charge controller to start with... the one shown here will only handle three 21 watt panels safely at 12 volts. You may wish to start with a 10 amp or larger charge controller, depending on your plans and needs.
A note of warning! BE SURE to check the water levels in your deep-cycle batteries EVERY MONTH, they will dry out quick if they are on a continuous charge! Mark it on your calendar!
Good luck! If you have a solar system, we'd love to see how you've done it!
Warlord
All materials at this site not otherwise credited are Copyright © 1996 - 2001 Trip Williams. All rights reserved. May be reproduced for personal use only. Use of any material contained herein is subject to stated terms or written permission.