*Tying It All Together*
If you've been following our other articles on Solar power, you know that We've been taking the "modular approach" to the project. We buy stuff as we can afford it, and then add it in to what we already have.. Now it's time to tie all the modular components together into one system.
Before we start, let me stress that this was NOT meant to take us "off the commercial power grid". Our Electric Company sells us a KILO-WATT of electricity for about 6 cents.... The Solar companies sell us a WATT for about 5 bux. True, those Watts get cheaper over time, but we can not produce power cheaper than the power company can. Solar Panels, Batteries, Wire, Charge Controllers, Inverters, connectors, etc, etc, all cost money and it can add up quick. The cost of our home Solar system will take a long time to pay for itself, but it will eventually.
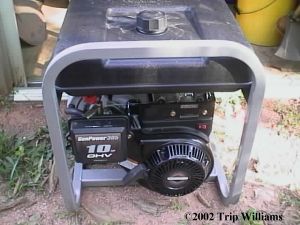
Our Solar Power system is designed around power outages. We live out in the country in the S.E. USA and we get the typical spring storms which are common in this area. Sometimes we also get a little snow and ice in the winter, and that can take our power out too. Therefore, our system is designed to work with the Grid power, Solar Power and a 5KW backup generator.
Zones
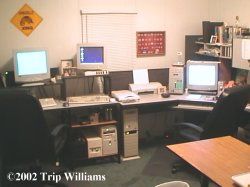
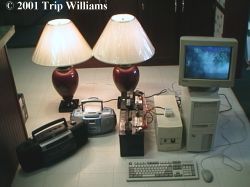
Our first task was to decide what HAD to be powered. We have a home office with 5 Computers, Monitors, printers, cordless phones, and all the other trappings of a regular office. Our Internet connection comes from a full duplex Satellite dish installed on our roof. Therefore we also have to provide power to the satellite system, satellite modem, a router, and a network hub. We call the home office Zone 1.
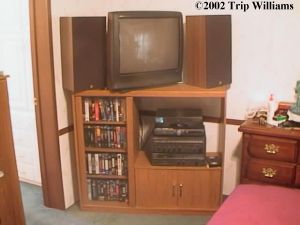
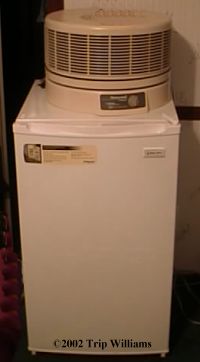
Zone 2 in our house is our Master Bedroom and Bath. We spend a lot of time here since it's a large area and our "safe room"... it's where our kids feel comfortable and it's where we all go when there's storms or trouble of any type. Our backup comms, large TV set, DVD player, VCR, Stereo, a Dorm Room type refrigerator, Cell phones, etc, are here. It's another "High power consumption area". The Lamps, Clocks, TV/VCR/DVD/Stereo all run totally off Batteries connected to the solar panels... there's very little "grid power" being used in Zone 2, and what IS on grid power is also setup to run without it should the power go off.

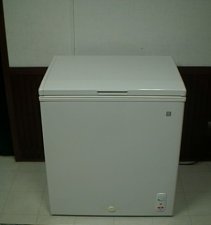
Zone 3 is our Kitchen and living room. They have all the normal stuff that a typical living room and Kitchen have. We actually don't use the living room much, but it's where our fireplace with woodstove insert is. About the only power we'd NEED in an emergency in the Living room and kitchen is the lights, and maybe our small deep freeze.
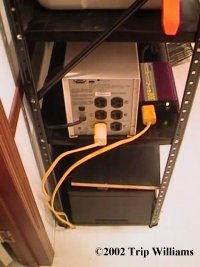
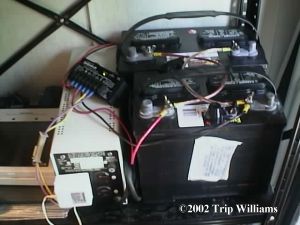
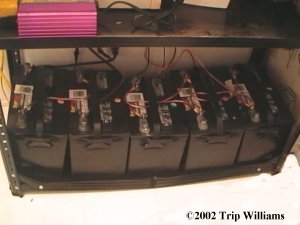
Zone 4 Is where the central power system lives in our Utility room. The whole setup is on grounded metal racks and consists of 14 120amp/hour deepcycle batteries, five 900 Watt "Uninterruptable Power Supplies (UPS)" which act as our inverters, two 500 Watt Inverters and assorted other equipment... BTW, those 14 Deepcycles provide 1680 amp/hours of instantly available power 24 hours a day, 7 days a week... That's 20+KW of AC power. We can run a LONG time off of that.
You might say zone 4 is the heart of the system. If you need a LOT of power, Zone 4 is obviously the place to go to get it. This is where all the distribution lines in the house start and you can pull 5KW of power there for a LONG time, day or night. If extra power is needed for any other part of the house, Zone 4 can supply it. Zone 4 also is where our battery chargers live for recharging NiCad's, Emergency lights, Survival Equipment, night lights, Alarm system, etc, etc.
UPS's
You might ask "Why did you use UPS's instead of regular inverters?"
Two reasons.
As I said before, we only use Alternate power when the grid power is out, or to power some things that seem to ALWAYS be turned on (but used very little). UPS units have several advantages in this situation. When the power goes out, a UPS does it's job, it automatically kicks on so fast that the computers don't even blink. You only know the power is out because the lights go out. They get their power from a Battery (Or several batteries) and they keep those batteries "topped off" and fully charged from grid power when the batteries are not needed. They constantly monitor the batteries connected to them, and if they need a little charge, the UPS gives them a little charge and then the charger portion shuts off.
Reason #2... They were free :)
Grinch got EXTREMELY lucky and scored a bunch of 1250 UPS units from somewhere and has given many of them away to Rubicon Members (he's given me 5). If you want to know more about them, click here. These babies are MONSTERS, they weigh about 50 pounds without batteries, and they allow you to easily strip out the gelcell batteries in them and use Deepcycles as their power supply. Yeah, Grinch is DEFINITELY the Hero of the day when it comes to our Alt Power system.
Connecting Batteries
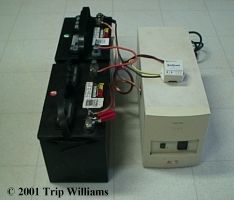
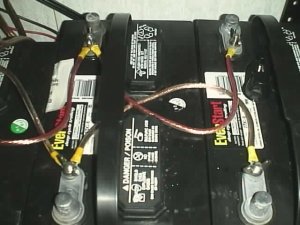
NEVER hook two batteries together of different amperage ratings! I had a much abused 100A/H deep cycle battery connected in parallel with several 116A/H batteries just to see if the old tale about not doing this was true... the 100 A/H battery died a bad death within two weeks. The cell on the positive terminal cooked and the battery now reads 10.8 volts at full charge... it's history.
Ventilation
Be SURE that the place where you keep your baterries is WELL VENTED! You'll also want to be sure that a little battery acid on the surrounding area won't hurt anything. When batteries charge they give off explosive gasses, and sometimes they vent a little water/acid mix... this is really no big deal unless your wife's favorite dress happens to be nearby when the batteries decide to vent :)
Other stuff
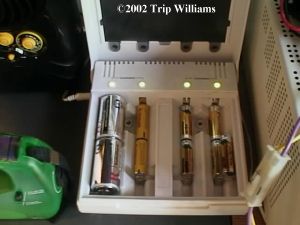
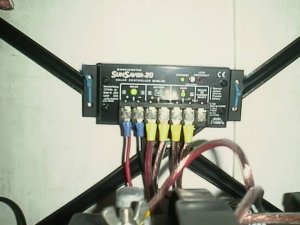
Other stuff in Zone 4 is the relay box. I made this from a small rubbermaid container. Inside is a 20 amp "Sun Saver" Solar Charge controller (From Northern Arizona Wind and Sun), a junction/switching box, and several other items discussed in a bit.
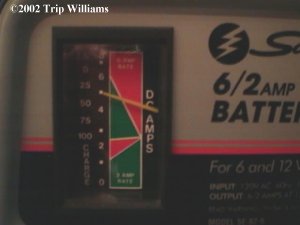
Charge Controller
The "Sun Saver" Charge Controller is a slick little device, No Doubt. It's the electronic brains of our alternate power system.
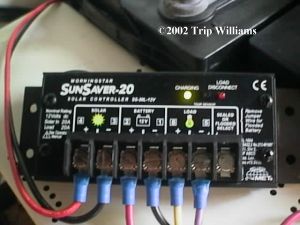
Starting left to right on the picture above, the Sun Saver works like this:
Solar Power is connected (+ and -) to the first two terminals. The second two terminals are where your battery banks hook up (again + and -). The third set of terminals are for the "System load" (+ and - ...UPS Units in this case)... And the last terminal is used for setting the type of batteries used. The batteries in this system are Deepcycles so the last terminal is not used... if we were using sealed gelcell batteries, there would be a jumper on the last terminal (Yeah, it makes a difference).
So, in a nut shell, the solar power from the outside panels comes into the charge controller and is used to charge the deepcycles, The excess solar power is used to run the inverters. Now here's the beauty of the system...
The Charger controller wants to horde battery power. It'll use Solar to run as much of the load as it can without tapping into the battery banks. If the load required exceeds what I can deliver with solar panels (and right now it often does, we need more panels desperately) then it looks to grid power to draw the load (remember, the UPS units run off Grid power unless there is no grid power). If it can't find grid power, it next looks to our generator for power.. if the genset is not connected, THEN it taps into the emergency battery banks.
This description makes it sound like the Sun Saver is smarter than it is. Actually, it just looks to solar first, then taps into the battery banks if it can't find solar power... but the way I have the inputs connected, the end result is the way I described above.
Expanding
This is our newest aquisition, So in the very near future, the "Grinch Power UPS units" will be replaced with this 48 volt, 4KW UPS. This'll actually power the whole house minus the central Air Conditioning and heating unit.
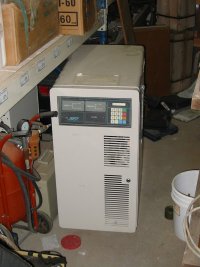
This beast can easily be added into the existing Alt Energy grid to replace the "smaller" UPS units we have running now. Like I said, that'll be done in the near future as we get time.
Switch box
What this box does is allow US to decide where the system get's it's power, and where that power goes. Remember that the UPS units charge batteries in their normal mode while running off grid power, and we let them do just that. But if there is no grid power, the solar panels charge the battery banks and the UPS's happily run off the batteries. If there's no Sun and no grid power, the genset starts up and the UPS units charge the battery banks from the generator while supplying the house with power.
Basically, we have three ways of powering the house. Grid power (Cheapest), Solar power or generator. We can run everything we need to run in the house for 5 days TOTALLY off battery supplied Inverters (True inverters and UPS units). After that, either the Sun has to come out, or the genset has to run for 5 hours.
Emergency Receptacles
As we know (or should know), DC power doesn't travel well over long distances, and you have to have BIG stranded wire to run it even short distances. If you hook a 12 volt battery to two BIG wires the length of your house, you'll have less than 11 volts at the other end of the wires, and the wires will really get hot if you try to pull even a few amps...This is why our Inverters and UPS units live close to the source of DC power (Battery Banks and Solar Panels).
However, AC power travels just fine over longer distances. There's no perceptible voltage loss in wires the length of your house. So now all I have to do is get the emergency AC power to the rooms I need it in.
We didn't want to mess with our home's breaker panel or existing wiring. There's several ways (expensive) to add "power cut outs" to your home's breaker panel, and some people just remember to kill the main breaker before they turn on their genset, but that's dangerous... many homes have gone up in flames after a power outage because the grid power came back on while the generator was running on the same wires... also, many power company line workers are killed when they touch a line that's supposed to be dead and some guy's generator is actually pumping power through it accidentally because he didn't cut his main breaker off.
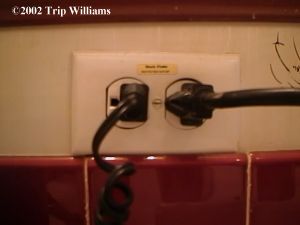
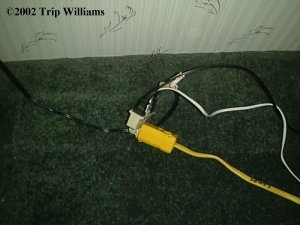
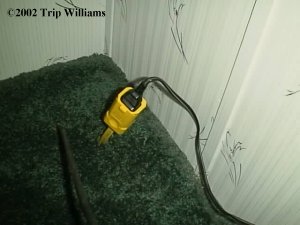
Our way was a bit harder, but it works. The kids crawled under the house with a roll of 12-2 Romex wire and we simply added an "Emergency receptacle" to each area where we needed one. The Romex bundle terminates in Zone 4 and each wire has a heavy male plug on it. This plug is plugged into the appropriate UPS unit. You can usually use 12-2 wire on shorter runs of inverter-made-AC, but for longer runs you may have to go with 10-2 or 10-3 wire.. your inverter doesn't have as much flux on the lines to help the power flow as efficiently as the power company does.
ANYTHING plugged into the Emergency Outlets in any zone of the house will not turn off when the grid power goes out. The computers stay on, the lamps stay on, the TV/VRC/DVD stays on, the fridge stays on, etc, etc, etc. There's really no difference between the regular outlets in the house and the Emergency outlets other than the Emergency outlets don't go dead during a grid power outage. Other than that, it works just like a normal house outlet and you can plug anything you want into it.
We try not to plug unneeded stuff into the Emergency outlets because if it's on when the power goes out, it kills our batteries faster. Sometimes we "run out for just a minute" and arrive back home to find out the power is out and all of our computers, lights, TV, etc have been running for several hours off backup power... you get very conscious of what's left turned on when you know you are wasting YOUR power... 6 cents per KW/hour is not too bad to waste (I know, GROAN, wasting power is never good, but it happens), but 32 cents to 50 cents per KWH starts you thinking (That's what it costs me to make power from Solar or Generator once all the costs are added in). So if you aren't using an item, TURN IT OFF! Get into the habit now and it's easier to live with later.
Some Miscalculations
We initially made some miscalculations in our Solar power system.. I tend to "over engineer" things and "Err to the side of caution". After hooking up our system, our batteries kept over charging and we couldn't figure out why.. so we went back and started figuring over again...
We GROSSLY overestimated the amount of power we were using for the stuff that now runs on "Solar only".. We figured up 80 watts for lamps, 450 watts for entertainment center and stuff... It turns out the actual usage is MUCH less than that, AND the Entertainment center and lamps are only used for about 5 hours a night... We figured them running 24/7, which of course, they don't.
Still, our batteries continued to over charge (Or recharge much faster than we though they should)... We started digging into the paperwork and found several clues we had over looked before. Our panels are rated in "Area three" of the sun belt in the USA... we live in Area 2 further South and get more sun (and more intense sun). So again I had to revamp our power strategy to put more load on the solar grid...
The batteries were STILL over charging... back to the documentation. Our panels are rated at 100 watts each at TWENTY volts... we're running them at 13.8 volts. All total, this means that our panels are actually producing 22.7 amps, NOT the 13.7 amps we thought they were putting out. I'm not complaining... But it DID show us that we needed some concrete figures about what type of load we were drawing from the batteries, and what type of charge we were actually putting into them.
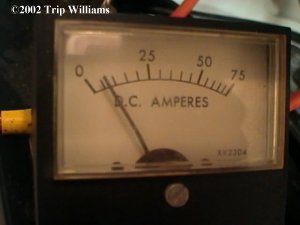
One of our teammates, GrayFox, brought us a big DC amperage meter, so now we're able to see EXACTLY what a load is pulling from our batteries... What we thought was about 400 watts turned out to be 173 watts! (7.2 actual amps of draw times 24 volts = approx. 172.8 Watts)
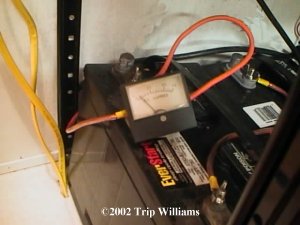
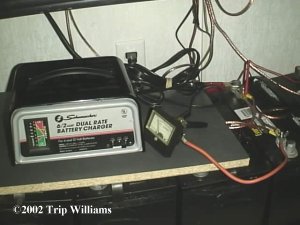
To make SURE the meter was reading accurately, we tested it on a known load... We broke out the 6 amp battery charger and connected one terminal of the battery charger to one terminal of the amp meter, and then the other terminal of the amp meter to the negative side of the battery bank... The charger's meter showed charging at 5 amps, the new 75 amp meter also showed it charging at 5 amps... It's calibrated correctly in my book ;)
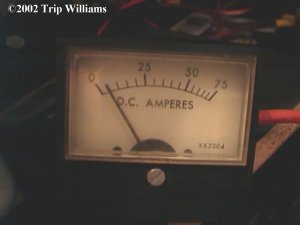
The rated wattage on an appliance is only a ballpark figure in most cases.. it'll get you close, but when you start adding many appliances together the figures can be very misleading! Get a DC amperage meter (They aren't expensive at all) and find out EXACTLY what the load is on your batteries!
Additionally, Be careful when figuring out what you have to power and how much power you are able to produce. If we lived further North, this could have easily worked against us instead of to our advantage... as it is we had to install another Charge controller and split up the battery banks since our charge controllers are only rated at 20 amps each.
TSHTF
Like I said, we normally rely on Grid power for most of the house, but our system is also designed to allow us to live decently even if The Stuff Hits The Fan and the grid never comes back on. Yeah, we need more solar panels to be "comfortable", but we'll get there. As I said at the start of this article, This project was started 18 months ago in a modular way to allow us to change it and add on to it as we go along. All we've done now is tie all the modules together into one system. As we add more solar panels, we are less reliant on the grid. As long as the Solar panels can handle the load of the system, neither the grid or Battery banks come into play. Someday, the grid won't have to come into play at all, but even now, the power our panels generate cuts our power bill by a lot each month, as we add more panels, our power bill will keep going down.
Making the most of the Sun you have
We choose to live in the Sunny south, and one advantage is that we're in the "Sun belt". There are charts on the internet that show the average amount of "Sun Fall" each area of the world receives, and we're in one of the highest areas.
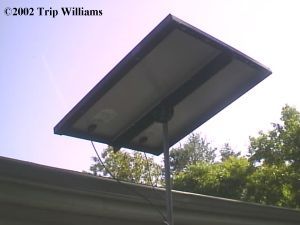
But even being in the high Sun light areas can be improved on... and if you live further North in lower bands of "Sun Fall" you REALLY need to make the most out of what Sun you get. In comes the solar tracker.
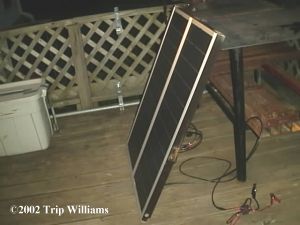
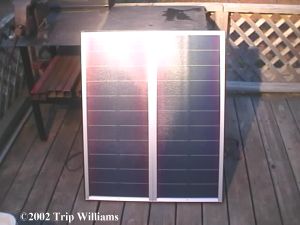
Solar trackers aren't new. All "Solar panel companies" sell them. There are many different types. What a Solar tracker does is keep your Solar Panels facing the Sun all day. As the Sun moves, your panels move.
There are many different ways to make your panels face the Sun all day. Some trackers rely on freon (or freon-like) gases in a sealed chamber (like a Car shock absorber). As the chamber is heated by the Sun, the gas inside expands and causes a rod to push your panel racks in the opposite direction.. therefore your panel racks are (more or less) pointing at the Sun.
In the South where temps can vary widely day to day, that aint the way to go (in my opinion). What we did was to tear down an old VCR and use it to find the Sun. Inside a VCR is a small stepper motor (several actually) and a light sensor. Since this is a Solar Article, I won't go into what they do inside a VCR, but trust me, they are there.
We simply made a small "comparator circuit" and attached two light sensors to it. One tiny light sensor sits on each side of each solar panel rack. When the Sun is up, the comparator circuit looks at the difference between the amount of light hitting each light sensor and then tries to make the light hit them both evenly. It does this by taking a tiny amount of power from the solar panel to supply the stepper motor, and the stepper motor moves the panel rack towards the Sun till the light is evenly striking both tiny light sensors.. then it turns off. When the Sun moves, the light between the two sensors is again uneven, the circuit comes back on, adjusts the panel rack again, then turns back off. This costs us nothing and we don't have to fool with it.... We get maximum Sun light on the panels all day, even if it's cloudy.
Soon we will replace the light sensors with two 1 watt solar panels. These panels will act as the light sensors AND power the stepper motor... You'll see why we want to do this in a future article... Solar panels aren't the only things that need to face the sun for best results ;)
Quite by accident, we solved another minor problem. At night the panel rack is left facing West (Where the Sun was last)... As you know (or should know) the Sun comes up in the East, and it may be 30 minutes before there is enough light in the sky to make the rack want to swing back Eastward AND have enough Solar Power power to do it... When we raised our panels over the house, the Motion detector lights happened to be East of the panel rack. The motion lights usually come on at least once a night as a dog, cat or deer strolls across our yard and it's enough light to activate the sensors and power the stepper motor. So every morning, the panel rack is again facing East. We started to put a spring on the panel rack which caused the panel to swing back East when the Sun went down, but we didn't like that idea for many reasons (During ultra cloudy times the panel might swing back East, also the stepper motor has to constantly fight the spring, etc). There are other ways to make the panel rack swing back East, but we scrapped the ideas when we saw that the motion lights solved the problem.
A Big No-No
Whenever discussing the topic of getting maximum Sunlight onto your panels, someone is SURE to say,
"Hey, What if I use a reflector or magnifying lens to put more light onto the panel, can I get more power out of it?"
Short answer: "Yes, but not for long". The added light will cause your panels to burn out quicker and the excess heat WILL damage the panels and wiring. DON'T DO IT!"
Racks
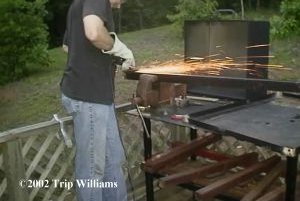
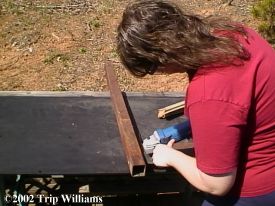
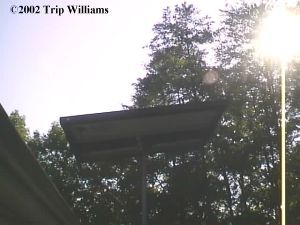
If you have any skill at all with metal working, you don't need to buy Solar Panel racks, they are simple to build. You need the rack to get your panels up in the air where they can get Sunlight all day. We didn't want ours on the roof for many reasons, so our racks stand on poles right at the roof line. They get unobstructed Sun from dawn till dusk and you can't see them from anywhere except our back yard... none of our neighbors know they are there.
Building the racks is simple. I only like to have two panels in each rack in case a storm blows one rack over... I'd rather lose two panels from one rack falling than lose them all because one rack fell. Don't put all your solar panels in one rack (Sound familiar? :)
Put two solar panels side by side and measure their width and height. Now using angle iron make a square rack for the panels to fit in (We used an old king sized bed frame and it worked out perfectly for 3 racks).

As I've said repeatedly in this article and many others.. Don't expect to go solar all at once unless you have a LOT of cash (or credit). We've spent over 18 months building our Alternate power system, little pieces at a time as we could afford it.
We started out with one Deepcycle battery, one solar panel and one UPS which was used to keep our computers on line during grid outages... we added another battery each month and another panel each time we could afford it and attached them to other appliances as needed.
Finally we had enough stuff so that we could Tie it All Together as one system. We'll keep adding more solar panels as we can afford them (I think we have enough batteries now). If the power blinks off, we're covered... if it blinks off and doesn't come back on, we'll live better than most.
This is something YOU can do! We started article one in the Alphaway section when we started this project, and you can follow our progress right up to this article.. it's all there, waiting for you to read how. "A journey of a Thousand miles begins with one step"... getting started on that first step is the hard part.... GOOD LUCK!
Warlord & PaleHorse
Other Articles Mentioned Here:
Home Power Generation (Part One)
Home Power Generation (Part Two)
Home Power Generation (Part Three)
Home Power Generation (Part Four)
Home Power Generation (Part Five)
Home Power Generation (Part Six)
The ABC's Of Solar Power and Batteries
All materials at this site not otherwise credited are Copyright © 1996 - 2002 Trip Williams. All rights reserved. May be reproduced for personal use only. Use of any material contained herein is subject to stated terms or written permission.