*Make A White LED Flashlight Bulb*
After reading Justme’s article on making an LED bulb for a 2 cell flashlight, I got to thinking that this would be a good thing to try. I have a nice rechargeable Stinger for bright light, but most of the time I’m more concerned about having a lower light level that lasts a very long time and won’t break the bulb if I drop it. LEDs are perfect for this use. Justme used a red color LED, but since the white colored ones have come down in price so much, I wanted to try them instead. I also wanted to see if I could improve on the method of getting the incandesant bulb envelope out of the base. Breaking it works, but it’s a bit of a mess.
I got my white ultra-bright LEDs from Optica Space;
Part Number: WLED-5W-01
50 each for $21.95 (As of this writing if you use "opticaspace" for the discount coupon code you’ll get an additional 5% off. Don’t know how long that will last though.)
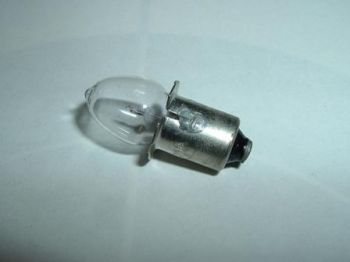
These LEDs are 8,000-9,000 MCD bright and run off 3-3.5VDC, the exact voltage supplied by two standard alkaline flashlight batteries. I had an old 2D cell Maglight that always seemed to be breaking bulb filaments and I didn’t like its’ beam pattern anyway, so I got it and started work. The old bulb looks like this.
I decided to try melting the solder connections and the glue that holds the glass part into the base with a torch instead of breaking the bulb out.
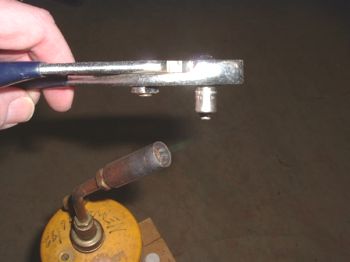
After I’d heated it with the torch and while it was still quite hot, I gently shook the molten solder off (WEAR SAFETY GLASSES, LONG PANTS AND GLOVES!). If you have ANY concerns about shaking off molten solder, PLEASE use a soldering iron and solder wick to remove the solder first - molten solder and skin don’t mix very well. Also, when the goop in that holds the glass in melts, it STINKS. You might want to consider doing this outside.
I then held the base with a pair of crimpers I have for coaxial cable. You can use pliers if you’re careful. Grab the glass part with a gloved hand, twist and pull.
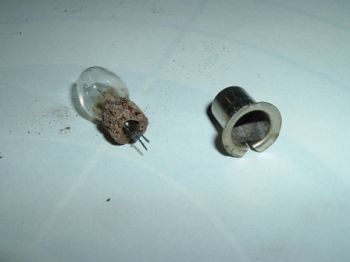
Wada ya know, it worked!

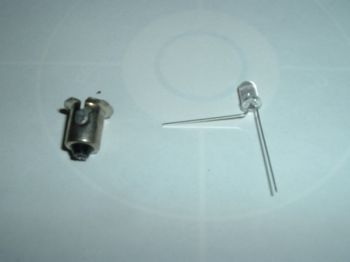
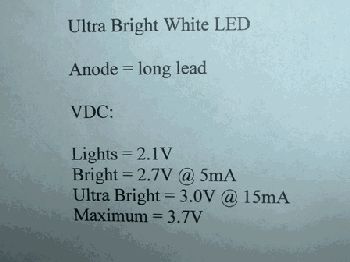
Next, I pitched the old glass part and prepped the LED to go in the base. Note that the LED has one lead that is longer than the other. This is the anode or positive side (plus) of the device. It will end up going through the center of the bulb base. The shorter lead (cathode if you want to know) will go on the side of the base. Bend the shorter lead out at 90 degrees. NOTE: LEDs are polarity sensitive and won’t work if you put them in backwards. They won’t get fried if you hook them up backwards, they just won’t work.
Put the straight lead (the longer one) through the tip and route the other lead in the slot in the base, folding it over so it’s flat.
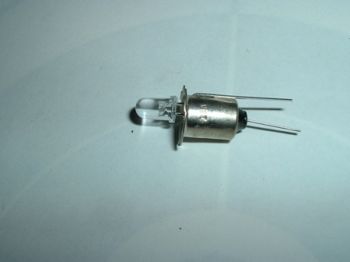
It should look like this.

Solder both leads, and then clip off the excess lead length.

Bend the LED so that it’s centered and put it upright in some kind of holder, and then pour in glue to hold it. I used carpenters glue, but strongly suggest you take Justme’s approach here and use 5-minute epoxy. The carpenters glue was a mess and took all night to dry.
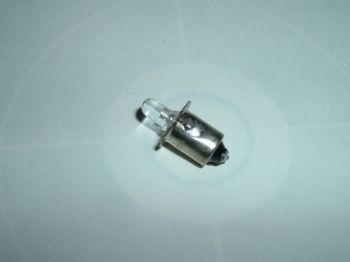
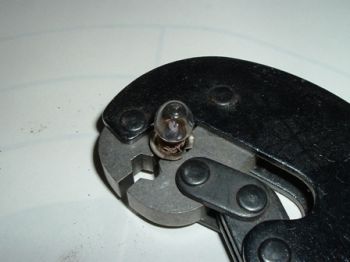
It looks like this when it’s finished.
Put it back in your 2-cell flashlight and fire it up!
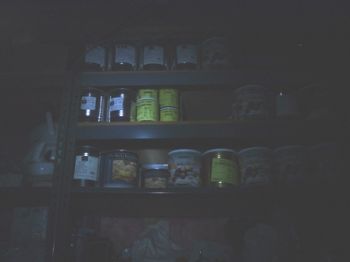
From 10’ away in a completely dark room. Plenty of light to pick stock or read, and the white light shows the true color of stuff. Just what I was looking for!
I profiled the electrical parameters of this particular LED. From this you can see that this particular device is NOT going to work well with NiCad or NiMH batteries. The voltage will be too low for a nice bright light.
While I have not tested run time, it should go for around 200 hours quite bright, and be usable for another 200 hours on 2-D cells. You can also use the bulb in 2-AA or 2-AAA flashlights that use the standard flange type bulb, with reduced run time.
Thanks for reading!
Spitfire
www.alpharubicon.com
All materials at this site not otherwise credited are Copyright © 1996 - 2005 Trip Williams. All rights reserved. May be reproduced for personal use only. Use of any material contained herein is subject to stated terms or written permission.