*Outlets, Installing & Wiring*
By Jaden
27 October 2004
Disclaimer:
Improper electrical wiring can cause fire hazards, shock hazards and even electrocution if not done properly. You MUST have a basic understanding of electricity before attempting an electrical project. Ensure all wires are de-energized before working with them. I nor Alpha/Rubicon assume ANY responsibility for any screw up’s or other mishaps on your part. This article is for information ONLY, what you do with the information is your own business.Ok, with that all over and done with, let’s get to work.
I am going to cover mounting an outlet/switch box and wiring an outlet in a new wall. Installing them in existing walls can be done, just a little trickier.
The first thing you need to do is determine the location of the outlet. Then decide what thickness sheetrock or wall boarding you’re going to use (typically 3/8’s inch). For this article, I’m using 3/8’s. Boxes are pre-measured to make life easy for you if this is the case. Outlets should be wired with 12 gauge copper wire. Your wires will need to be run to your outlet locations. Assuming this is done….
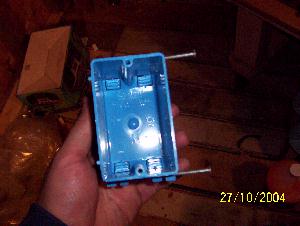
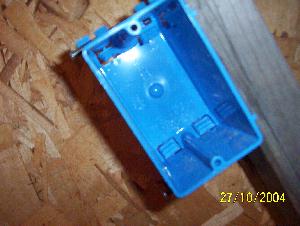
Here’s what a cheap plastic box looks like. They only cost about 40 cents and they work great.
Comes with nails Measuring tabs
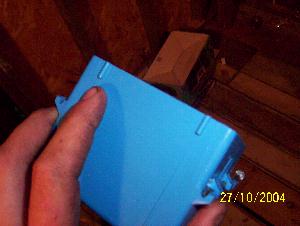
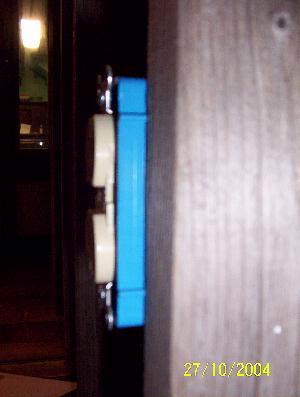
On the side of the box opposite where the nails are sticking out you’ll see a couple of bumps. These are 3/8’s of an inch long. This makes it easy to mount. Just hold the box next to the stud, the ends of the bumps sit on the face of the stud and then nail it. The front of the box now sticks out 3/8’s inch beyond the stud. Then when the sheetrock goes up, the box front will be flush with it. Pretty neat huh?
3/8’s of an inch
Before you go sticking it to the stud, determine which direction(s) the wires will enter the box from. Then determine which side of the stud the box will be on. (Using the above LEFT pic. If the box is mounted to the stud..which would mean the right hand side of it.. just like I’m holding it… and the wire(s) come from above… knock out a knock out in the top of the box.) The claw of a hammer can be used. Just tap one of the knockouts and it’ll break. It’s just easier to do it now, than it is once it’s mounted.
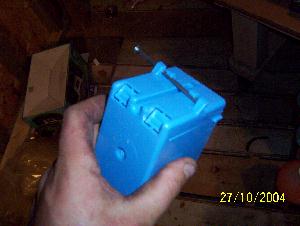
2 knock outs on each end of the box
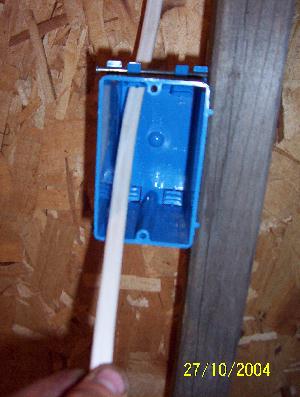
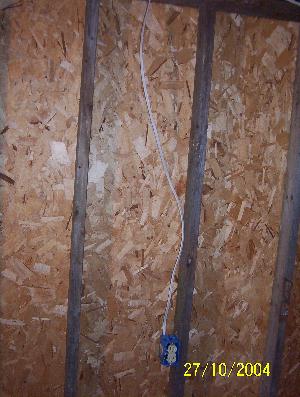
Ok, now it’s ready to be nailed to the stud. Determine how high off the floor you want your outlets and then measure and put the box there. Don’t drive the nails all the way in, leave the heads sticking out enough so that you can pull the nails if you need to adjust the box. Once you are SURE that’s where you want it, finish driving the nails.
Nail heads sticking out
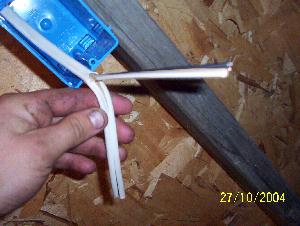
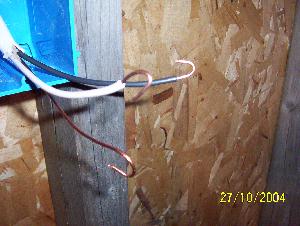
Ok, the box is mounted. Enter wires!! This outlet is on the end of my circuit so there is only 1 wire. I’ll get into multiple wires later. The below pic will help explain figuring out which knock out to knock out.
Ok, run the wire down through the hole in the box. You’ll need about 4" sticking out of the box. That’s 4" from the face of the box, not where the knock out was. Use a sharp utility knife or other knife (Romex stripper is even better) BE CAREFUL and carefully cut the jacket from about 4" back to the end. Cut down the CENTER of the jacket and keep it in the center. If you knick the insulation on the black or white wire, you’ll need to cut all the wires back and start again. I suggest practicing a little bit on some scrap wire.
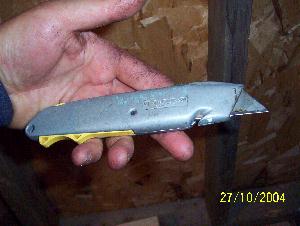
Wire in box Utility knife
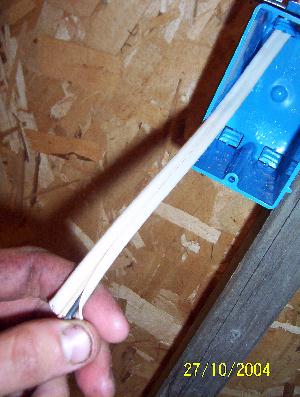
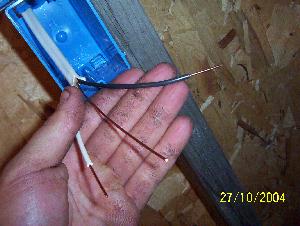
Jacket sliced, ready to peel Peeled
Peel the jacket back and then cut it off. You’ll have a white wire, black wire and a bare wire wrapped in paper. Remove the paper.
Using a pair of wire strippers strip about 1.25" of insulation of each wire.

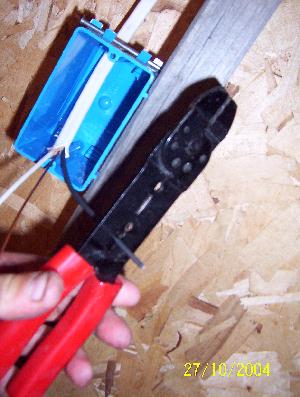
Strippers at work
If you’re not sure about this, you’re in luck. On the back of the outlet there will be a strip gauge. Just use this to measure the amount of insulation to be removed.
Strip gauge
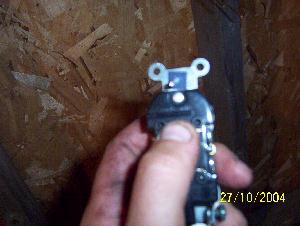
Stripped Looped
After the wires are stripped, use a pair of needle nose pliers and bend the wires into a loop. (Above right). Notice how the black is curved up and the white and bare are curved down. This is set up so that the outlet screws will match right up.
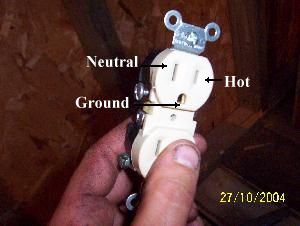
Now, remember that when you’re looking at the outlet and it’s upside right, the black goes right (outlet has gold screws), white goes left (outlet has silver screws) and bare goes below (outlet has green screw).
 .
.
Black is the "hot", white is the neutral and bare is the ground.
NOTE: The Mickey Mouse ears on the outlet can be bent off and used for spacers behind the screws that hold it into the box.
Let’s hook this puppy up! The wire needs to wrap around the screw in the direction that it tightens (clockwise). This way the wire is pulled IN to the screw and not pushed OUT of the screw while being tightened. (above right picture…as long as you set it up like that, yer golden.
Wrap the wire around the screw and then if needs be, use the pliers to compress the loop. Snug the screws with a regular screwdriver. Don’t use a power driver or you will break the outlet. Don’t over tighten the screws. Just snug snug snug arooo. There should be NO insulation underneath the screw. This minimizes the copper to copper contact and it also makes for a weak connection. It should look just like below.
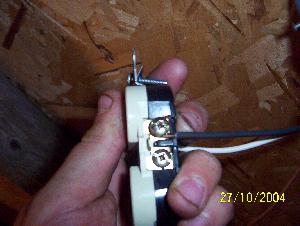
Hot wire secured Neutral secured
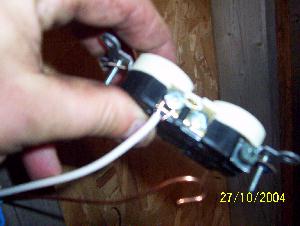
Then hook up the ground. You can wire it in any order as long as it’s done right.
To get the wires in to the box, just fold them and then push the outlet in. Don’t worry about the jacket inside the box. It’ll push back out through the hole and into the wall. A little extra slack is good to have incase the outlet ever needs to be changed.

All wired Folded, ready to go in
Start the screws into the box. If you’re impatient and lazy like me and don’t want to sit there turning a screwdriver, NOW you can use the cordless drill and screw the outlet into the box. Just don’t wrench down on then. Use low speed on the drill and stop just before the screw is tight stop and finish it off with a regular screwdriver.
Done, some slack wire stays in the wall for spare.
The only thing left to do is install the cover after the sheetrock is on.
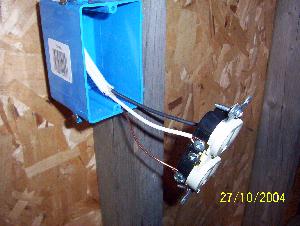
Now let’s go over having 2 wires attach to an outlet. (This outlet below is in the middle of the circuit. One wire is supply while the other feeds the outlet shown above.) It wires the almost the EXACT SAME!! The only thing different is the ground hook up. Both blacks go on the gold screws and both whites on the silver. The ground screw is made to accept ONE wire. There are now TWO ground wires in the box. Here’s how it’s done.
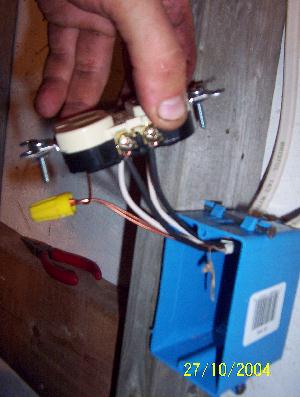
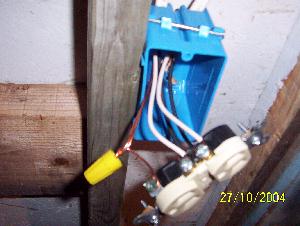
Use a short piece of wire (4" long or so) and attach it to the ground screw. Then use a wire nut and join the grounds together.

3 ground wires now.
To install a wire nut, the ends must be even. Hold the wires together and push the nut on. Then turn it clockwise and it’ll tighten. Tighten until it turns no more. In the above 2 pix, you’ll see where it actually started to twist the wires…that’s tight.
Now just fold the wires and install the outlet like any other.
Good luck.
Jaden
www.alpharubicon.com
All materials at this site not otherwise credited are Copyright (c) 1996-2004 Trip Williams. All rights reserved. May be reproduced for personal use only. Use of any material contained herein is subject to stated terms or written permission.