*4 X 4 Hub Locking Key*
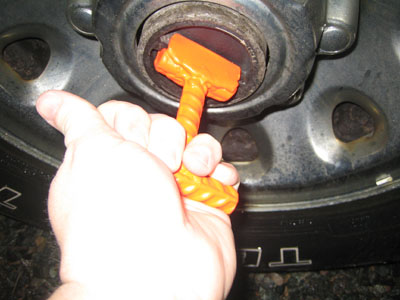
After having the Ford Service Department replace the brakes, hub assemblies and ball joints on my F250 4 X 4, all warranty work except for the brake pads. I discovered that the lock in mechanism to engage the 4 wheel drive hubs had become very stiff and difficult to turn with the fingers. For several months I simply took a pair of pliers from the tool box and turned the hub every time I needed to use the 4 wheel drive. This was not a real problem except that the tool box is kept under the rear seat and usually I would have to unload the gear in the seat to get to it.
During a recent snowstorm and being off work I decided to create a solution, a 4 wheel drive hub key. I keep this in the truck box where it is easily accessible in an instant at all times. I made this with scrap material which was simply lying around the shop.
Materials List:
1- 3” X 1/2 “ piece of rebar
1- 2 Ľ” X 3/8” piece of rebar
1- 2” X 3/8” of rebar
2- 2” X 3/4” pieces of flat sheet steel
Taking the scrap material and cutting the component pieces to the desired dimensions after measuring the length and depth of the hub mechanism, and allowing for the size of my hand for comfort in its use. I used a chop saw to cut the rebar to the desired length and a plasma cutter for the sheet metal. You could use a oxyacetylene torch just as easily to get the desired dimensions. Then the pieces were smoothed on a bench grinder to remove any sharp edges and create a slightly beveled edge on the handle piece.
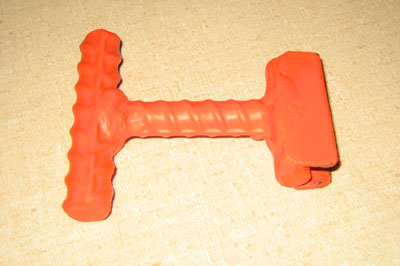
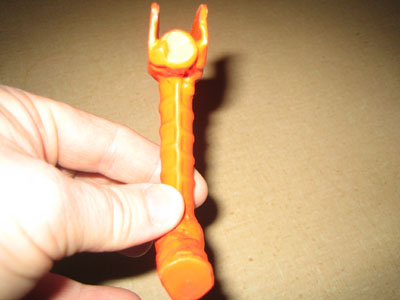
Using a MIG welder (a stick welder works just as well) I welded the three pieces of rebar into an I shape. The larger ˝” piece of rebar is used as the handle providing a larger grip surface. The 2 Ľ” piece is attached to the ˝” piece being careful to get it centered, then attach the 2” section to the end of the 2 Ľ” piece being careful to center it as well. The remaining 2, 2” X ľ” sections of flat steel was welded to the 2” piece of rebar horizontally, leaving about 3/8” over the edge of the rebar to provide the working key. This was the most difficult part trying to hold the metal, keep it level and straight.
Eventually I was able to get the device welded together. After it cooled I tested it for use, it worked perfectly. I then decided to give it a coat of paint to prevent rust and the color was chosen specifically for visibility. By using a florescent orange color the key will be easier to see if you drop it, as we know usually happens with a tool your using just when you need it. It shows up extremely well in snow, on the forest floor and particularly at night in the rain and mud.
www.alpharubicon.com
All materials at this site not otherwise credited are Copyright © 1996 - 2010 Trip Williams. All rights reserved. May be reproduced for personal use only. Use of any material contained herein is subject to stated terms or written permission.