*Building a Bug-Out Jeep Trailer: Part 2 - Welding the Frame*
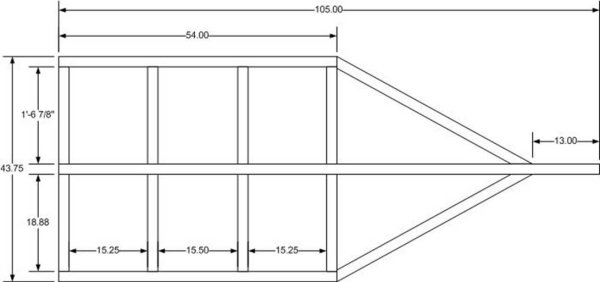
Material Cut List
| Part | Length | Qty |
| Tongue | 2x3 tubing, 105ö long | 1 |
| Ladder Frame | 2x3 tubing, 18 7/8ö long | 8 |
| Sides | 2x3 tubing, 54ö long | 2 |
| A-frame side | 2x3 tubing, approx 44ö long, cut to fit | 2 |
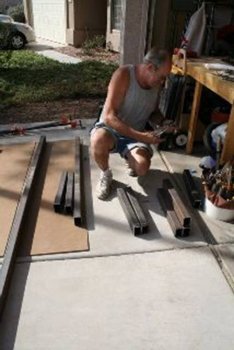
Using the above cut list, we began by using a piece of chalk to lay out all of our pieces, and then chopped them up with a cutoff saw. It was quite a workout for the saw to get through that thickness of tubing; we kept blowing the breakers if we tried to go too fast. Once all the parts were cut we used an angle grinder to remove all the sharp edges from the pieces.
HereÆs a picture of my Father in Law laying out the pieces.
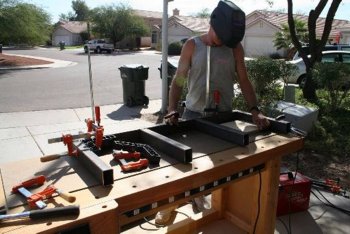
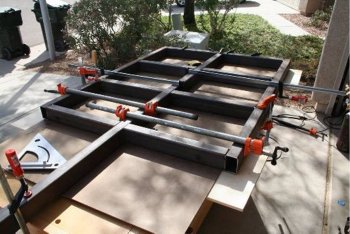
Because the trailer was designed with an integral tongue, the frame was welded up as two EÆs, and then the tongue added to the middle, allowing me to layout and clamp everything to my workbench to ensure the frame was nice and straight.
Here is the first of the EÆs clamped to the workbench being tack welded together. Yes, those are plastic clamps, and no, they didnÆt get melted too bad. :)
Once the EÆs were tacked together they were gently ōpersuadedö into square with a mallet, and the welding finished.
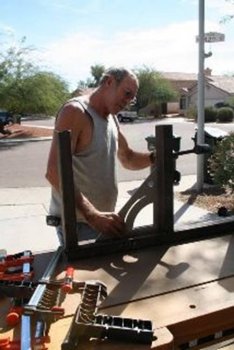
Next, both EÆs were brought together along with the tongue and clamped to my workbench.
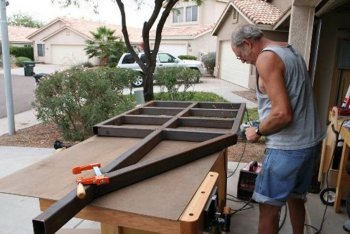
Welding the tongue into the frame:

Next, the A-frame pieces were measured, cut, and welded into place. Instead of measuring the length of these we simply lined up the length, scribed the lines with an awl and cut the pieces.
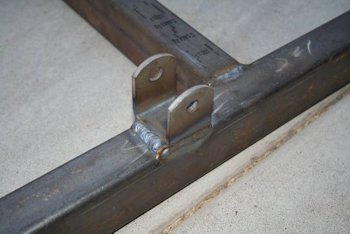
The brackets for the suspension were centered in the frame, with the required 25 ╝ö spacing and welded in place. These pieces are the most important to have absolutely straight and exactly the same distance from the front of the tongue. We measured at least 50 times to make sure they were right.
This is the front hanger:
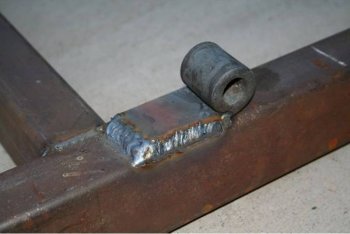
And this is the rear hanger. They are both made out of some very thick material so welding them on was a bit of a pain.
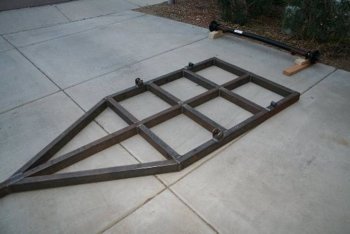
The final result after a dayÆs worth of cutting, grinding, and welding:
Azgard
www.alpharubicon.com
All materials at this site not otherwise credited are Copyright ® 1996 - 2007 Trip Williams. All rights reserved. May be reproduced for personal use only. Use of any material contained herein is subject to stated terms or written permission.