*Installing a Glass Mount Ham Antenna*
Todayĺs vehicles often donĺt have an ideal location to mount your 2m/70cm ham radio antenna. Many folks default to a magnetic mount on the roof or use a trunk lip mount. While these options work, the roof mount often wonĺt quite fit in the garage and the trunk mount sometimes slams the antenna onto the roof when the trunk is opened. Why not consider a through the glass RF coupled antenna? Hereĺs how to install one.
First some background is in order. Through glass mounts have an inside metal coupling plate that hard wires to the transceiver and an outside metal coupling plate that the antenna whip mounts to. There are passive tuning components on both sides but no wires pass through the glass ľ the plates are simply glued on each side of the window and the glass itself becomes a capacitive coupling element. I have used this system successfully with 2m and 70cm (ô440ö) up to 50W.
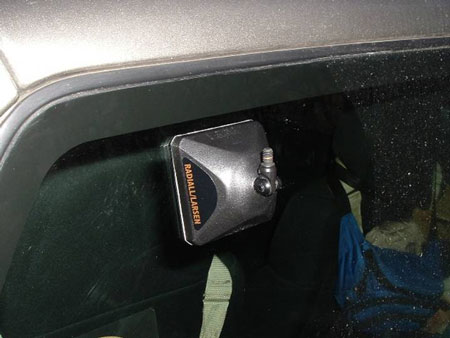
OK, letĺs put on a Larsen KG2/70CXPL. This antenna has a 2m gain of 2.4dB and a 70cm gain of 4.6dB, making it ideal for repeater work and limited simplex communication.
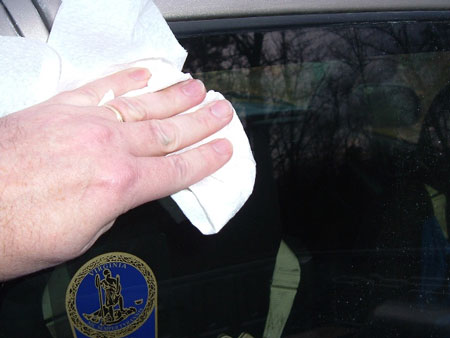
Decide where you want to mount the antenna and then wash and dry the window well, both inside and outside. Iĺm putting the antenna on the rear glass of my pickup truck, behind the driverĺs position.
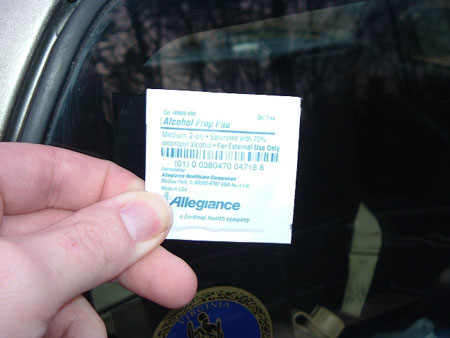
The antenna comes with an alcohol prep pad. Use it on both sides of the window and the mounting plates to clean anything off that your first wash missed. Make sure you give a minute or two for the alcohol to dry after you use it.
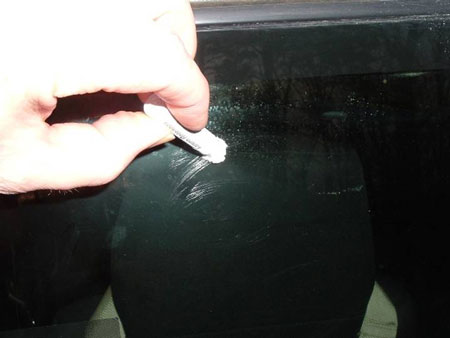
Open the activator and smear it on the glass where the plate will mount.
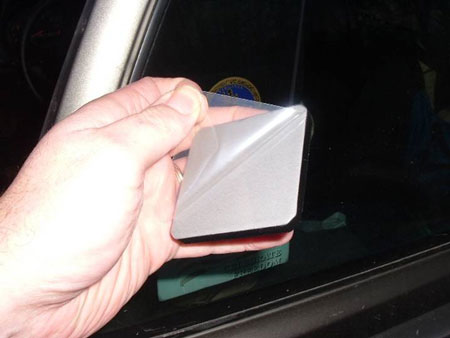
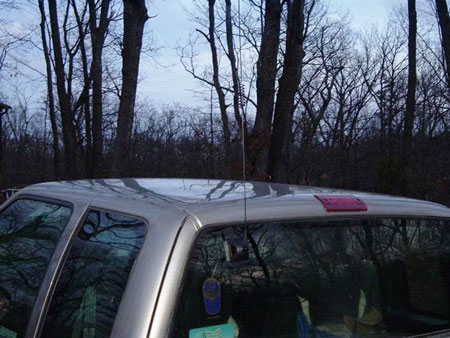
Peel the protective plastic off the outside mounting plate and stick it to the window where you applied the activator. Be careful to align the mount exactly where you want it ľ you have about 1 second to move it once itĺs on the glass! BTW, the little threaded stud where the antenna whip will mount goes UP!
And the outside is stuck on, awaiting the antenna whip. Donĺt put the whip on yet ľ the glue needs to set first.
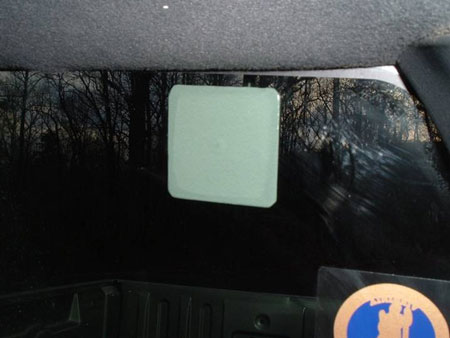
It looks like this from the inside. Thatĺs the target youĺre aiming for when you repeat the activator / plastic peeling / sticking with the inside unit. With the inside unit, make sure that the wire coming off of it is pointed the correct direction.

There ľ perfect alignment with the outside unit! Let everything sit for at least 2 hours (I prefer 12 hours) so the glue can harden fully.
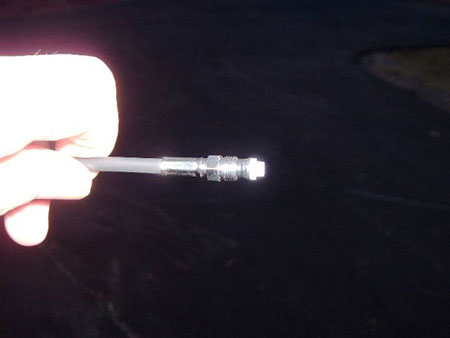
The cable end that goes to the transceiver comes terminated with a connector that you can get different ends for. We want a standard PL-259 plug for our radio.
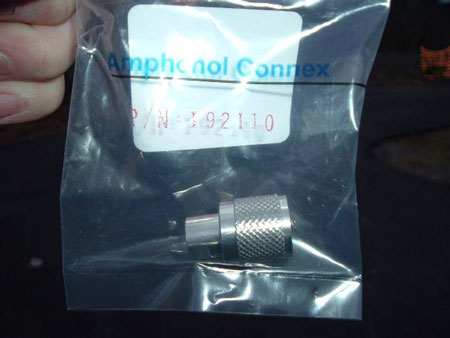
Our antenna came with a PL-259 adapter so weĺre good. It just screws onto the cable end adapter. Tighten it with pliers and youĺre good to go.
Now you can screw the whip on and tune up the antenna. Tuning is pretty standard with a VSWR meter and a couple of hex wrenches.
This antenna has actually been on since 2006 and has held up perfectly, despite being hit by tree limbs and a bird or two! You will want to check the whip tightness from time to time as it tends to unscrew itself over time.
Spitfire
www.alpharubicon.com
All materials at this site not otherwise credited are Copyright ę 1996 - 2009 Trip Williams. All rights reserved. May be reproduced for personal use only. Use of any material contained herein is subject to stated terms or written permission.