*Mobile Ham Radio Installation *
By: Pitbull
21 June 2010
I recently installed a 2m/70cm rig in my Jeep Cherokee. This is my first mobile installation and I am quite pleased with the result. Hopefully this article will help you getting started if you are planning a mobile installation.
The radio is a Yaesu FT-8800R, which is a dual-bander with cross-band repeat functionality. This is a cool feature which means I can setup the mobile radio to receive on one frequency and transmit on another; acting as a repeater for the transmitted signal. To see an application of this feature, let’s say I am hiking in the woods carrying a low powered HT (hand held radio). HTs are nice and compact but low powered, essentially meaning that they have limited range, which may make it difficult to for me make a contact in an emergency situation. Now in the same scenario, I can park my jeep at a place where I am likely to get good coverage of my HT’s signal, turn on the cross-band repeat feature on mobile radio, and use its 50W transmit power to re-transmit my signal to a much greater distance.
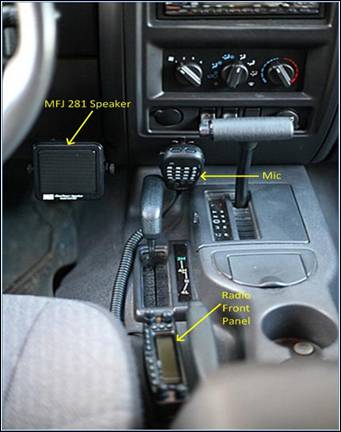
I got a remote mounting kit with this radio, which means I can separately install the radio and its control panel. I have installed the panel right beside the parking brake - a pretty easily accessible place, while the radio is sitting under the driver's seat. I am planning on getting an HF rig soon so the installation needed to conserve space for future additions. I have mounted the speaker (MFJ-281) as low as was possible without interfering with driving. The speaker cable is going under the console. Mic is similarly installed to be unobtrusive and conserve space. Both speaker and mic are attached with screws. If I had been more concerned about the resale value of my vehicle, I might have used strong double-sided tape.
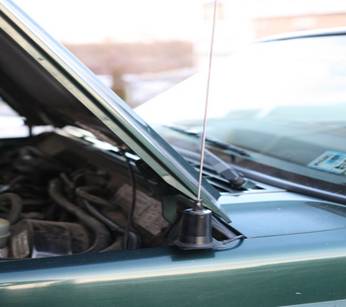
The antenna is a Larsen NMO 2/70. It is about 33” tall, and so mounted on the fender of Jeep Cherokee, it just barely scrapes my overhead garage door. I looked at several antennas and found this one to be both reasonably priced and highly recommended. It is mounted at the edge of Jeep's hood on driver’s side.
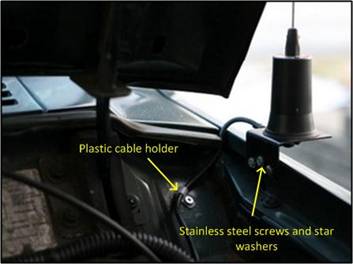
The mount itself is a Larsen trunk L-bracket that is fastened with stainless steel screws and star washers to vehicle’s body. Coax is routed so that it does not get nipped by the engine hood. A little plastic wire holder holds the cable in position.
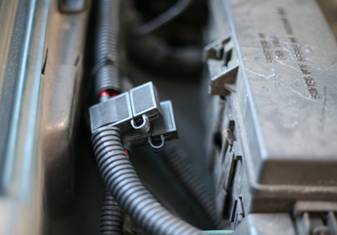
Power for the whole setup is coming directly from the battery on AWG 10 cable, which is protected by split loom along its length inside the engine compartment.
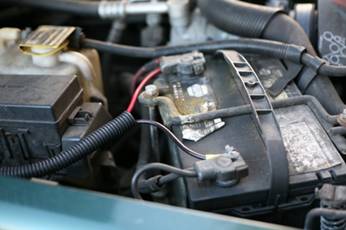
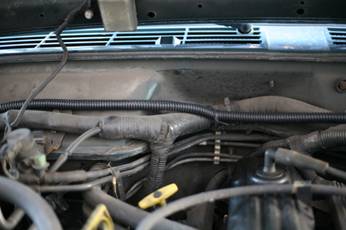
Power cable is fused near the battery with an ATC fuse holder. It is best to have a fuse near the battery, in addition to fuse near the radio, to protect the entire wiring in case something goes wrong. Otherwise you can easily have a fire going because of a short circuit somewhere between battery and radio.
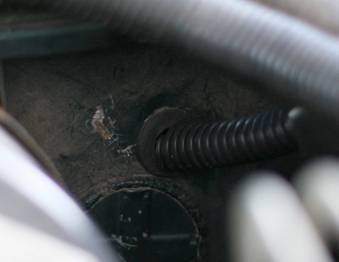
Both the power cable and coax go through a grommet in the firewall. There is a spare hole in the firewall, as seen in the pic, but it was way too big for a few cables. Instead of going through the effort of plugging rest of the "big" hole, I decided to make a new one of the right size.
The power cable is going into a Rigrunner that is mounted on the car frame behind the firewall and high above the brake pedal. Securing the Rigrunner in that spot was the most difficult task in the entire installation. I chose that spot as it allows me to fuse and distribute the wiring right at its entrance into the passenger compartment. But the effort was probably not worth the benefit and there ought to be better spots for mounting this. Radio's power input cable goes into Rigrunner and is then routed through molding along the driver's door.
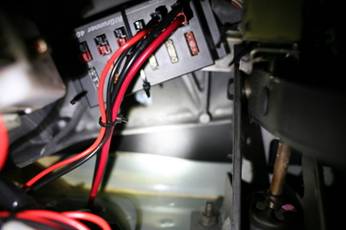
The entire electrical wiring setup uses Anderson Powerpole connectors. I will highly recommend these connectors if you are planning any radio installation.
"Anderson PowerPoles Website"So far the setup is working great and I am picking up stations that I didn't think were reachable in my area.
73's
Pitbull
www.alpharubicon.com
All materials at this site not otherwise credited are Copyright © 1996 - 2010 Trip Williams. All rights reserved. May be reproduced for personal use only. Use of any material contained herein is subject to stated terms or written permission.