*O2 Sensor replacement in a 1998 Land Cruiser*
One fix for the Service Engine Soon light
By: Natrix
28 November 2009
Our 1998 Land Cruiser is our “go to” vehicle since it has proven to be the most reliable of our herd. The Service Engine Soon light came on and this vehicle is new enough to have the latest generation computer technology. This means the diagnostic trouble codes must be read by a dedicated reader but most parts stores will read the codes for you or let you use their reader for free. The computer said the bank 2 front oxygen sensor was bad. Okay, that sounds serious and expensive but it was actually neither. O2 sensors help the computer figure out how much fuel to inject by seeing how much unburned fuel is in the exhaust. It’s not a good idea to drive around long term with a bad sensor mainly because the fuel efficiency will go down and you’ll flunk any emissions inspection.
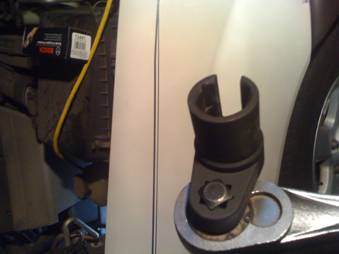
First step to fix the problem is to get the part. In this case the local Autozone had one in stock and also had a “crows foot” adapter which should make the job easier. Here’s a picture of one if you are unfamiliar with them
They allow you to use a socket on nuts that have a wire or plumbing going through them. In this case, the O2 sensor has a set of wires coming off the top. It wasn’t really necessary but made the job easy.
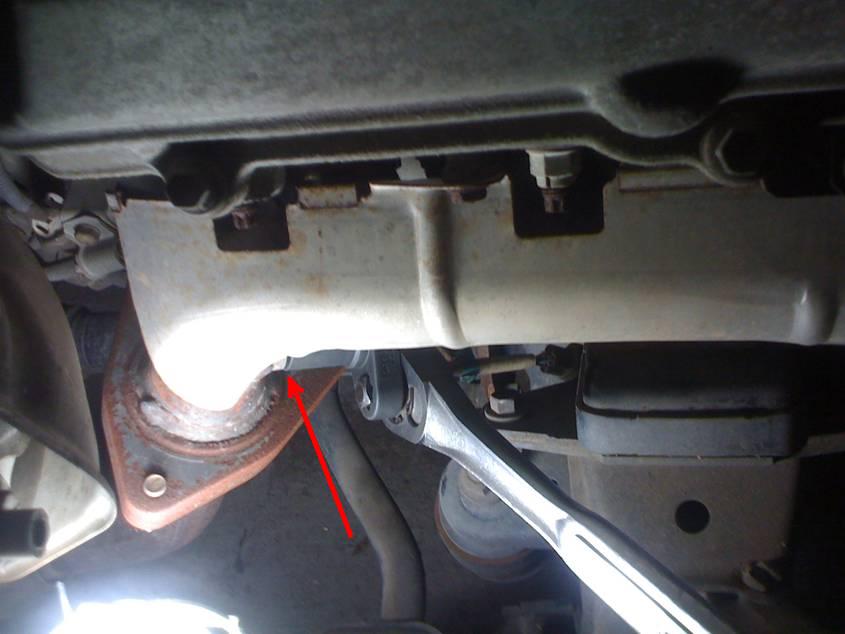
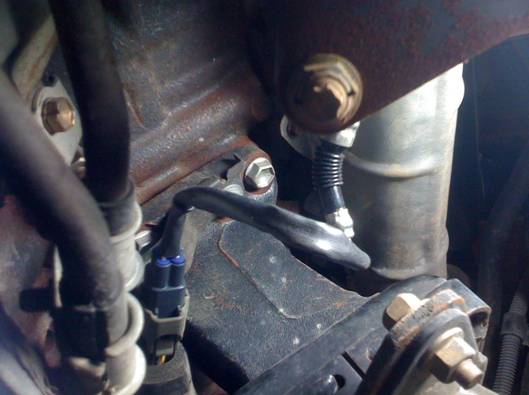
Next I took off the plastic skid plate that was held by seven 12mm bolts. The banks are numbered starting with the first cylinder, 1 being on the driver’s side, 2 being on the passenger side. Here’s where the O2 sensor is on the exhaust manifold on the passenger side with the crows foot over the sensor.
O2 Sensor
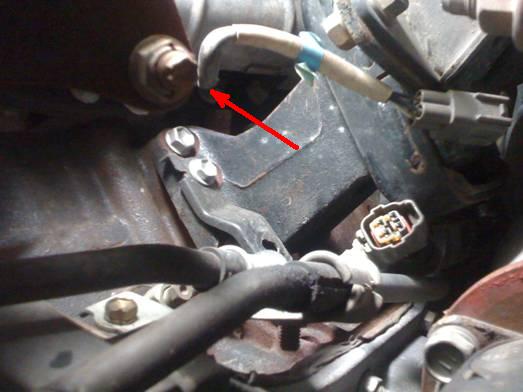
It’s usually a good idea to disconnect the wire so it can spin free before unscrewing the sensor and here’s a picture of the connectors. This photo was taken from beneath the vehicle. The blue tape on the wires coming off the sensor can be seen in both pictures. The connector has a plastic barb that keeps it secure and it can be undone with a little bit of pressure to release it.
O2 sensor (hidden by exhaust manifold)
The old sensor came out easily and is the top one below. The old and new look different but seem to work the same. Hopefully the new one will get another 120,000 miles like the original. One very important note, anti-seize is very important and it’s the silvery “goop” on the new sensor’s threads. It would be much more difficult to remove the sensor after it’s been in there a while without anti-seize.
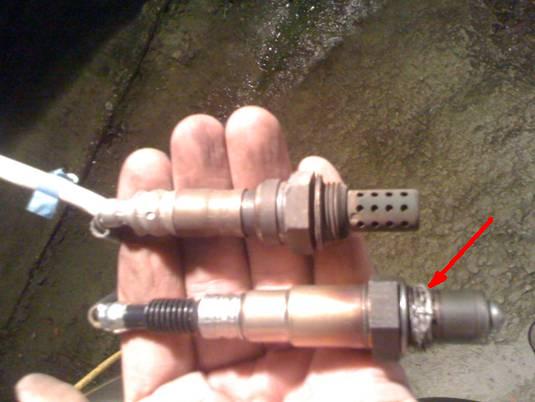
Anti-sieze
So here it is, almost done. The new sensor was hand screwed in and a final ˝ turn with the crows foot and the wires are snapped back together with the connectors.
All that’s left to do is bolt the skid plat back on and it’s good to go. The whole job took about 20 minutes including picture time and was actually easier than changing spark plugs. Cost for the sensor was about $100.
Natrex
www.alpharubicon.com
All materials at this site not otherwise credited are Copyright © 1996 - 2009 Trip Williams. All rights reserved. May be reproduced for personal use only. Use of any material contained herein is subject to stated terms or written permission.