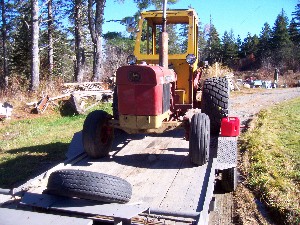
"John Deere 300 Industrial"
*Rewiring An Old Tractor*
By: Jaden
08 January 2010
"John Deere 300 Industrial"
We've got an old 60's vintage John Deere 300 industrial tractor. After taking a look at the wiring I decided to strip it and rewire it which also meant a new alternator with an internal regulator. The plug wires were cracked and had insulation missing, the 12 volt electrical wires were original and had been altered. I figured it was better to rebuild it so *I* know how its set up in case it dies in the middle of a snowstorm so I yanked out every piece of wire there was.
I put it back together as simply as possible. Power for the starter, coil, from the alternator, a field wire to the alternator and that's it. For lights I made a new circuit from the battery.
Here's what's needed to make the motor run and charge the battery.

The tractor is negative ground. The “R” on the starter provides 10 volts to the coil at start up only. Once the ignition switch is in the ON position that circuit is opened and about 6 volts is provided to the coil. The manual states it takes 2.2 ohms to achieve that voltage, I have 6 ohms on it now and have it at 8.3 volts. The charging voltage is 14.58 from the new alternator, 2 ohms gave me 11.3, 4 ohms gave me 9.5 and 6 ohms is 8.3. I guess I need to add a couple of more ohms to it. I’m using wire wound ceramic resistors. The tractor will run with more voltage going to the coil, but the condenser and points will burn up faster.
I crimped and then soldered all connectors to prevent things from wiggling loose down the road. The battery cables are 4 gauge, the alternator charging wire is 8 gauge and everything else is 12 and 14 gauge.
Jaden
www.alpharubicon.com
All materials at this site not otherwise credited are Copyright © 1996 - 2010 Trip Williams. All rights reserved. May be reproduced for personal use only. Use of any material contained herein is subject to stated terms or written permission.