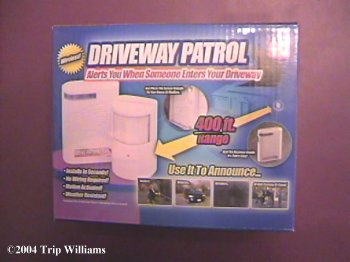
*Driveway Alarm Mods*
For those of you that got in on the group buy for driveway alarms, You are going to soon find out that the receiver has two settings... "LOUD" and "OH-MY-GOD"
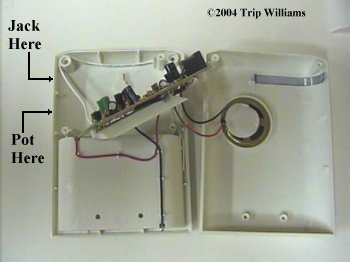
Obviously that's not good in some circumstances, so we need to add an ear Jack and a volume control.
The ear jack allows you to turn off the speaker when you plug in ear-phones for those occasional tactical situations.
The volume control let's you turn LOUD into whatever is comfortable for you to listen to with, or without, ear-phones.
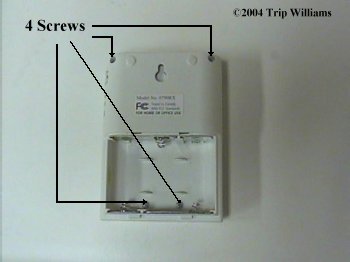
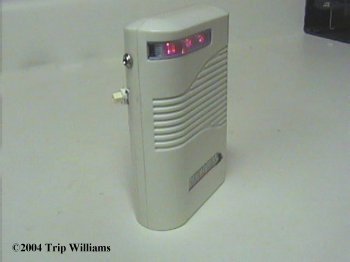
First, Flip the RECEIVING unit over and remove the battery cover... there's 4 screws total in the back of the case that need to be removed.
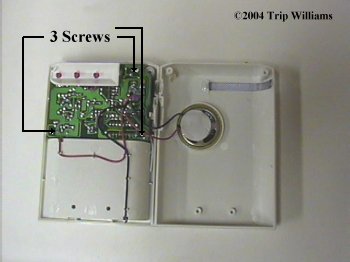
CAREFULLY pull the front cover loose... the speaker is attached to the front cover, so don't yank it loose. On the front circuit board there are three screws that need to come out.
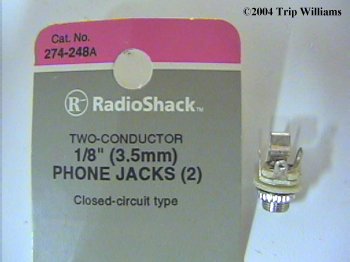
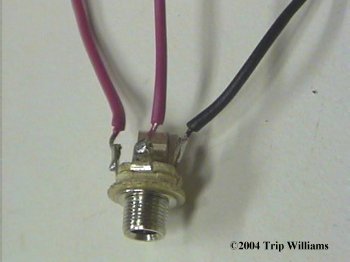
Now you need one of these jacks.. and a mono ear-phone that fits it.. available at Radio Slack.
While you are at Radio Slack, tell em you need a three leg Potentiometer (Pot). Get one that you can get your fingers on good enough to turn it, this will be your volume adjustment.
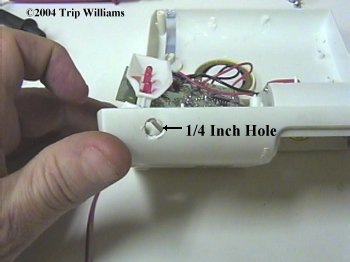
Now drill a 1/4 inch hole into the case for your jack where shown. Be SURE that the jack won't hit anything on the circuit board. I went down a little over 1/4 inch from the lip of the case to start my hole.
Before putting the jack in the hole, prewire and solder some flying lead as I have done here.. about 6-7 inches of each is enough.
Once you've done that, take your potentiometer and mark the receiver case where each leg will touch it. I took a piece of wire and heated it up (Using pliers to hold it) and pushed a hole through each spot on the case where the legs touched. This let me put the legs through the case and bend them down on the inside to hold the Pot in place. Then I cut the positive wire that runs from the Receiver's circuit board to the speaker, and wired everything like so:
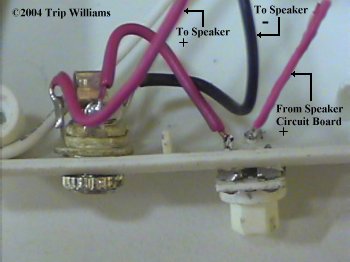
Notice that only two of the legs on the Potentiometer are used.
What we've done is cut the original speaker wire in half, then run a wire from the circuit board's side of the Positive Speaker wire to the potentiometer. Then a wire comes from the second leg of the potentiometer and runs to the jack, then from the jack a positive wire runs back to the positive side of the speaker. The Black wire runs from the negative terminal of the speaker to the third tap on the jack (Yes, there will now be two black wires attached to the negative terminal of the speaker).
Heat shrink or tape any connections!
Now CAREFULLY put the unit back together. DONE!
If you plug your ear-phone into the jack, it cuts off the Receiver's speaker and transfers the alarm sound to the earphone. When the ear-phone is out of the jack, the Receiver's speaker works like normal. Since we ran the speaker wires through a potentiometer first, we can now control the volume of the alarm to the ear phone OR the receiver speaker by turning the potentiometer.
BTW, I have 4 of these units now, and all of them seem to be on the same frequency... so one receiver is all you need, you just kinda have to guess which alarm is the one sensing movement.. but there are ways around that too... ;)
The sensor part has an aggravating red LED light on the front that comes on whenever the unit senses movement.. that's not good if you don't want the unit to be seen at night... A few layers of black electrical tape will take care of this ;)
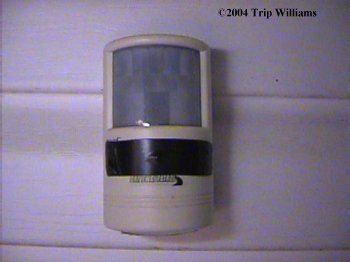
You'll need 3 C-cell batteries (For the Receiver, they seem to last forever) and one 9 volt battery for the Sensor (They last about 4-6 months)... the sensor is water resistant (not water PROOF) but mine sit out in the weather and are just fine.. the screws tend to rust, so put a drop of clear fingernail polish, or hot-glue, on them.
They are really good for items you don't want stolen... put one pointing towards your BOT, another pointing toward the gas tank of your vehicle, another pointing at your outbuildings, etc.
Warlord
www.alpharubicon.com
All materials at this site not otherwise credited are Copyright © 1996 - 2004 Trip Williams. All rights reserved. May be reproduced for personal use only. Use of any material contained herein is subject to stated terms or written permission.