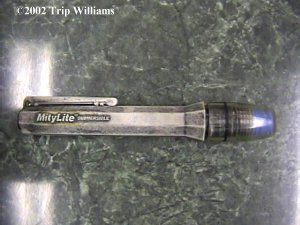
*The (not so) Mighty Light*
If you're like me, you have a bunch of these inexpensive types of small lights laying around with dead bulbs. When you buy em, they are BRIGHT, but they also eat batteries. When the bulb dies in this unit, you have to replace the whole head in it, and that part is usually more expensive than the light was... When my bulb dies, I don't throw the light away, I alter them slightly and put them back into service.
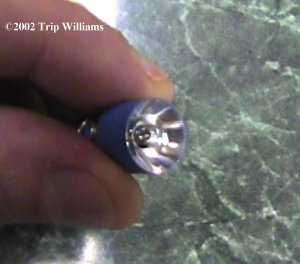
As you can see in the picture above, there's nothing special about this "Cassette" that the light bulb comes in. It's made as one pre-manufactured piece that's SPECIFICALLY designed NOT to be "Consumer replaceable"... we're gonna fix that...
You can buy the original bulb for these things if you want to, they sell the small high intensity bulbs at RadioSlack. But I usually just use high intensity LED's so that I get a pa-zillion hours of run time out of 2 AAA batteries ;) RadioSlack sells these LED's also..
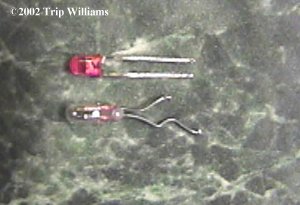

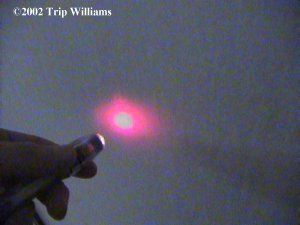
For the purposes of this article, I'm gonna use a red LED since it's easier to see in the pictures.. but you can use any color (Or no color) that you want.
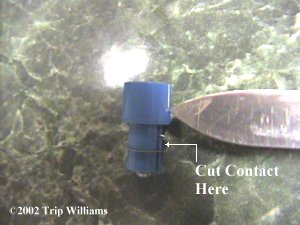
Start by taking the light apart and pull out the bulb cassette

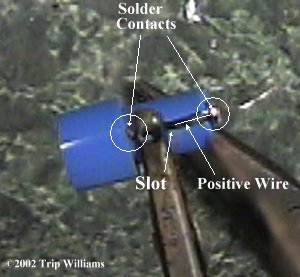
The bulb cassette will have two contact points on the back of it.. one on a ring, the other attached to the stud in the center of the back of the cassette... cut these loose using a sharp knife and pull the bulb out of the front of the cassette.
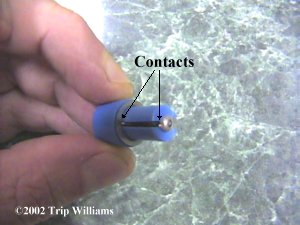
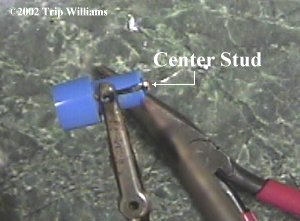
Pull the center stud out of the back of the unit using a SMALL flat head screwdriver blade, knife blade (BE CAREFUL) etc.. I used small wire cutters to get a grip UNDER the stud where it meets the plastic housing, but either way is fine.. just get it out.

Take your new bulb and fish it back through the top of the light cassette.. make SURE the wire legs of the LED don't touch!
Now, the inside of an LED looks something like this:
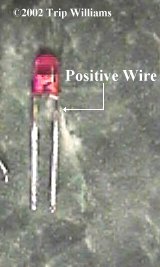
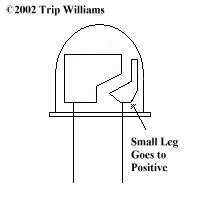
Be SURE the leg with small semi-conductor will run to the center stud of the light cassette! This is your positive terminal.
Grab a soldering iron and pre-tin the little ring you pulled off the negative leg of the old bulb. Some of these rings won't pre-tin... if that's the case, just tuck the negative leg of the new LED under it so that the ring is pressed against the wire when the spring is put back on the bulb cassette.
Now, pull the positive leg upwards slightly through the slot so that the back center stud can be put back in place without hitting the positive wire. Once the center stud is back in place, bend the positive wire so that it runs up the slot and lays flat against the center stud... Solder this with a drop of solder (It'll heat up quick, so don't stay on it very long!).
Now just put the whole thing back together... yer done! Like I said, don't expect this to be anywhere near as bright as the original bulb (Unless you get an original bulb).. but it will provide light in your tent, or around camp when light discipline is needed... and the batteries last almost forever ;)
All materials at this site not otherwise credited are Copyright © 1996 - 2002 Trip Williams. All rights reserved. May be reproduced for personal use only. Use of any material contained herein is subject to stated terms or written permission.