*Adding a Switch to a Mini-Mag Endcap*
You can buy mini-mag endcaps that have a cord running to a pressure switch for about $12 from places like Centerfire Systems. However, I decided to make mine to save a bit of money and have some fun. I had some help from a friend who had a good soldering iron, a drill press, and some spare electronics parts.
Materials:
Here's a diagram of how the current normally flows in a mini-mag. Note that there's a spare bulb in a plastic protective case under/inside the spring in the endcap.
To make the light controlled by the external switch, you have to disrupt the normal flow of current so that it must run through the switch before passing into the spring and going to the battery to complete the circuit.

The other end of the cord was attached a small pressure switch. When the switch is depressed, the circuit is complete and the light will function; when it's not, the light is off. If I want to disable the light and prevent it coming on accidentally, all I have to do is turn the front end of the mini-mag to turn it off the standard way.
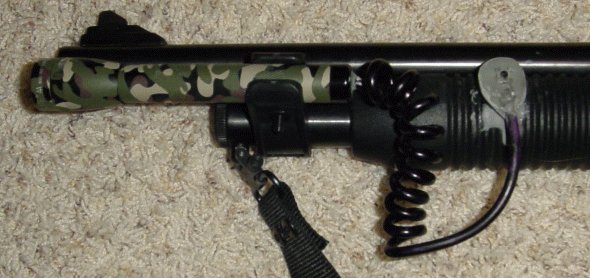
The mini-mag was mounted using an ATI light/mag extension holder. Mounting the switch itself was somewhat harder, especially since solder alone was not enough to secure the wires to the switch. I ended up using a lot of JB Weld epoxy to build up the area around the switch and cover the connections. My first attempt at actually attaching the switch involved using zip-ties glued to the JB weld and wrapped around the forend of my shotgun. The zip-ties snapped on the first shot. I ended up using JB Weld (again) to build up a flat base on the forend, and attaching sticky-backed velcro to that base and to the backside of the switch after sanding both contact areas flat. It's not a very pretty mounting method, but it works.
I used a Sharpie to change the cord from computer grey to black. No problems with it rubbing off yet.
There are other ways of doing this. You could use a different insulator, a toggle switch instead of a pressure switch, and some other method for mounting the light and/or the switch. Use your imagination.
Crazy J
www.alpharubicon.com
All materials at this site not otherwise credited are Copyright © 1996 - 2004 Trip Williams. All rights reserved. May be reproduced for personal use only. Use of any material contained herein is subject to stated terms or written permission.