*PL-259 Connector Installation*
There are many options for the installation of PL-259 connectors. You can purchase factory made cables, use crimp connectors or simply have the local radio shop prepare them for you. Why bother?
With a minimum of tools, and little time you can homebrew your own.
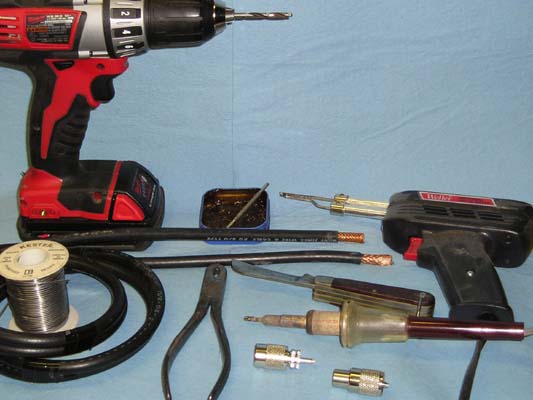
As shown below; I use a drill, soldering iron, soldering gun, knife, pliers, solder, resin flux, cable and PL259 connectors.
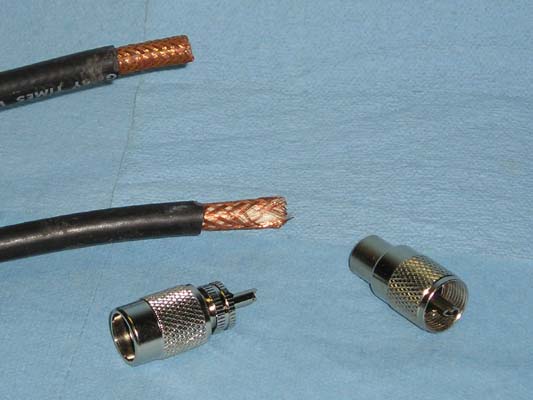
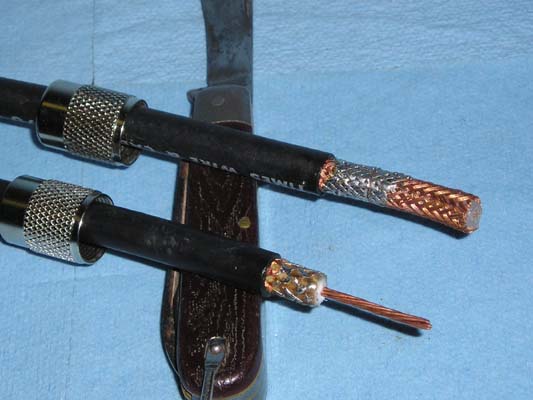
There are any number of makes and designations of RG-8 coax and this method should work on them all. In the following photograph there are a couple of PL coax connectors and two pieces of coax. If you look closely the top one has a full braid of copper shielding and the bottom one a loosely woven braid. The coax has been around the shack for a while and had the ends cut off for some unknown reason.
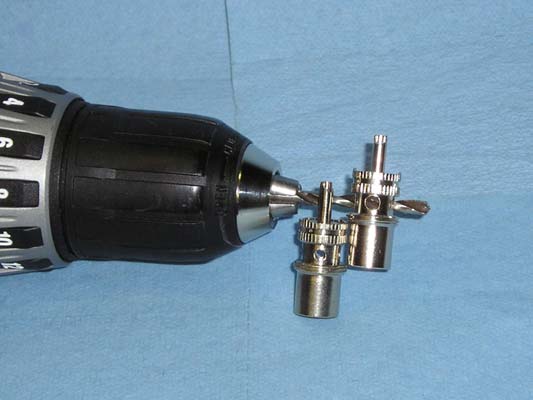
The first step that you will want to take is to remove the collar from the PL-259 connectors. You are now left with the center of the connector that has the four soldering holes. These holes are used to solder the braid to the connector and for me that has always been a problem. It is hard to get the small tip of the soldering iron into the hole and supply enough heat to make a good solder joint.
My solution is to simply drill the holes slightly larger then the tip of my soldering iron. In the picture a 5/32 drill bit was used. You can see the holes are almost twice the size with out damaging the connector.
Next is the most important step! Take the barrel of the connector and slip it over the coax. Check to make sure that the threads are pointed towards the end of the coax and the future PL-259 connector. At this point I take a knife and strip back about 1 1/2 inches if the black plastic insulation to reveal the braid. Try not to nick or cut the braid in any way.
Coat the first 1/2 inch of braid closest to the insulation some resin core flux. Your solder probably has a flux core but this step will help the tinning process with a minimum amount of heat and solder.
You want to tin or solder the first 1/2 inch of braid together on all sides (all around). I like to use the soldering gun for this step as it gives a lot of heat for a short period of time and you are less likely to melt the center core insulation. Allow to cool before the next step.

With a knife carefully score the soldered braid about 5/16 to 3/8 of an inch from the edge of the outer insulation. Continue to rotate the coax ringing the braid with the knife until it is cut. Continue to cut with the knife until the center conductor is reached. Remove the excess braid and the center insulation revealing the center conductor. Try not to nick the copper conductor.
The interior of the back of the PL259 connector has threads, which will help with the installation on the coax. Insert the connector over the coax with the center conductor coming out the male end. Tighten clockwise onto the cable until the end of the braid seats itself at the back of the knurled ring. Depending on the coax thickness you may need the use of a set of pliers. Try not to score the connector. At this point double check with an ohmmeter to make sure the braid has not shorted to the center conductor. If everything is fine proceed to the soldering phase.
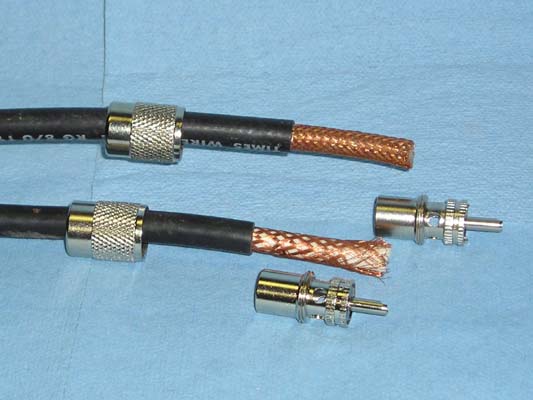
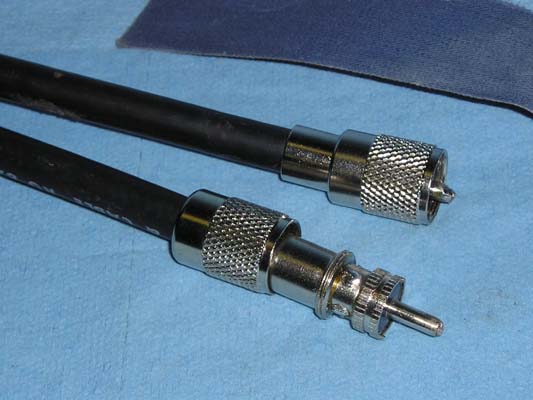
The lower coax in the following picture shows the relationship or how far the connector should screw onto the coax.

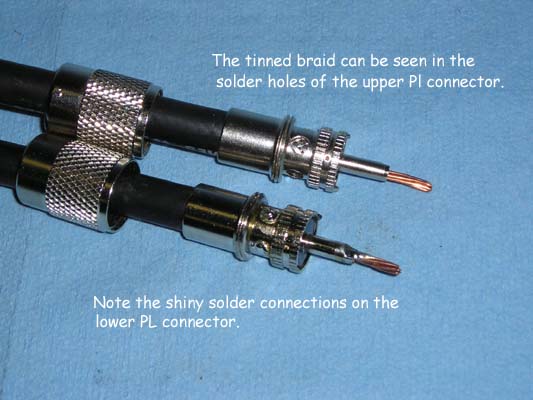
At this point I add a little more soldering flux to the solder holes and the center conductor prior to soldering. A small tipped soldering iron is used for the holes and the gun is used for the center conductor. The idea is to supply enough heat to quickly solder the connections but not enough to damage the cable. The cable is quite resistant to heat and you should have no problems making the connections.
A good solder connection should be slightly shiny which means it has had enough heat and cooled correctly. If you do not supply enough heat or jar or shake a solder joint while cooling it will look gray almost crystallized. This is the sign of a poor connection, which should be reheated.
Trim off the center conductor with pliers and file or clean up with a piece of emery cloth. Bring the connector collar down and screw back onto the connector.
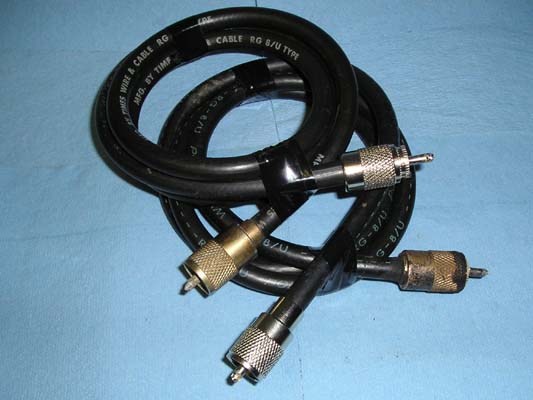
Congratulations you have just completed your first set of cables for the ham shack. One down and probably ten more to go... good luck and have fun.
www.alpharubicon.com
All materials at this site not otherwise credited are Copyright © 1996 - 2010 Trip Williams. All rights reserved. May be reproduced for personal use only. Use of any material contained herein is subject to stated terms or written permission.