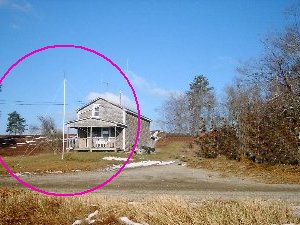
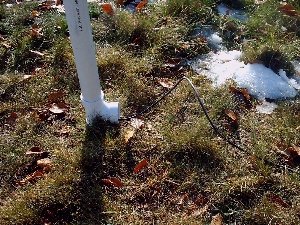
*Portable PVC Antenna Mast*
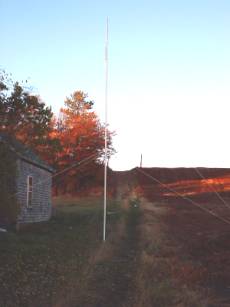
1st time it was up.
On my recent trip to New York I ran across a ham operator on the Coast Guard base. We got talking about different things and he told me about a ham who’s in a club with him. He told me about making a tower out of PVC pipe. He drew a rough sketch for me so I could get the idea. Looked pretty cool. After I got home from NY I ran the idea by JW and we decided to build one. We added some new ideas to it and started building.
When the mast is completed you will have a 20’ mast guyed at its top and midsection in 3 directions. It will be capable of supporting a lightweight antenna such as a J-pole, small beam or solid dipole. It’s not designed to withstand a lot of wind or large antennas.
You’re more than welcome to make it taller, but it’s not recommended.
Parts list for a 20’ mast:
2 pieces of 1 ˝" schedule 40 PVC pipe
3 male 1 ˝" threaded couplings
3 female 1 ˝" threaded couplings
1 1˝" tee
1 1˝" to 1" reducer (glue on)
1 1" Pipe cap(female threads)
Small can of PVC cement
2 100’ length coils of clothesline rope or equivalent
3 large stakes for guy ropes
2 plastic or aluminum guy plates (see note)
NOTE: Guy brackets are recommended for use of a small directional antenna to ease in turning mast to aim antenna. If not used, then you must tie guy ropes directly to mast. Pictures are later in article.
If you decide to use the brackets then the following materials are required:
Recommended tools:
Hacksaw
Tape measure
Knife
Cigarette Lighter (fuse the end of your guy ropes if synthetic rope)
Hammer; maul; rock; club( somethin’ to drive guy stakes with) We used RxR track.
Any other tools you may need to mount the antenna
If you decide to use the brackets then the following are required:
2" hole saw
3/8s drill bit
Drill
De-burring tool, sandpaper, file or dremel tool to smooth edges
Bench vise and hammer. Or some means of bending metal.
Ok, let’s start building…. the fun begins
Cut both pieces of PVC pipe exactly in half. (There is still one more cut to be made, more on this later)
There is some counsel necessary when it comes to working with PVC cement. Heed the advice from those who have screwed up and had to buy new parts. Not to mention any names….
Once the PVC cement is applied it will start to set in approx. 10 seconds and WILL be set in approx. 15 seconds. This may not sound like much time, but it is sufficient as long as you planned properly. The 7 P’s= Prior Proper Planning Prevents Pi$$ Poor Performance. Read the instructions on the can of cement that you plan to use. Different manufacturers have different recommendations.
Make sure to keep cement off from all threaded surfaces and anything that you don’t want glued. Once glue is applied it is PERMANENT.
This is the pictorial procedure for gluing all PVC pipe, couplings, fittings etc. regardless of the application. The steps in constructing the mast follow.
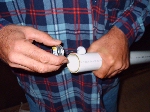
Apply glue to pipe Apply glue to coupling
NOW VERY QUICKLY
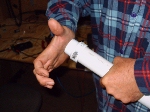
Twist coupling onto pipe Hit it with your hand to seat coupling
This must all be said & done within 10 seconds!!!!
Now, let’s look at the mast laid out on the floor, loosely assembled. Just so you get the overall picture of the final product.

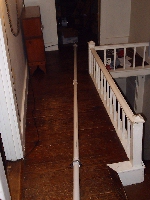
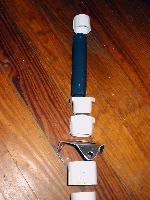
Bottom showing "T" fitting Mid- section showing guy bracket
Top w/ guy bracket & reducers View from top to bottom
Lay your parts out on a flat surface. Starting from the top and going to the bottom they must be in this order.
DRY fit everything together to make sure everything fits well. Now glue the fittings on…ONE GLUE JOINT AT A TIME!!!
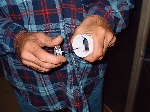
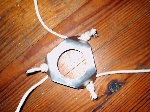
Here’s a couple "detail fotos"
Exploded view of top
Assembled joint
Male threads should be facing UP whenever possible to prevent water from getting into the threads and possibly freezing. Shown in "Assembled joint" picture.
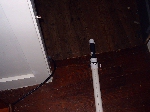
The purpose of the Tee joint is to allow coax to run down the interior of the pipe and surface at the bottom without the weight of the mast sitting on it.
The reduction to 1" pipe at the top is to allow a small beam to be mounted with the use of standard "U-bolts". The reducers that we used were locally available to us. Due to your location specifications may vary, but you get the idea.
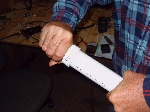
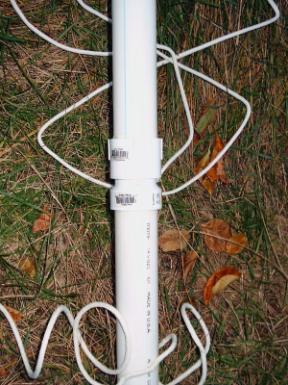
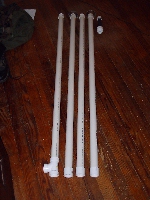
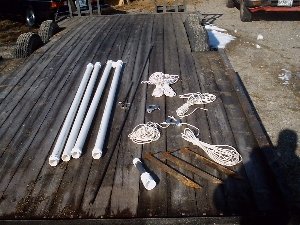
When all of the cuttin’ & gluin’s done, here’s what you should have:
WHA-LAA!!!!!!!
One last item to manufacture…da guy ropes. You will need 3 sections of rope cut 30’ long for the top guys. You will need 3 sections of rope cut 25’ long for the mid guys. Tie the guys directly to the mast or to the guy brackets if used.
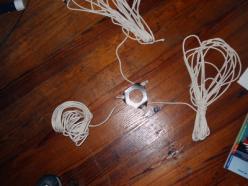
Guy ropes on bracket Close-up of the same
JW has a friend who is handy with aluminum. We custom manufactured these brackets. 2 ˝ hole in the middle, 3/8’s holes for the guy ropes. The bends are approx 45 degrees.
Now, let’s erect this puppy!!!!
This takes at least 2 people to erect. 3 would be ideal. Find a clear flat area approximately 35’ in diameter. Decide where you want the mast to set. Measure out by the following approximate dimensions and set 3 guy stakes/anchor pin.

Where guy placements should go
Measure approx 16’ out from where the bottom of the mast will be in 120 degree intervals.
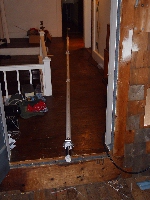
Mast ready to go up
Lay out the guy ropes in their respective direction. Attach 2 of the top guy ropes to 2 stakes. The mast must be completely assembled and laying on the ground with the
top FACING the 3rd stake. The antenna & coax must also be installed. Nothing is tied off to the 3rd stake yet.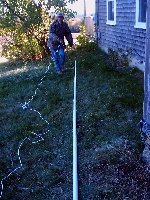
JW tryin’ to look busy!
1 person pushes the mast toward the 3rd stake and pushes upwards at the same time using the 2 guy ropes that have been tied off at support for the top of the mast. Don’t try and tip this thing up. You NEED to use the 2 guys to your advantage. If you just try and tip it up, it will break!!
As the 1st person pushes the mast up the 2nd person holds the 3rd top guy rope. When the mast is vertical, it’s the 2nd person’s responsibility to hold tension on the 3rd rope.
THIS IS CRITICAL!! If the 2nd person fails to hold tension, the mast will fall over backwards. Also, as soon as the mast is vertical, the 2nd person pulls SLIGHT tension and ties off the guy rope to the 3rd stake. The 1st person stays at the mast to hold it. The 2nd person is the one who runs around and ties the mid-point guy ropes and makes any adjustments.During the "standing up process" the mast will flex. It’s only PVC pipe. A little flex is ok, just ensure that it doesn’t start looking like a fishing pole with a 15 lb fish on it and you should be fine.
JW and I set this up in 15 minutes on my front lawn
See the J-pole "copper cactus" in the top?
Coax coming out of the Tee joint
We know you can buy a collapsible 35’ mast at Radio Slack all pre-assembled for about $35-40 bux, BUT can you fit that in a small vehicle?….didn’t think so. Being only 5’ long this will fit in just about any trunk! :o)
Well, that’s pretty much all there is to it. Get creative and paint it. Cammo would be cool! Again don’t overload it and try to stick a HF beam on top or try and use it during a hurricane. Common sense prevails. Have fun & happy HAMMING!!
Be safe and stuff.
Eli & JW
All materials at this site not otherwise credited are Copyright © 1996 - 2002 Trip Williams. All rights reserved. May be reproduced for personal use only. Use of any material contained herein is subject to stated terms or written permission.