*Bondo: It's Not Just for Auto Body Repairs*
By: Stats
24 January 2017
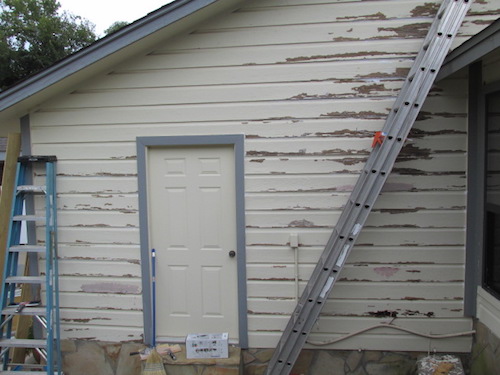
I had to make some repairs to the house before the Holidays and the winter rains set in as there would be water intrusion into the house if I didn't. It was time to paint as peeling paint was pretty bad in some areas as well.
I had to scrape, remove degraded caulk, recaulk and prime and paint various areas. I also had to repair damaged wood (wood rot) areas in about 6-7 locations around the rear of the house.
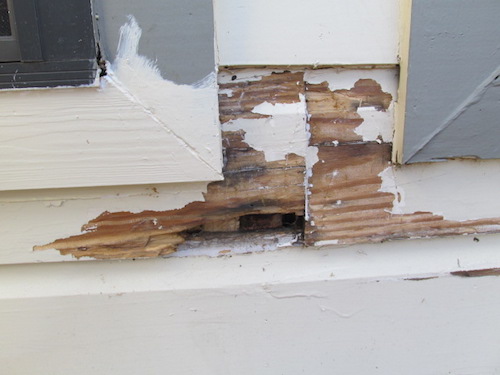
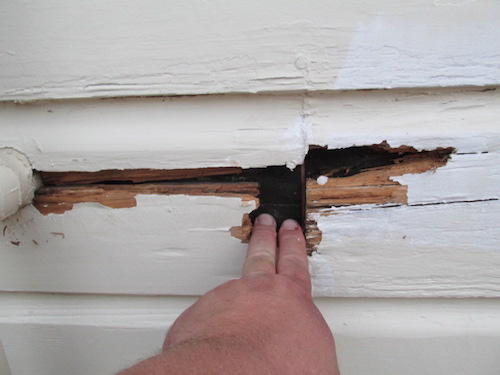
There were various dry rotted areas around nail heads, cracked siding or where moisture intrusion was present from peeling paint.
Peeling paint was really bad as that part of the house receives direct sunlight and little to no air movement so it get pretty hot as it is an alcove area of the rear yard.
There is a property "re-habbers trick" I have been using for about 10 years to make "spot repairs" vs replacing an entire board of the shiplap siding. You can repair a pretty large hole with this method. 4" x 6" was not uncommon for this project.
I removed as much rotted wood as possible and fill it with an auto body repair, two part epoxy material better known as Bondo.
If an area is really big, you can add newspaper in the cavity area or screw a board behind the damaged area to reduce the cavity to be filled. Leave old nails or add nails-screws as/where needed to help hold the bondo in place.
I mix the bondo "hot" i.e. adding extra accelerator so it cures pretty fast to get stiff in about 2 minutes. I have about 1-2 minutes to smooth it out and shave off the high spots with a 5 in 1 painters knife. In about 5-10 min you have a surface that is ready to sanded or painted. Note the material will continue to be hot from curing.
I used a flexible putty knife to mix the bondo and hardener on a 6" w x 10" long a piece of wood until it was consistent in color.
I pressed the mixing board wood against the hole to be repaired and used the putty knife to move-lift the bondo to the hole-area to be filled. I had to keep filling, and moving the material "up" into the hole as it would slump down due to gravity.
I would keep doing this until the material started to become thicker and stickier until it would stay put where I wanted it to go. It was like frosting the sides of a cake.
Having the board pressed up against the siding repair area made it easy to apply the material without dripping onto the patio.
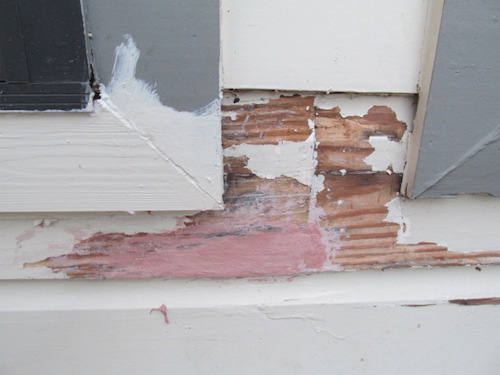
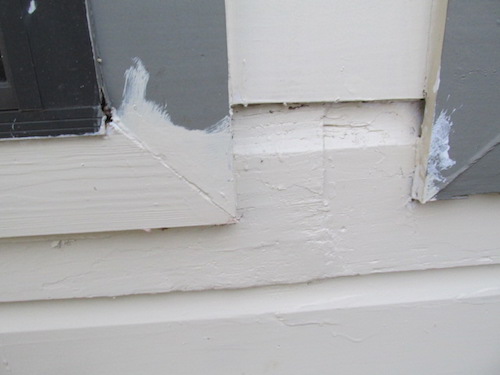
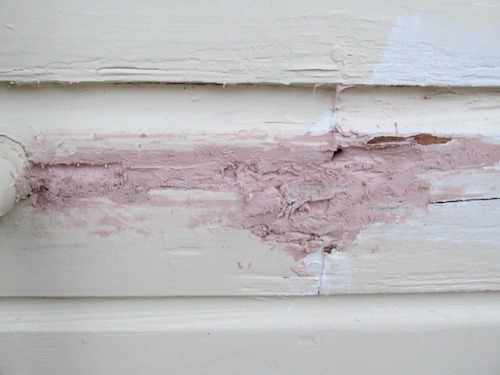
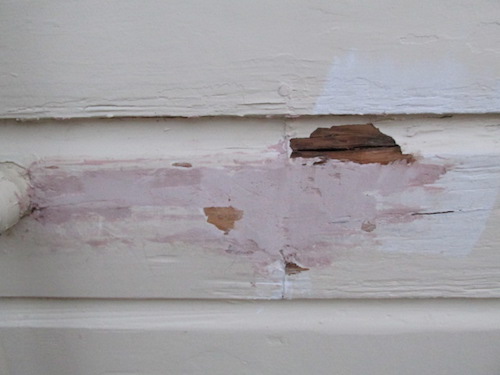
Here are some before, during and after shots of the degraded areas. None of these areas were sanded. Just smoothed out and shaved while still curing, primed and then painted. Sanding would make the repair virtually undetectable once painted.
I bought a gallon of bondo-hardner (kit) at the local auto parts store. I used about half of the gallon making these repairs. Your repairs may not require that much material. You can buy it in one quart containers as well.
These repairs make it easy work vs having to replace the whole board. I didn't have that kind of time and it was only a "spot" that was damaged. I did replace some boards due to the severity of degradation. The "bondo fix" was good enough for now. The pink areas are where bondo repairs have been made.

The pink areas are where the bondo was applied to fill the damaged areas.
Primed for painting.
Another area to be repaired.
Roughed in bondo
Smoothed out bondo
Finished area ready for the rain.
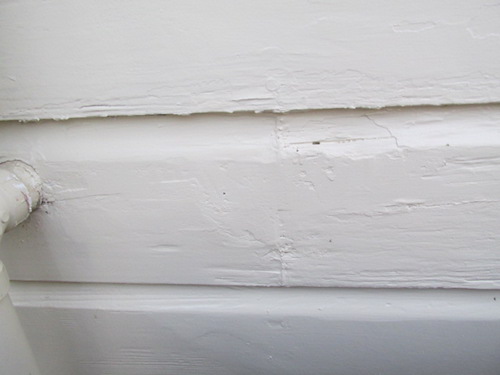
Fully repaired (except the hole above the conduit I repaired after this picture was taken)
Note: The conduit was installed with the hump when we bought the house.
Before
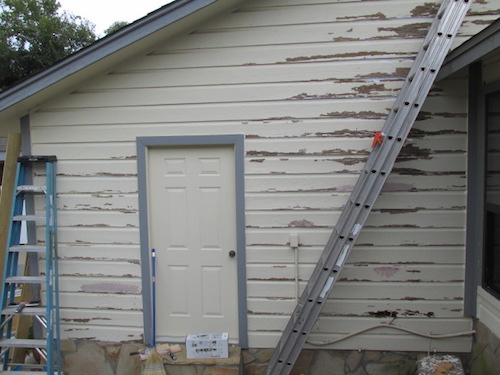
After: Ready for trim touch up paint. The house has been painted many times before we moved in and to have perfectly smooth surfaces is not happening unless it's a new board. Some call it character lol.
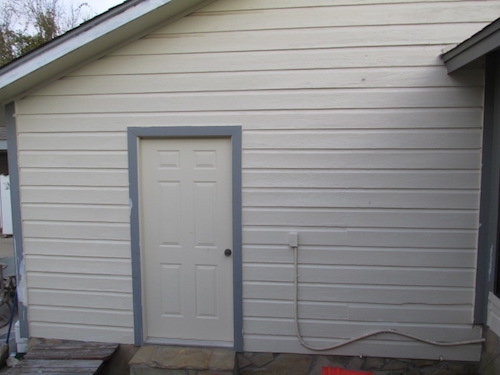
If you didn't know about this fix... Here's your 5 bux for this month.
Stats
www.alpharubicon.com
All materials at this site not otherwise credited are Copyright © 1996 - 2017 Trip Williams. All rights reserved. May be reproduced for personal use only. Use of any material contained herein is subject to stated terms or written permission.