
*Cheese Waxing - Store Bought Cheese*
This is my own cheese-waxing experiment after watching and reading so much on "store bought cheese waxing."
From my research, the difference in "homemade cheese" and "store bought" is the water and oil content.
Store bought cheese is injected with water to make the weight more (again, just from hours and hours of research) but tomorrow I'm trying my hand at actually making my cheese from raw cow's milk which will be put into a cheese press, etc.
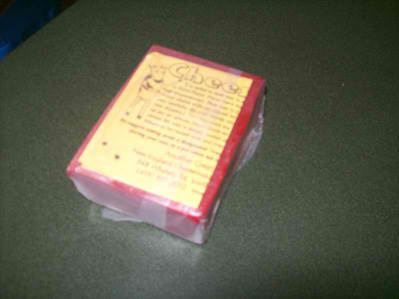
For now, I went to the store and bought 2 blocks of Borden Medium Cheddar Cheese - the individually wrapped ones in the dairy case. I really wanted to experiment with this!
I also bought a block of cheese wax from a new "prepper" store in my area because I was anxious to try this cheese waxing vs. waiting on a shipment to arrive. I paid waaaaay to much for the wax, by the way! I should have ordered it and waited on it to arrive from Cheesemaking.com (this was my "buy once and cry twice ordeal!")
I brought the cheese home with the wax and followed directions of cheese waxing experts....
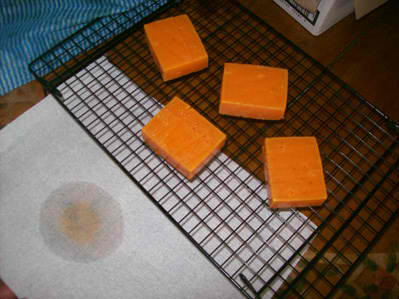
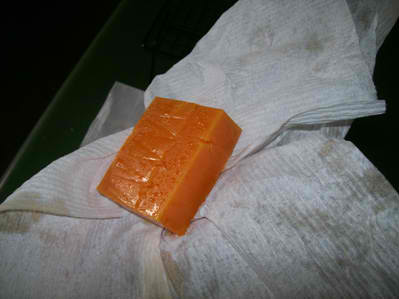
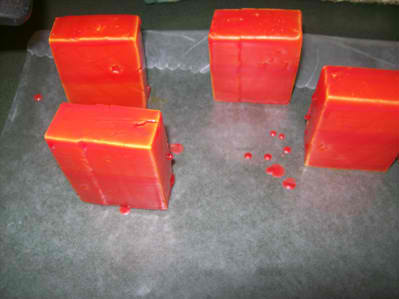
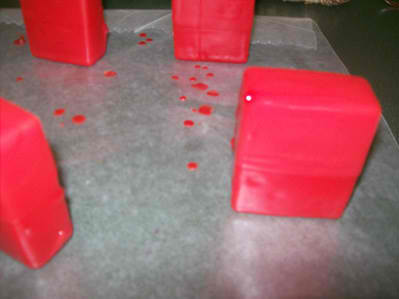
I cut the 1 lb. cheese blocks into halves. So I had 4 smaller blocks of cheese. I laid them on a baking cooling rack to "dry out" and put a cloth on top and a paper towel underneath. I expected water and oil to drip out or be absorbed.
I got exactly what I expected.
The amount of oil surprised me. You'll see the top cloth has absorbed some and the paper towel did too. Glad I put that there because that oily mess on our dining room table would have really ticked me off! ;-)
Suggestion was to let this cheese "dry" out for 48 hours but mine took 60. At 48 hours it was still mushy on the outer side and I wasn't satisfied it was dry enough. At 60 hours I was satisfied.
The cheese was solid crust on the outside so I got my aluminum pot out and my block of cheese wax. This pot, which turned out to NOT be optimal because it was too deep, it is the pot part of a very old pressure 'cooker' (not canner) but I thought it would work. It didn't. I needed a smaller deeper pot for these next steps because I was waxing very small 8 oz. blocks of cheese.
I removed the cellophane wrapping from the cheese wax and directions and then cut the wax block in half. I didn't need to melt the whole block of cheese for just 2 lbs.
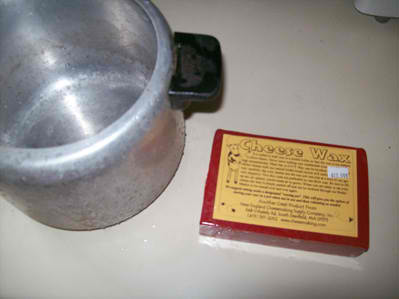
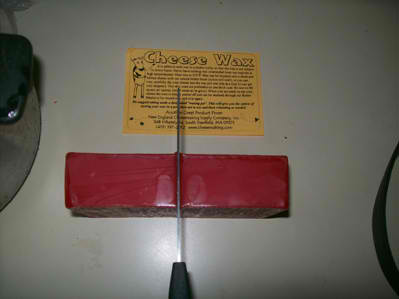
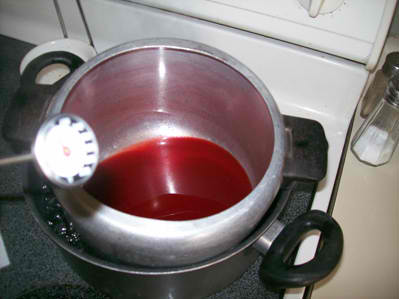
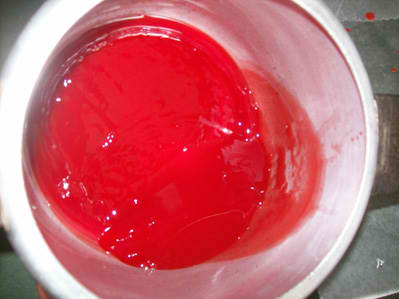
Because the manufacturer instructions stated to use a double boiler and I don't have one per se, I made one. Wax, is highly flammable and I didn't want to take a chance... so I put the block of wax in the old cooker pot and put that in a pot of water in one of my normal pots to create a 'double boiler'.
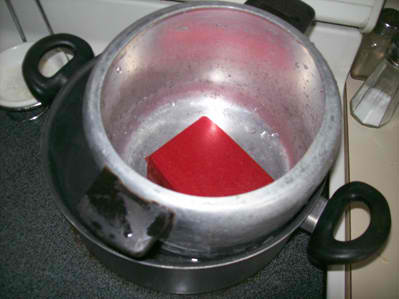
The cheesewax instructions said to bring the wax to 210 F but on an electric glass top stove that was hard to do, especially with the heat loss in the double boiler. The heat on the glass top stove raises and lowers and you have no control over that. I should have used the gas stove for this step but I did manage to get it to 205 F.
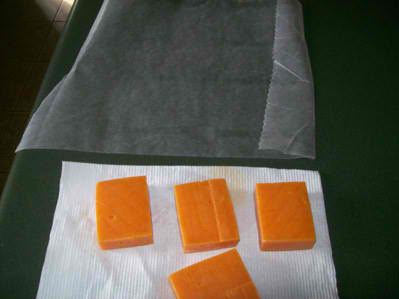
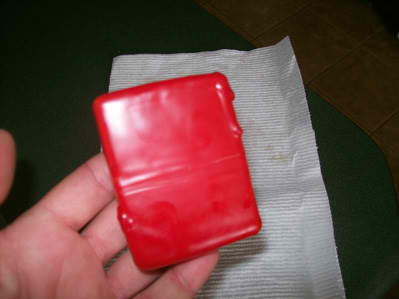
While the heat was rising on the wax I was wiping off the cheese that had been drying out.
Don't be surprised at the amount of oil from store bought cheese. It was a lot, in my opinion. The picture above shows the block already wiped once and I'm getting ready to wipe again.
I was constantly checking the wax during this time and stirring it around.
With the cheese wiping finished, I was happy with the dryness and laid a piece of wax paper on the counter top for the waxing process.
My wax had melted perfectly so I checked the temp and it was 205. At this point the wax had been on the stove for almost 45 minutes and I decided it was time to take it off and start waxing.
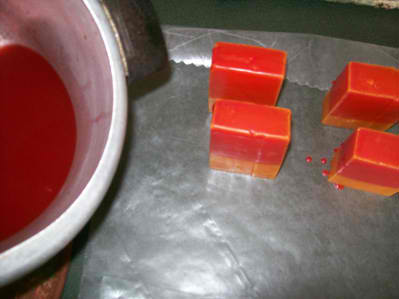
I moved the wax off the stove and onto the counter top (on top of a stove mit) close to the blocks of cheese which were on the wax paper.
I did not brush the wax on, I choose to dip it. I dip one side, slightly shook, and placed on the wax paper - unwaxed side down until I waxed all 4 pieces. The wax dries very quickly.
Now I dipped the unwaxed side and placed onto the wax paper.
I repeated the second coat of wax in the same manner - one half at a time.
The directions and suggestions all state that 2 coats of wax is sufficient, but I could still see "cheese" through the wax. In the picture above you can still see cheese around the edges, so I had to go for a third coat of wax.
At this point, I could no longer see cheese through the wax on the edges and I was happy that I had a good coat of wax to protect the cheese, so I stopped at three coats. I've got a few runs but that's ok because the cheese is coated.
The cheese wax is very soft to the touch. Even when you first purchase the cheesewax it's a very soft wax. At this step, above picture… it's still soft.
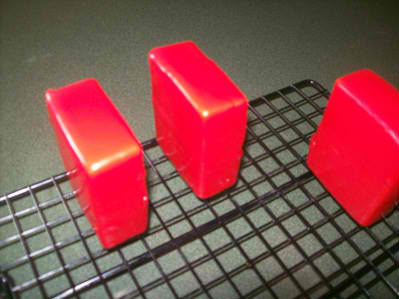
I decided to put the blocks back on the drying rack for a day to see if they would harden up a bit and they did.
In the meantime the wax in the pot hardened back up and I placed the lid on the pot and took it to storage (in the basement) for future warming and using. The extra cheese wax block was rewrapped with instructions (so I don't forget the heating instructions) and placed downstairs as well.
Today I went downstairs and checked on my cheese blocks and the wax had hardened somewhat and I am satisfied with the results. I have no leakage or water bubbles.
If water bubbles do erupt and leakage occurs; the wax will have to be removed and the cheese block cleaned and rewaxed. From my research, the drier you can get store bought cheese the better.
I have these few blocks on a shelf, standing up and not touching. I don't want the wax to adhere to another block and I want the air to circulate around them.
I hope this helps. I have no FNV on length of storage as this was my first time with store bought cheese; however, I did have to use one block 6 days later and there was some oil build up between the cheese and the wax. I wiped it off, cut off the hardened part and the cheese was perfect!
VIKIS
www.alpharubicon.com
All materials at this site not otherwise credited are Copyright © 1996 - 2012 Trip Williams. All rights reserved. May be reproduced for personal use only. Use of any material contained herein is subject to stated terms or written permission.