*Easy No-Knead Bread*
By: Casey
19 March 2013
To go with my regular loaf bread recipe, I thought I'd throw in the recipe I use for easy no-knead bread. It's about as easy as they come. All it takes is time and planning, to make it come out right when you want fresh bread.
I use a basic recipe from the book My Bread, by Jim Lahey. It's one of those books on 'artisanal' bread; however, as I find with most of these style books, if you ignore the pretensions and just focus on the recipes, you can come out with really good stuff.
Here is the basic recipe:
As you can see, he gives weight measurements for each ingredient, so that you can be very precise as to your ratios for ingredients. I find that I get better results with this recipe using half the salt, double the yeast, and maybe a third cup more of water - or a little less. I add the extra water in at the end of mixing until it gets to the right consistency, at least for me.
You take all of the above ingredients and mix them together in a bowl with a wooden spoon. I use an old Tupperware cake dish. I turn it upside down and use the lid/cover as my mixing bowl. When I'm done, I can put the base on the inverted cover like a lid to keep it sealed. That's the trick with this recipe, keeping it sealed up. When you have mixed all of the ingredients together, you should have a bit of a wet and sticky mess in the bowl.
Now, here is the tricky part. You put the lid on, or seal the large bowl with cling wrap or the like, and then you leave it alone. Although the author recommends letting it percolate for 12 - 18 hours, I find that 15 hours is almost a minimum - and I have let it go as long as 22 hours with good results. What's going on in there during all this time is that the yeast is fermenting a little (which imparts a wonderful flavor to the bread) and the gluten is forming long strands (which imparts the ability to hold large bubbles inside the crumb), making it very open.
Once that first 'rise' is complete, the dough should be doubled or more in size. Generously flour your work surface, and use a spatula or dough scraper to scrape your dough out of the bowl and onto your work surface. Once out, you don't knead it per se, but use your dough scraper, or spatula, to lift the edges over and into the middle of your dough ball. You'll incorporate a bit of flour into the dough as well, making it less sticky. This takes all of 5 minutes - if that.
Once you've lifted the edges in all around and formed a round dough ball, you want to lift it and put it seam side down onto a floured hand towel. I use a smooth kitchen towel, because you don't want it to stick. Make sure the cloth is well floured, and then sprinkle a bit of something bigger (like wheat bran, corn meal, or grits) onto it before you lay the dough on it. After that, sprinkle a little more flour and meal on top of the dough ball and fold the ends of the towel loosely over the dough ball.
Don't wrap the towel too tightly, as you're going to let the dough rise inside that towel and it needs room to expand.
While this second rise is going on, move your rack to the lower third of your oven and put a covered medium size Dutch oven on the rack as you pre-heat it to 475 degrees Fahrenheit. You can use a heavy pot with a lid as well, but I have a 4 quart lidded oven I use just for bread. You want it piping hot, so leave it all in there for a good 20-30 minutes past the time the oven reaches the preset temperature.
Once your dough has doubled in size, get yourself ready because you'll need to move quickly to keep the heat in. What you're going to do is pull your Dutch oven out and remove the lid. I toss a handful of grits or cornmeal in the bottom for good measure, then flip the dough out of the towel and into the Dutch oven - seam side up. Pop the lid on and slide the whole thing back into the oven. Set your timer for 30 minutes and walk away.
Now will be a good time to clean up the mess you just made. I always get flour and meal everywhere when I flip the dough into the pot. Once your 30 minutes are up, reach in and remove the lid from the Dutch oven and then let it keep cooking until your crust reaches your desired level of brownness. This is usually another 15-30 minutes, though I've never let it go longer than 20 additional minutes, and I have pulled it out in as few as 5 browning minutes.
Once you've reached the color you want, pull it out and use a wooden spoon or spatula to get the loaf out of the Dutch oven and right onto a cooling rack. It needs to cool for at least an hour before you try to do anything with it. This is actually a fun time, especially if you have kids - but it's fun for grown-ups too.
The dough will have risen in the pot, due to the yeast and a little steam. When you take the lid off, it hardens the outer crust and traps remaining steam inside - cooking the bread, and giving it that chewy consistency. When you take it out and it begins to cool, that outer crust tried to contract against the steam filled interior. What you get from that is little cracks in it, where the steam is escaping. Well, the little cracks, which you can't really see, occur with a snapping and popping sound, much like a bowl of rice crispies. You can also often see bits of meal or bran popping off of the loaf, usually from the bottom, when hit by a steam vent.
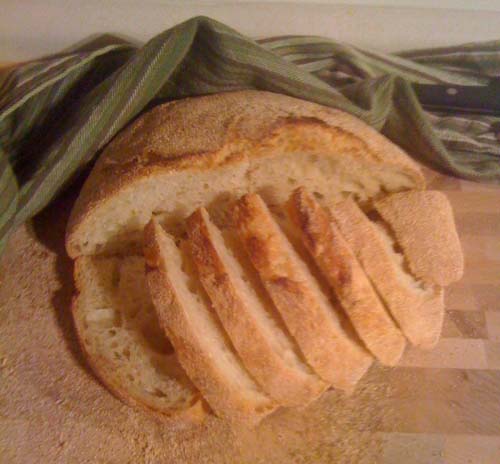
Once it's cooled, slice or tear off a chunk and enjoy! It's great all by itself, but I find it really good dipped in peppered olive oil.
It takes almost a full day to make, but you really invest less than 30 minutes of your time in the actual making. The rest of it is in sitting, fermenting, rising, and baking.
Casey
www.alpharubicon.com
All materials at this site not otherwise credited are Copyright © 1996 - 2013 Trip Williams. All rights reserved. May be reproduced for personal use only. Use of any material contained herein is subject to stated terms or written permission.