*Garage Storage Solution*
If you are like my family, we are constantly short on space in our house. Rather than buy a huge McMansion, we bought what we could afford and ended up with a ranch house with about 2000 square feet. While this is big compared to previous generations, it seems ours has more stuff. We have been working at cleaning out junk and freeing up space but we are still coming up short and everything seems cluttered. This seems even more so with our acquisition of more and more preparedness materials. In order to help alleviate the constant storage issue, I decided it was time to build overhead garage storage. I wanted a place where I could store items while I work on securing tickets for my family. I also want those items all together and easily accessible. My preference is to have some boxes which would easily load and stack on my 5x8 utility trailer and be strong enough to hang from the ceiling.
After searching around at various stores, including WalMart and Target, I found exactly what I was looking for at Lowes.
These totes are just under 30 inches long with allows me to place two rows in the trailer and hang them in rows of two on the ceiling. They are made to hold 400 pounds, not that I will ever put that much in them, but I know they are solid. This helps though when stacking them. I can comfortable stack two to three without worrying about the bottom tote having its sides bow out. They also have a solid lip around the top for hanging them like I wanted to do. Finally the tops have small holes on the edges where they can be secured with zip ties to ensure they stay shut.
Lowes did not have 1x4x10 but they had 1x4x8. I thought about purchasing the 8 foot lengths but thought I would end up with waste and end up spending more in the end. I went to 84 Lumber and they had the 10 foot lengths. I also purchased the lag screws at Lowes at $3.00 each, but when I went to 84 Lumber they were $1.89 there so I purchased them again and returned the ones I bought at Lowes.
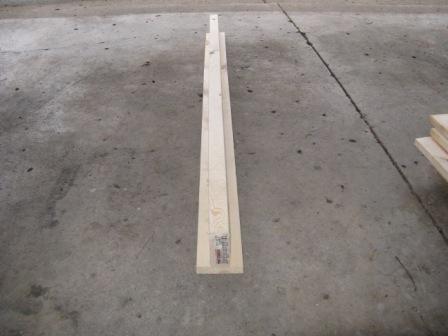
The first step is to cut the 1x4s and 2x4s in half. This provided enough room to support two totes with an inch to spare. Once all the boards are cut, I stood the 2x4x5s on the 2 side and put gorilla glue on the up side. Then I laid a 1x4x5 on top of the board and secured the ends with clamps. I then started putting the deck screws into the boards from the 1x4x5 into the 2x4x5. I spaced the screws 1 apart. Repeat this for all of them. I ended up with 8 of the combined boards.
*In my first attempt I left the boards uncut in their 10 lengths. I found this unwieldy and difficult to cut with my miter saw.

The next step is to prepare the ceiling of the garage. The joists in my garage were 24 apart. Rather than measure out everything before hand and end up missing or messing up something, I started with one side and moved from there once I had the first boards secured.
To make find the center of the joist I measured to where I thought it should be and marked it. I then took a small hammer and penny nails to find the exact center. I did this where I wanted to start and then I repeated this step well past where I thought where the boards would hang. I then had my wife help me put a chalk line on the ceiling to help me keep the boards straight.
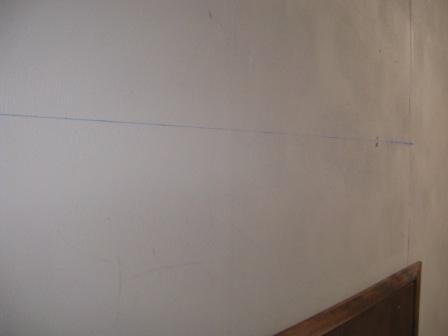
To put the boards up, I measured where the boards would cross the joists. Each board crossed the joist 3 times. I placed them so they would cross near the ends and again in the middle. I drilled a pilot hole into the joist with a 1/4 bit. I measured several times and made sure the holes I drilled into the boards lined up exactly. I marked the boards with a marker and drilled a hole into the boards with a 3/8 bit. I then put washers on the lag screws and pushed them through the holes in the board and put them up to the ceiling to ensure they lined up. Measuring multiple times helps to prevent mistakes here.
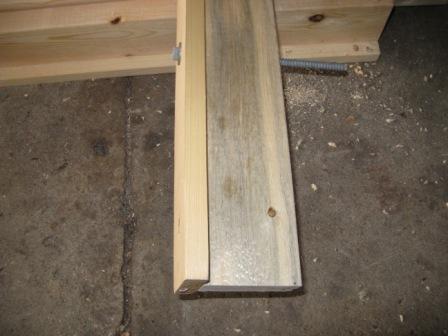
I put a few of these up by myself, but it is much easier to have some help here. I secured one end into the joist enough where it could hold itself for a minute and then climbed my second ladder to secure the second side. Getting the lag screws into the ceiling took some work at first. The head of the lag screw was 9/16. My 9/16 socket had a small ratchet and I could not get leverage. I took a 3 piece of pipe and added it to the handle and things when much easier from there.
After putting the first one up I needed to make sure I had room to slide the tote between the boards. I measured along the chalk line 21 from the boards I just secured to the ceiling. This helped keep the spacing right and kept me from drifting. I then measured 21 from the second lag screw and marked. This mark was usually off a little and I had to measure to find the joist. Again, lots of measuring helps keep everything straight.
Once the measuring is done I repeated drilling and securing the boards to the ceiling. After every time I added new boards I put an empty tote up there to make sure I had the proper spacing.
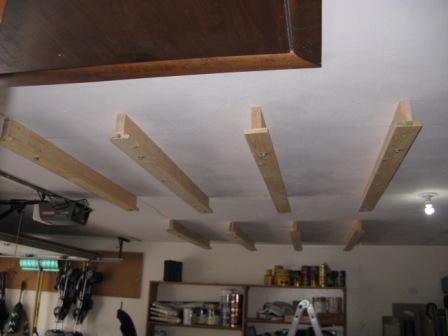
These boards are pretty secure into the joists. I have some of the boxes up in the ceiling now holding about 45 pounds each. To test them, I hung off of them with all of my 220 pounds and they did not budge.
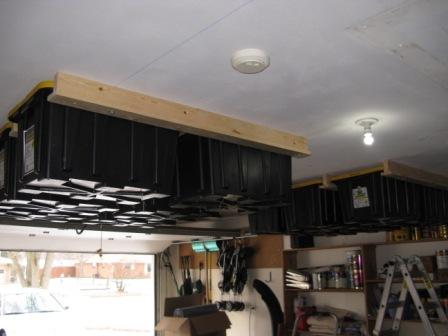
I am not that handy but I like to try to do stuff around the house and think through the problems. In the end I am very happy with how the project turned out. The total time I spent was about 5 hours. If I had consistent help, I think I could have cut it down to 2-3 hours. A lot of my time was lost climbing up and down my two ladders making sure I measured right.
Over the next few weeks as I fill everything I will put labels on the bottom and side of the totes to tell me what is in the boxes.
www.alpharubicon.com
All materials at this site not otherwise credited are Copyright © 1996 - 2010 Trip Williams. All rights reserved. May be reproduced for personal use only. Use of any material contained herein is subject to stated terms or written permission.