*Garden Tower Barrel*
By: TooshieGalore
26 December 2016
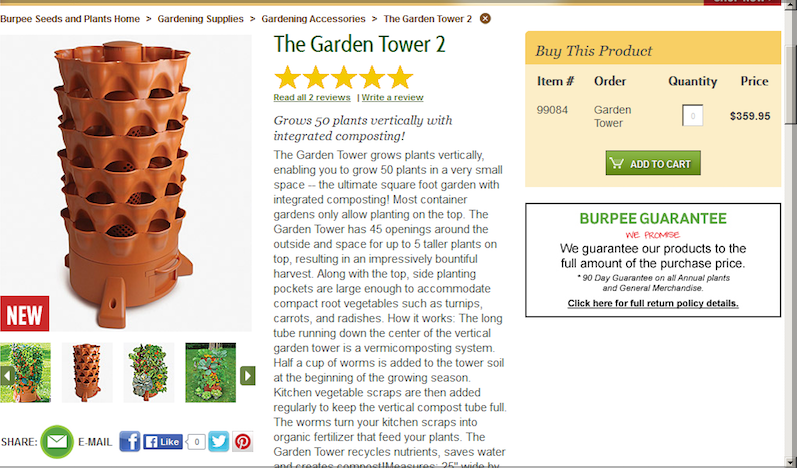
A garden tower is a vertical, container-garden with built in composter and vermiculture. Because it's vertical, it's easy to access without bending over - no tilling, no digging, no weeding. Add kitchen scraps to the compost tube and dump in a pound of worms. The worms eat the compost, wiggle out to the soil and leave their castings - adding fertilizer to plants. A water drain in the bottom of the barrel catches excess water, which is full of worm casting nutrients - sort of a compost tea - that can be returned to the barrel. Occasionally, clean out the compost tube and use processed compost in the garden. It's a self-contained, sustainable, growing system.
But they are not cheap. Here's one I found online for $359. I decided to DIY it.
THE BARREL: I used a 55-gallon plastic barrel but any size will work. As a note, the white 55-gallon barrels are made of thinner plastic and have fairly flat sides. The blue barrels have molded plastic reinforcement bands, which makes it stronger, but more difficult to cut.
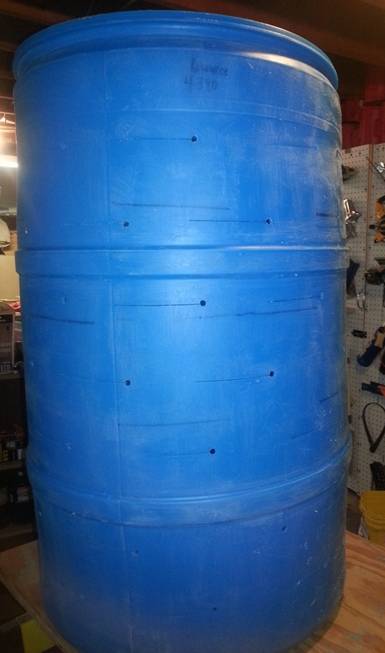
MAKE THE POCKETS: Plants will grow in pockets cut in the side of the barrel. Pockets can be any size you like. I use 6" pocket holes with 4" spacing between. I allow 6" spacing between rows. Don't skimp on the size of the pocket. It is difficult to get a good rootball into a small pocket. Measure and mark the location for pockets with a Sharpie but don't get obsessed about precision. In a week the plants will be so large that pockets are not visible.
Drill a pilot hole at one end of your mark for the jig saw blade to fit into and cut along the line. It is a challenge to cut on a round barrel. I lay it on plywood across sawhorses, with wood clamps attached to the ply. Push the barrel against the clamps. This allows me to cut and roll the barrel without it rolling off the back of the work surface.

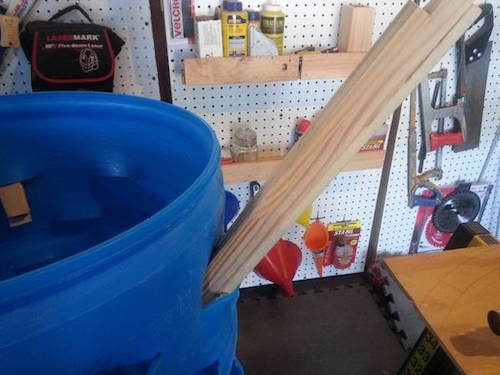
After the cuts are made, use a heat gun; heat the plastic above and below the mark line until it becomes pliable. Heat a triangular area similar to the one marked with dashes in the photo below. Pull up a stool and get comfy, this takes a few minutes.
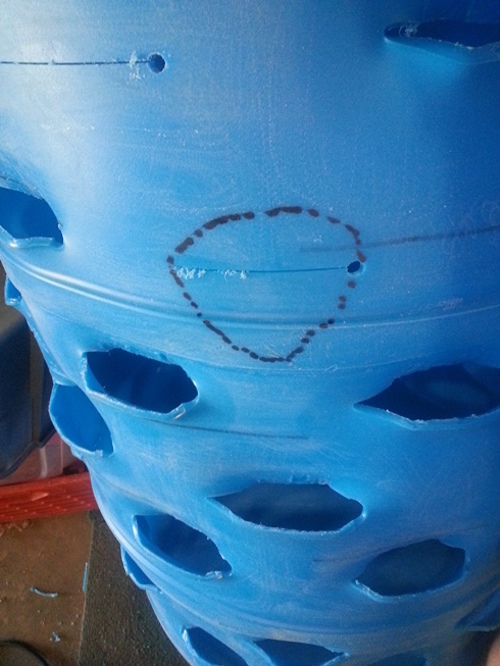
When the plastic is pliable, shove a 2"x4" into the hole. Push the 2x4 against the top of the barrel. Focus on forcing the plastic above the cut, back, into the barrel, rather than forcing the plastic below the cut, out. This creates a nicer pocket for plants and the soil won't fall out. It's trial and error. If you make a mistake, reheat and reform it. Allow the 2x4 to remain in place for about 15 minutes until the plastic has cooled to its new shape. Along the barrel banding, I first had to insert a 1x2 to start the plastic out then switch to the 2x4. Use a file on the edges to smooth the burs, inside and out.
MAKE A DRAIN: Your barrel needs to drain excess water. Turn the barrel over. On the bottom, in an area near the edge, mark an area about 6" in diameter and drill several holes in this area. I used 1/4" holes. Keep your holes within the marked area to make it easier to catch excess water. More about that later.
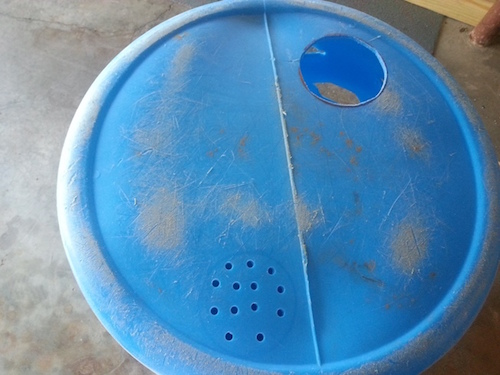
THE COMPOST TUBE: While the barrel is upside down, cut a hole for the compost tube. I used 4" PVC as my compost tube. Choose any size large enough in diameter to stuff in kitchen scraps. Most people put the compost tube in the center of the barrel, but that can be tricky when getting your hand under the barrel to retrieve processed compost. I prefer to put the tube near one edge - whatever's easy for you. Carefully jigsaw a hole for the PVC to fit into. It's worth taking your time and doing this with precision for a nice clean, tight fit.
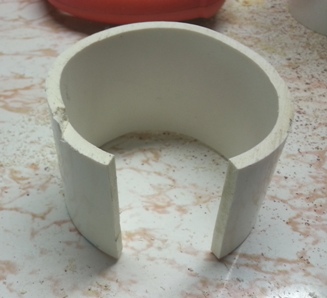
I suggest the PVC compost tube be about 12" taller than the top of the barrel so you don't disturb plants, as they grow, when adding compost. Measure the height of the barrel and add 12" - mine came to 49". Cut the PVC compost tube to length. While cutting PVC, cut an additional piece, 2" long, then split it and remove about 2" using a jig saw. We'll use this as a "bushing" to prevent the tube from sliding out of the barrel and to seal leaks. More on this later.
Drill holes in the PVC compost tube. Holes allow the worms to move freely from their food supply (your kitchen scraps!) to the soil. I omitted 12" at the bottom and 13" at the top of the PVC tube; and randomly drilled 1/2" holes in the area between. You don't need holes (worms) in the portion of the tube sticking out of the soil on the top and you don't need holes (worms) in the already-processed compost. The holes have to be large enough for big, fat, juicy, worms to easily get in and out of!
ELEVATION: Next, decide how you will elevate your barrel off the ground. Some people attach legs, others attach casters. Your barrel will be VERY heavy - plan for VERY large casters, or VERY thick legs or other VERY good support. The barrel has to be elevated to access your captured nutrient water - which means you'll be putting a dish pan under it. You'll also be harvesting processed compost - so you need enough room to get your hand under the barrel to remove the plug and dump its contents. I suggest practicing to see how much room under the barrel you're comfortable with. I prefer my barrel simply sitting on cinder blocks.
If you plan to attach casters or legs, it's best to do it now. You can use the 4" PVC hole to access the interior of the barrel to make those attachments.
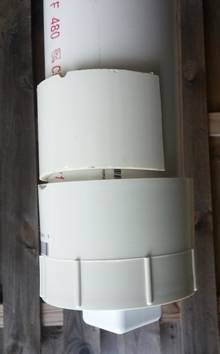
ATTACH THE COMPOST TUBE: Dry fit a PVC cleanout drain and mark where the top fits on the PVC tube. Remove the drain. Now mark about 1/8" up from that mark to represent where the barrel will be. Spread the "bushing" we made earlier to the mark 1/8" higher than the cleanout drain.
When done, the cleanout drain will be outside and under the barrel. The bushing will be inside. The barrel will be sandwiched between them.
Practice positioning the bushing in the right place a few times. When ready, spread PVC cement and secure it permanently in place. PVC cement dries quickly - you only have one shot to get it in the right position. Practice first!
Next, lay the barrel on it's side. Spread a bead of silicone on the bottom of the bushing (where it meets the barrel) and slide the PVC tube into the barrel up to the bushing. Use PVC cement to attach the cleanout drain to the end of the tube, outside of the barrel. So, the bottom of the barrel is now sandwiched between the bushing on the inside and the cleanout drain on the outside. Use copious amounts of silicone where the cleanout meets the barrel for a watertight seal.
The interior bushing is a pain but if your garden tower will sit on a patio or deck, you'd rather not have a messy leak.
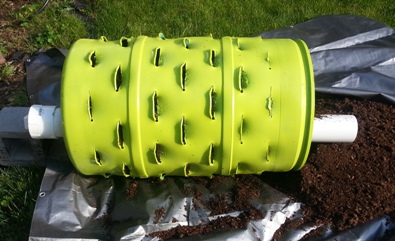
PAINT: I believe in a pretty garden so I roughed up the barrel with 80 grit sandpaper and used two cans of Rustoleum Plastic spray paint from Lowes. If you paint your barrel, I suggest sanding after cutting along marked lines but before expanding the pockets. It's easier; plus, you can sand away any mistake-marks.
PLANT: Position your barrel in its place, on its support, fairly level. If your barrel doesn't sit exactly level, position the drain near the low point for best drainage. It will be heavy and impossible to move after you've added soil.
Fill with soil. I use a mix of 1/3 compost, 1/3 peat moss and 1/3 vermiculite. It's a fluffy soil that doesn't dry out as quickly as other container mixes. In case you've never used fluffy soil, I suggest filling about 12" and saturate it with water. Fluffy soil will float on top of water until it the water is absorbed. Give the water a few minutes to soak in then continue working your way up the barrel 12" at a time. Once you get to the top, mound 2 to 3" of extra soil in the top. The soil will compress a bit after its saturated and this saves you from having to add more soil, later.
Wait an hour then water thoroughly again until water comes out the overflow drain. The soil should no longer appear to float and has compressed a bit. Adjust the amount of soil on top as needed. Now you're ready to add plants. Flowers, tomatoes, peppers, greens, root crops and herbs all grow well in a 55-gallon drum. Place a dish pan or small container under the drain to catch excess water. Add a 2" layer of mulch on top, around plants, to reduce evaporation.
WORMS: Fill about 1/3 of the compost tube with kitchen scraps. Add a little water and 1 pound of worms. Any worms will do. I hit the bait shop for night crawlers. I know you're gonna be tempted to get more. One pound doesn't look like a lot of worms but they multiply quickly. Trust me; one pound is all you need. Next, cap the top of the tube to keep out varmints and bugs. I use an old clay pot turned upside down. Add more kitchen scraps every few days. Keep your worms well fed for lots of fertilizer!
In my area, worms won't live in the tower through the winter so I add them to my garden and buy new each spring.
WATERING: Water the top of the barrel about every third day, depending on temperatures, starting with the captured nutrient-water. Drip line with large emitters will work. Calculate flow to provide five gallons of water. WARNING: My attempts to run drip line to each individual pocket has never worked.
NEXT YEAR: I often want to move my tower depending on the crops I'm growing. Another benefit of sitting the barrel on cinder blocks is in removing the soil. I spread a tarp on the ground and push the barrel off the cinder block onto the tarp. A few shovel fulls will pull out enough soil so you can tip it up on edge.
A garden tower is easy to build. A 55-gallon garden tower barrel takes about four hours, not counting planting and around $25, not counting plants. However it took me three days as I got bored expanding the pockets. I tend to take breaks and then get distracted. The garden tower makes a wonderful gift for friends/family or a nice donation to your favorite non-profit fundraiser or senior citizens home. I've done several and each is still in use this year.
In case I didn't explain how it works, this video might help:
https://www.youtube.com/watch?v=Q1C9zP5uJrE
Materials I used:
www.alpharubicon.com
All materials at this site not otherwise credited are Copyright © 1996 - 2017 Trip Williams. All rights reserved. May be reproduced for personal use only. Use of any material contained herein is subject to stated terms or written permission.