*Replacing Boards In A Hardwood Floor*
By: Josephus
06 July 2011
Purpose:
- This document serves to assist in the replacement of damaged tongue and groove hardwood floors. Time estimate - 2 hours per board.

Requirements:
- Tools - You will need a Dremel tool, circular saw, hand tools, hack saw, and possibly a band saw (optional). Safety glasses and possibly a dust mask for yourself, along with a set of knee pads helps.
- Parts - You will need a selection of replacement boards, Adhesive caulk, and painters tape.
- Patience - You will need a goodly bit of patience.
Overview:
- You will be carefully cutting out and removing the old boards and trimming replacements, then gluing them in place.
Procedure:
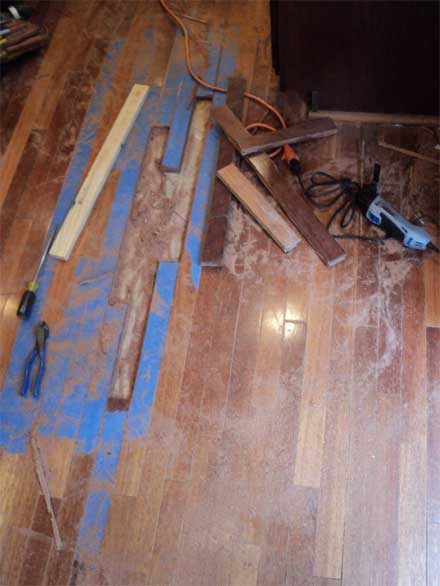
- Start by taping off the good boards around the damaged area, to prevent scratches from the saws.
- Locate the edge of your first board to be removed, using the dremel tool and a flat blade, carefully start a cut 1/8 of an inch from the end of the damaged board.
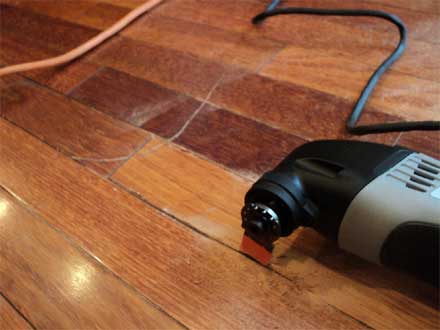
- Firmly keep it straight and make sure not to let the dremel tool 'hop' onto the keepers. Cut a straight line all the way through the hardwood flooring (mine was 3/4"). Be sure to cut all the way into the corners, and take your time to ensure you do not mar the finish of the neighboring 'keeper' boards. This takes a fair amount of time, and if you rush the wood will begin to smoke - slow down or move to another section for a while.
- Once you've got the corners started, carefully cut along the edge using the circular saw. Beware that you may see sparks from time to time, as you cross a staple or nail. Again, patience and steady pressure will cut through it as well.
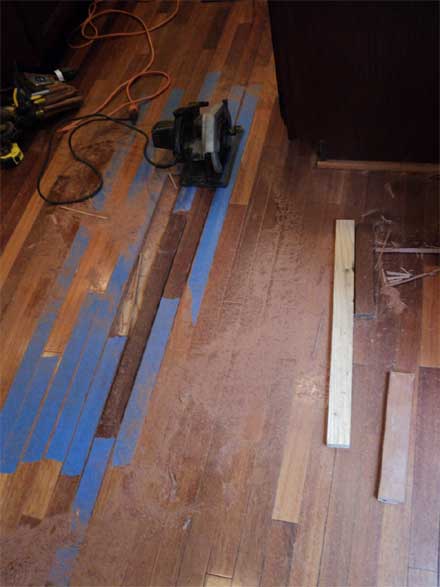
- Now for the fun part... Using a block of wood and a thin screwdriver, start prying the board out. Pay attention to what is loose, and what areas are still uncut and not moving. Go back with the dremel and complete those corner cuts.
- Once you have the old board completely out, you can clean out the area, along with nails and staples.
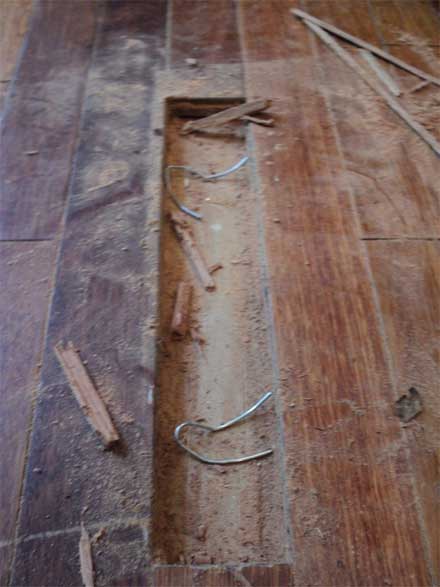
- You want a very clean, smooth flat surface.
- Dig out any splinters and be sure to remove the tongues as well.
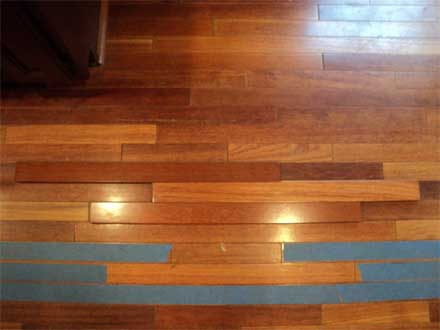
- Here is another fun part, picking out the replacement boards. For our flooring we had a randomized pattern. Your results will vary.
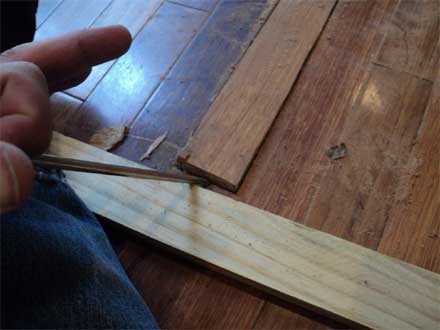
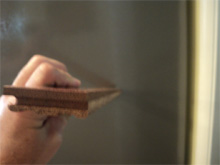
- Get measurements on the first board, first cut. Mark out with tape on the board the line to cut. Make sure it is squared. Then, using the hack saw on an angle, slowly start a pulling-away single direction cut. Gradually working the hack saw down to level you can ensure a minimal width cut through the finished surface. Finish the cut with a band saw (or another).
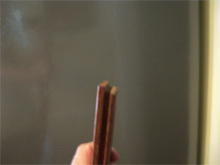
- Using a band saw, I was able to cut off the tongue groove from the replacements. Note the lack of tongue below. The sides of this board are cut on a 15 degree angle, this helps with any remaining splinters, dust, and chunks.
- Do a test fit and make adjustments as needed. Once the board barely fits (you want a nice snug fit), then you can move onto the next board.
- Working on a group of 3-4 boards at a time allows you to do more test fittings. You can put a wrap of tape (thin) or string on the underside of the board to help pull it out after fittings (remember it should be snug and flush).
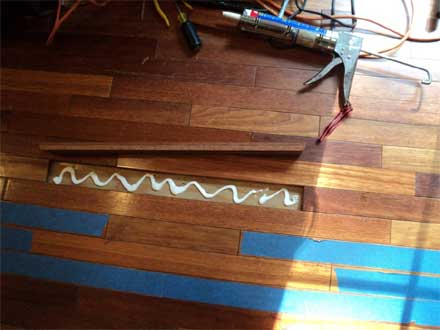
- Once this group of boards are all cut to length, lay down a 1/4" bead of caulk adhesive well into the corners. You may need to "pound" your hands or "jump" on the boards to get them all the way flush.
- The Lock-tight Heavy Duty indicates you have only 15 minutes to "adjust" the substrate - however, my boards were creaking loose until the following morning. Placing some weight on them overnight (75-200 lbs) can help ensure they remain flush.
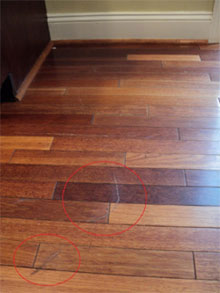
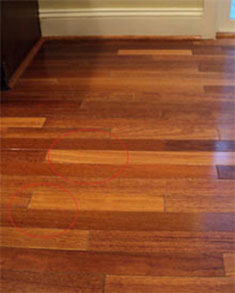
Before... Finished...
Josephus
www.alpharubicon.com
All materials at this site not otherwise credited are Copyright © 1996 - 2011 Trip Williams. All rights reserved. May be reproduced for personal use only. Use of any material contained herein is subject to stated terms or written permission.