*Making Maple Syrup*
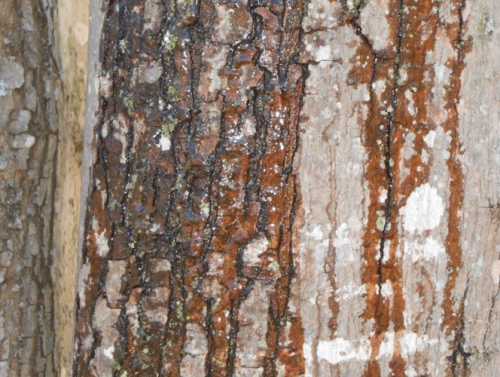
If you have access to maple trees, especially sugar maples, red maples, black maples, or Norway maples, consider making some maple syrup during the late winter. Maple syrup is made from the tree's sap which starts flowing, depending on location, between February and March.
Over the winter, the trees store starches and sugars as food. As the days start getting warmer, the tree distributes these nutrients throughout the tree through the flow of sap. Critical to this flow are cold nights and relatively warm days. The cold nights allow the trees to create suction which pulls water into the tree. The warm days create pressure which, when tapped, allows some of that sap to exit the tree. Ideally, you want to tap when the daytime temperatures are above freezing and the nighttime temperatures fall below freezing. Sap runs when it's good and ready to do so.
So how do you get the stuff out? And once you have it, what do you do with it?
You start with tree selection. The experts say the maple tree should be at least 10" in diameter. Up to about 18" in diameter, you can put one tap in it. A tree 18" to 24" in diameter can handle two taps. You can probably put a third tap in it if it's wider than 24" across, but don't push it. This is the lifeblood of the tree. We've been tapping trees about a foot in diameter, so we're limiting each to one tap.
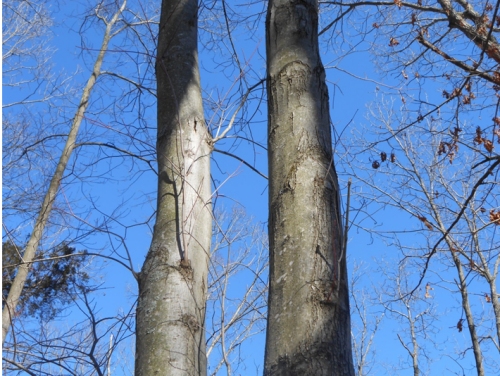
The trees should have large canopies or crowns with plenty of branches and leafing capacity. The bigger the top of the tree, the more sap the tree likely will produce and the more sugar the sap is likely to have. You can expect 10 or 15 gallons of sap per tap. Some trees give even more.
To tap the tree, we use a simple bit brace and drill bit. You can use a battery operated drill if you want, but there's something about the sheer simplicity of the bit brace that feels 'right.' We tap when temperatures are above freezing. We've been told this doesn't damage the trees whereas drilling in freezing temperatures can harm them.
Drill into the tree about 2 to 2 1/2 inches deep and drill at an upward angle. This allows the sap to flow right down into the waiting bucket. After drilling, insert a spout or spile. You can buy one or, if you prefer, you can do what we do. We keep old arrow shafts and use those. We cut the shaft to about four inch lengths and insert one of these pieces into the newly drilled hole in the tree. Make sure the hole is free of shavings. And take care not to pound on the spout or otherwise disrupt the bark. That tree is going to give you sap for years, so take good care of it.
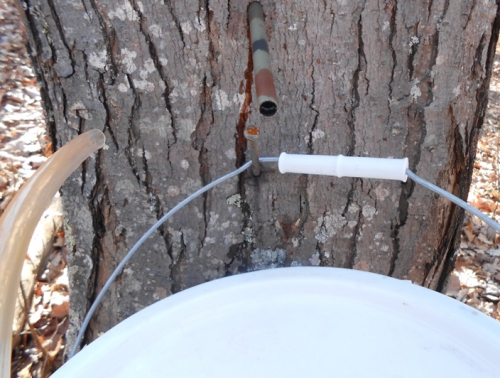
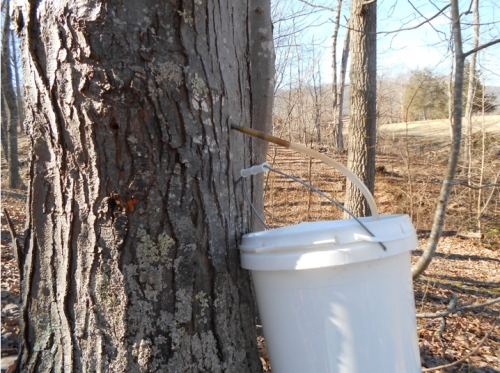
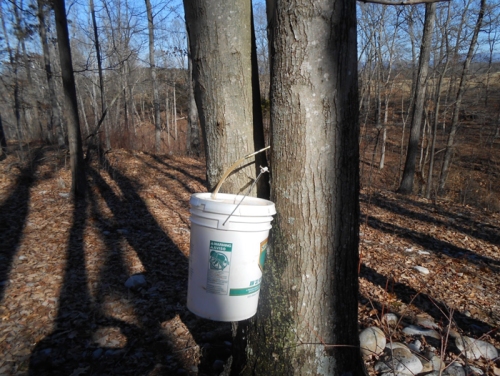
We hang a 5-gallon bucket just below it. We use a nail for hanging the bucket and prefer to use a bucket lid with a bung hole. We attach tubing to the homemade spout.
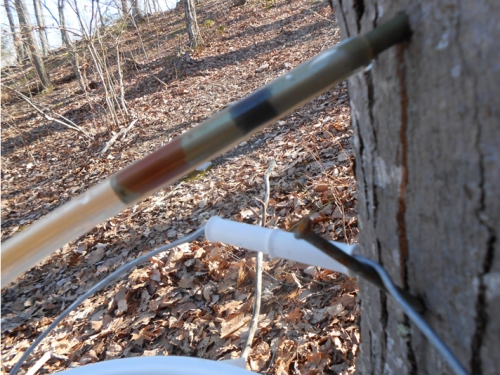
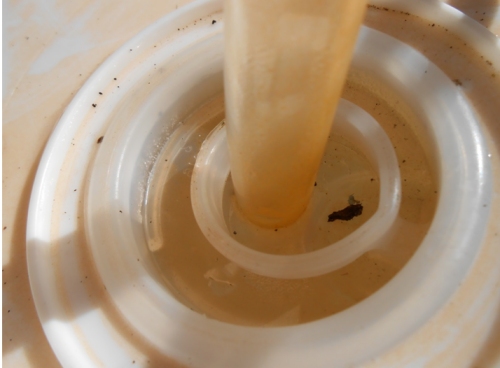
It's a simple matter to punch a hole in the bung hole and run the tubing into the bucket through that hole. As the photo shows, little bits of debris invariably end up on the surface. Covers really do help keep the crud out.
Some people use Aquatainers or other large containers to collect the sap. I've seen everything from 1-gallon water bottles to soda bottles, cooking pots, and even mason jars. But we've found having something with a lid helpful to keep leaves and branches out of the sap.
Once you have the sap, you can start cooking it down. This removes most of the water from the sap and concentrates all the sugars in the liquid that remains. Be prepared to cook for a long time. It takes about 40 gallons of sap to make one gallon of syrup. And you'll continuously collect more sap as long as it continues to run. Expect to do this in batches, particularly when weather conditions cause the trees to push the sap or, alternatively, limit production for periods of time.
Although we could just boil it, we take advantage of the wood stoves already heating the house and set large pots of sap on those. Some say cooking syrup down inside the house can result in sticky deposits on the ceiling and surfaces around the stove but we've never experienced that problem. You'll want to watch for that possibility, though, if you do this.
We filter the sap through cheesecloth before putting it in the pot. Then we continuously add more filtered sap to the pot as the water evaporates. Over time, the stuff thickens and turns golden brown. After several days, having run about 10 gallons of sap or more through the pot, I'll move the remaining concentrated liquid to the cooking stove for a full boil. I use a stainless steel pot and use a good candy thermometer with the final boil so I'll know when it reaches 219 degrees Fahrenheit. The thermometer tip should not touch any of the metal—it should touch only the liquid to ensure an accurate reading.
Don't get lulled to sleep here. The boiling process can seem endless but the syrup's temperature will rise very quickly at the end as the sugar content intensifies to the magic 66 percent. So don't miss it. It can scorch or end up crystallizing if you do. When the syrup reaches 219 degrees, it suddenly foams. Remove the pot from the stove immediately and filter the syrup before it gets too thick. You now have maple syrup. Of course, if it didn't quite reach 219, it'll still taste great. It just might be slightly thinner and it can't 'legally' be called maple syrup because it hasn't quite reached that requisite 66 percent sugar content. But it's just as good on pancakes or in coffee.
We use a canning funnel and 1-quart canning jars for the final filtering. Be sure to wipe the edges of the jars clean before sealing them—maple syrup is sticky and can make lids very hard to remove from the jars. You might prefer the small half-pint jars, quilted jelly jars, or even jars specially made for maple syrup. They make beautiful gifts.
If the mixture does get too hot and crystallizes, it might still be a terrific maple candy as long as it hasn't scorched and isn't so solidly stuck to the bottom that you can't get it out of the pot. So don't throw it out without tasting it. Cleaning the pot can be a bear, but this candy is usually pretty tasty too!
I would add one thing here. Maple syrup flavors can vary from region to region for all sorts of reasons. We don't know why—maybe it's the soil, temperatures, sun exposure, the composition of trees we're tapping—but those of us who produce maple syrup in our area of the Shenandoah Valley end up with a syrup that tastes like vanilla. Rich, sweet, incredible vanilla syrup. It's pretty fantastic, even if people don't believe us when we tell them it's maple.
When the sap stops running or you're done collecting it, be sure to remove the spouts/spiles and nails from the trees. If you're gentle with the tree, the holes you leave behind will seal themselves and will be healed in a couple of years. When you tap the tree the following year, use a different area of the tree for the hole.
And meanwhile, enjoy your delicious maple syrup. Talk about getting something from nothing!
ThePiedPiper
www.alpharubicon.com
All materials at this site not otherwise credited are Copyright © 1996 - 2014 Trip Williams. All rights reserved. May be reproduced for personal use only. Use of any material contained herein is subject to stated terms or written permission.