*Roof Repairs*
By: Josephus
12 December 2010
Warning: Depending upon damage and roof pitch angle, you may need to use extreme caution walking on your roof. This example is a small puncture, but larger trees can significantly weaken a structure. If in doubt contact a professional carpenter, builder, or inspector. Disclaimer over.
Purpose: The purpose of this article is to guide in the repair of a punctured asphalt shingled roof.
Time: Including trip to Home Depot 5 hours, but I didn't rush.
Requirements:
Objective: One of the objectives for this article is to demonstrate a Top-Side repair. Many attics are difficult to access. This procedure shows a 2-layer patch of plywood, then asphalt shingle repairs.
Overview:
Step 1:
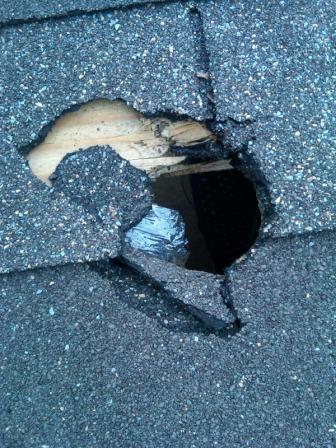
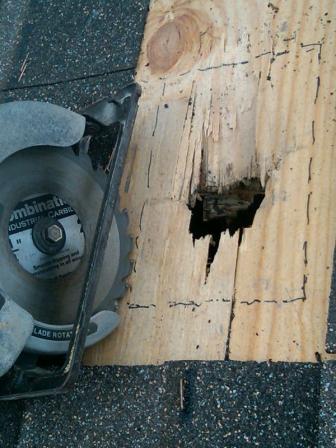
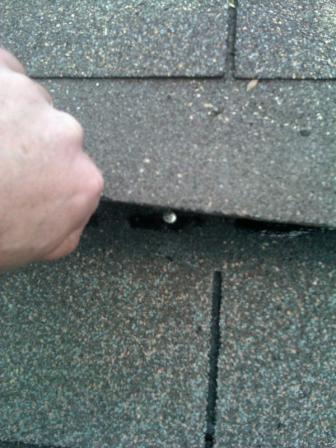
Get your tools, parts and self safely up to your roof, being careful as you approach the damaged area, some damage may be hidden. Remove debris and start by removing old shingles.
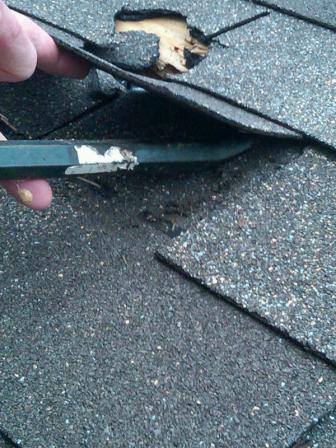
Carefully pry up your last row of un-damaged shingles, using your pry-bar. Note rows of shingles overlap by the rule of thirds, and each will shift 1/3 row-to-row vertically. Use the pry-bar to loosen nails or staples trying not to disturb the existing shingles any more than necessary. Nails may need to be removed if bent, staples seem to stay straight and can be used again. Patience pays dividends here.
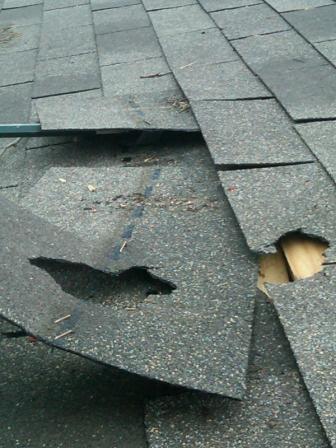
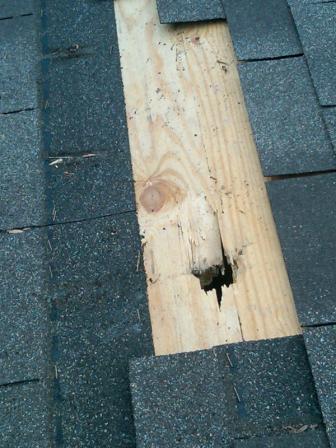
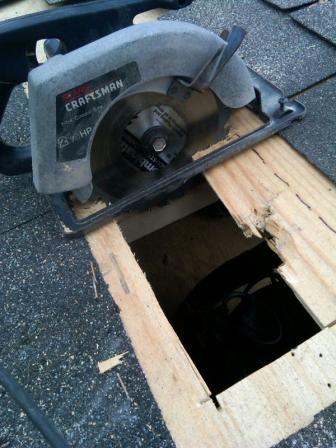
Once you have all of the damaged shingles out you can clearly see the damaged wood underneath. See if you can locate your rafters/joists through the opening. You do not want to cut the joists/rafters at all.
Measure and mark out and your area to be patched, again avoid cutting your rafters here most plywood roofs are 3/4" thick or less. If you can only see (1) rafter, they are usually centered on 16" centered.
Step 2:
Note - This is a Top-Side-Repair using a 2-layer patch. Some attics are difficult to access. You can do this easier with a helper inside the attic space. For this portion I am avoiding the underside of the roof. Think of this next section as a toggle bolt wing.
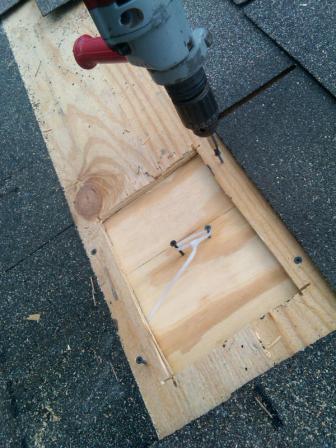
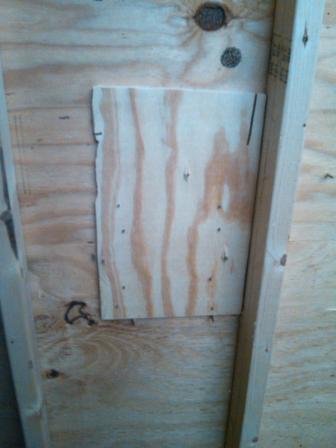
Trim your replacement piece of plywood to be slightly larger than the hole by about 2" to 3" above and below the hole. Start (2) screws into the plywood near the center. Put the zip-tie tightly around both and use this as a handle
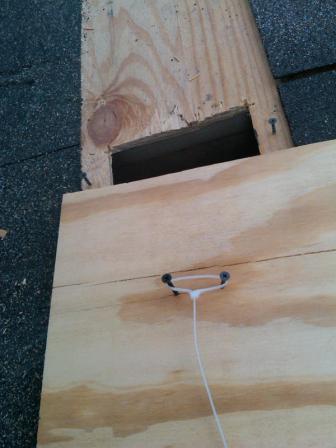
Start 4 screws within 1" of the hole above and below the hole.
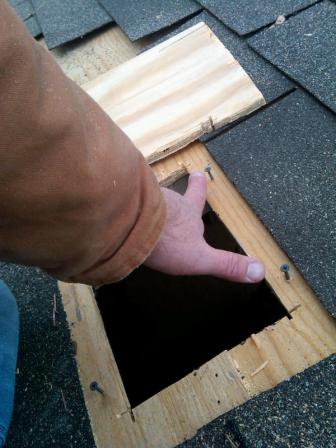
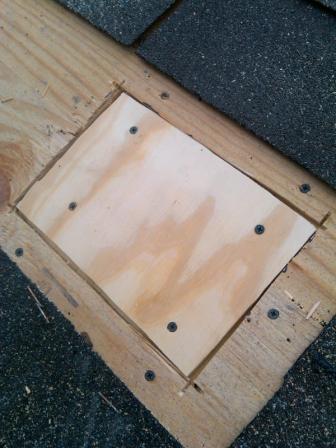
Now grab the zip-tie handle and slide it into the attic space, turn and position it to line up straight with your hole covering most of it. This does not need to be water-tight. Screw your (4) screws into the new plywood piece, pulling it tight to the original roof. This will support a second piece of plywood so make sure you remove the handle screws, and zip tie and get everything flush.

Now cut the patch plywood to the size of the hole. Screw this new board to the previously installed piece. This example was a shed roof which used no tar-paper, however for most homes you do want to install tar-paper at this point. Make sure your tar paper overlaps top-over-bottom layer to prevent water penetration.
Step 3:
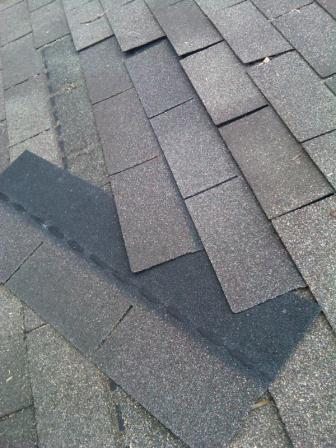
The above picture is an attempt to demonstrate the rule-of-thirds when staggering your shingles. Make sure you stagger each row shifting 1/3 from row to row. Make sure you line up your rows evenly to the original shingles. Make sure no seams line-up vertically or this will allow water penetration.
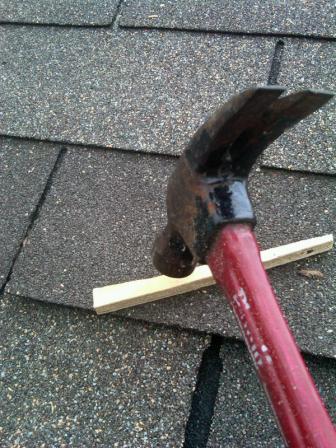
In the first picture use a scrap piece of wood to distribute the impact of the hammer when resetting old nails and staples. Directly hitting the shingles will damage them. The second picture shows where to nail the new shingles at the glue line under the row above. Be gentle on the old shingles here, they may crack easily. I was able to angle the nail downward and get the hammer head under the shingle to drive it in.
Finish nailing in all of your shingles, and make sure you get all of the original nails and staples as well.
Lastly here are the completed pictures. You can see a slight color variation compared to the 3 year old shingles.

www.alpharubicon.com
All materials at this site not otherwise credited are Copyright © 1996 - 2010 Trip Williams. All rights reserved. May be reproduced for personal use only. Use of any material contained herein is subject to stated terms or written permission.