*Generator Preps*
By: AlasKen
29 September 2021
Last winter I added a tri fuel kit to my Generator. I ensured it worked and called it good as it was to cold to mess with it much. This spring I changed my oil and serviced my air filter. I put in a new AGM battery as the original one wouldn't take a charge. Each time I used my generator I turned off the fuel and ran the carb dry in order to try and prevent the carb from gumming up. This spring I emptied the tank and left it empty. It is ready to fill and run if I am not using propane. One nice thing about propane is it doesn't mind a dirty carb as it just needs the air to flow. This weekend I decided finalized a few things I had planned. I still have some more to go.
I added a SAE Plug socket connector that will allow me to plug in my Foval 1000mA Automatic Trickle Charger which uses the SAE connector so I have no need for clamps or getting down on hands and needs trying to hook them to the battery. I also added a voltmeter gauge with touch switch to see the state of charge and the charging circuit while charging or running. I can also use the 12V connector if I need to grab 12V or jump the battery from a jump pack. I made a wiring harness with the SAE connector pigtails and a SAE splitter. All I needed to do was use 2 marine grade rings to connect to the batter and 2 marine grade female spade connector to connect to the voltmeter. I have started using only marine grade crimp connectors with the adhesive lined heat shrink.
I also used a Kill A Watt knock off to set the propane mixture. I put it under about 2500W of load and set it to 125V and 62Htz. I filled up 6 propane tanks to have on hand if needed. I also have about 50 gallons of treated gasoline if needed.
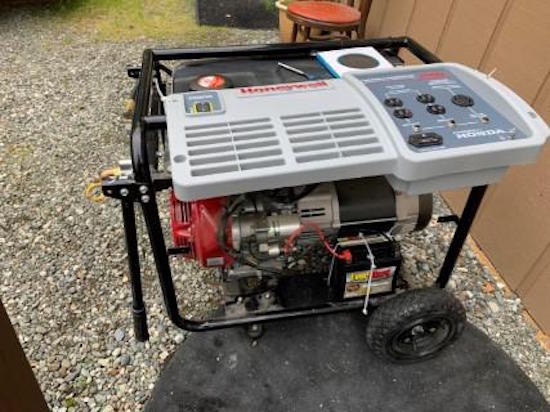
I also have connection parts to tap into my natural gas line with a shutoff and quick connect to run on natural gas if needed. The following are some photos of the project.
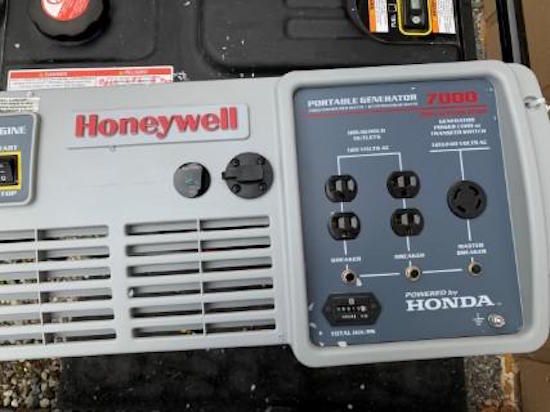
I had to remove the front in order to get to the back side and drill a couple of holes. 7/8 for the voltmeter and 1 1/8 for the SAE socket. I left room for 2 120VAC voltmeters that I plan on adding so I can see that each leg is working. Just ran out of time. The Kill A Watt does the same thing
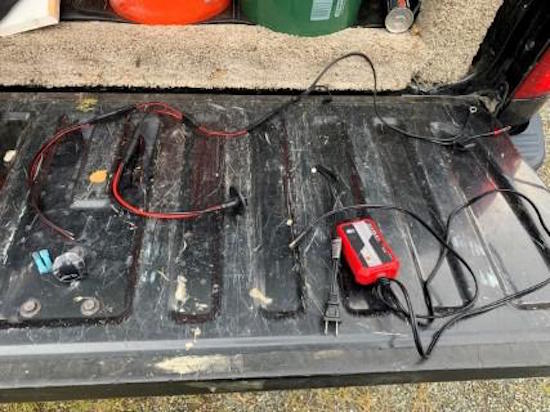
Here you can see the wiring harness. Starting on the right you see the rings that connect to the battery. This goes to the splitter with one leg going to the socket connector and the other going to the voltmeter. It isn't a great photo something about black on black doesn't give much contrast. You can see the 2 female spade connectors and the little trickle charger
Here you see the meter and connector in place and hooked to the battery. The glare makes it difficult but the voltmeter is reading 12.5 V from the battery.
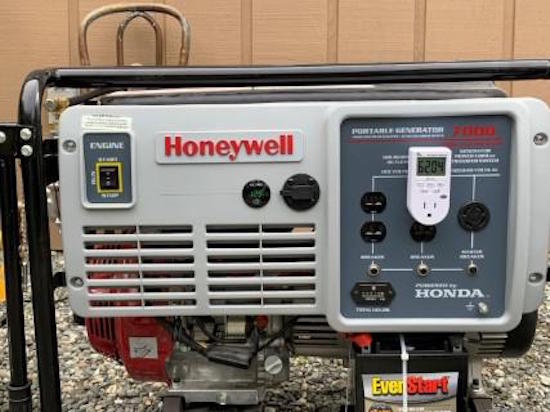
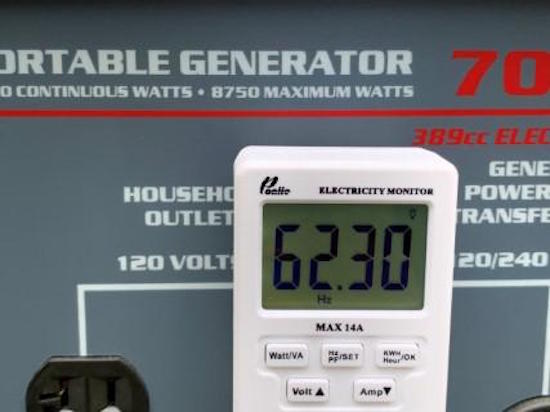
I now have the gennie running. It is putting out 62.3 Hz under a light load.
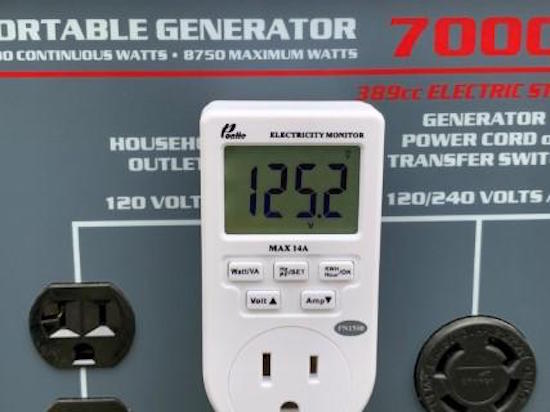
It has 125.2 Volts under that same light load.
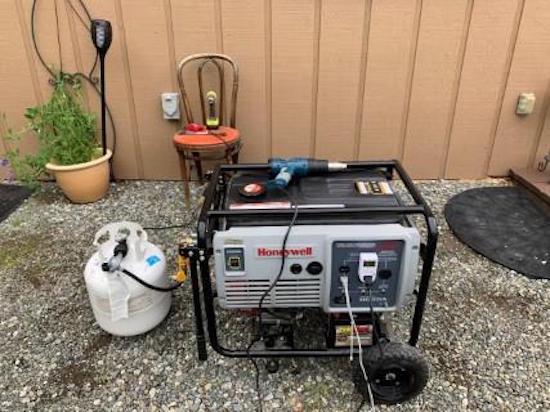
Photo showing the overall setup. I was using a 1000 W electric heater and a 1500 W heat gun for the load. Propane tank has a regulator attached to hose with a quick connect. This goes to the low pressure regulator that has the fuel mixture valve.
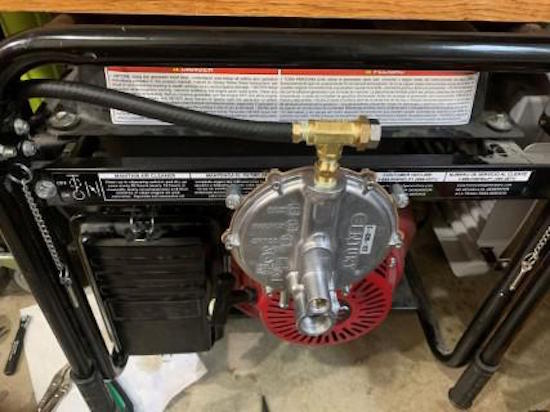
Here is a closeup of the fuel regulator. This photo was before I put on the quick connect. The silver colored bolt on the top tee is the fuel adjustment. Have to open it 6 turns and depress a valve on the back side to get the propane flowing. Once it starts vacuum pressure hold the the valve open. Once running I adjust it based on the Kill A Watt.
All in all a pretty simple project and should give me some additional options if the need arises.
AlasKen
www.alpharubicon.com
All materials at this site not otherwise credited are Copyright © 1996 - 2021 Trip Williams. All rights reserved. May be reproduced for personal use only. Use of any material contained herein is subject to stated terms or written permission.