*Fieldstrippimg the M1 Carbine. *
By serger
26 October, 2002
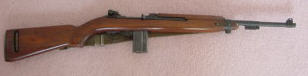
The process for Field Stripping the M1 carbine I’m going to describe is straight out of the U.S.Army Field Manual 3-27. I’ll use my own words because I don’t like their wording.
Here is an exploded drawing of the rifle without wood.
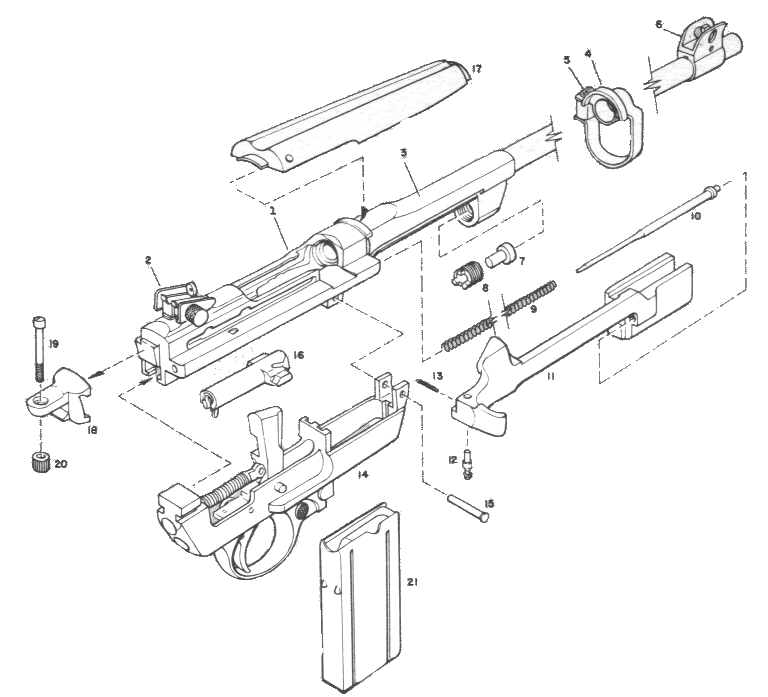
1.Reciever. 2. Rear Sight. 3. Barrel 4.Front band. 5.Front band screw 6.Front sight 7.Piston
8.Piston Nut 9.Operating Slide Spring 10. Operating slide spring guide 11. Operating slide
12. Operating slide stop pin 13.Operating slide stop spring. 14.Trigger housing Assy. 15.Trigger housing retaining pin
16. Bolt assy. 17.Handgueard assy. 18. Recoil plate 19.Recoil plate screw escutcheon 20 Recoil plate screw
21.Magazine assy,
First verify the weapon is unloaded.
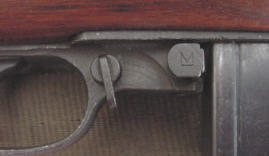
To do this, remove the magazine by pushing the magazine catch and pulling the magazine down. Then place the safety on safe. In the picture above the magazine release is marked with the "M" and the safety is in the safe position.
With the magazine out next retract the slide and look into the chamber and verify there is no ammunition in the weapon.

If you retract the slide all the way there is a button on it that you can press into the cutout in the upper receiver. This will allow you to examine the chamber. To disengage this feature retract the slide more and the detent will unlock from the upper receiver.
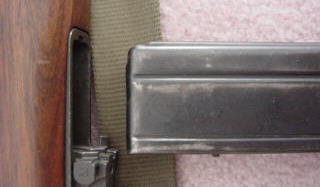
With the rifle unloaded and on safe unscrew the barrel band and depress the barrel band lock spring.
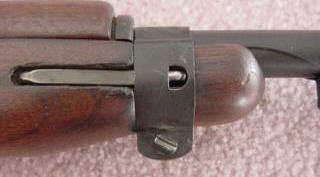
When the spring is depressed pull the barrel band toward the front sight and when it clears the wood you can lift the hand guard up and off the upper receiver
 .
.
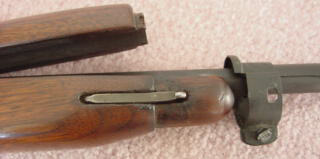
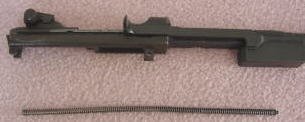
You can now lift the barreled receiver out of the stock. It will pivot on the recoil plate.
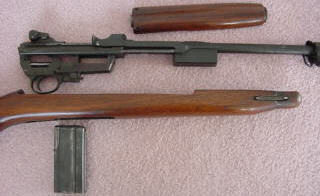
You need to push out the pin that holds the trigger group and slide the group toward the barrel. This will allow it to clear the upper receiver.
Next you will remover the recoil spring from the slide. To do this you retract the spring slightly and lift it from the slide. You will then be able to pull the guide and spring from the upper receiver.
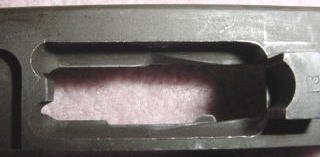
Next we need to remove the slide from the upper receiver. If you look at the right side of the slide there is a cut out.
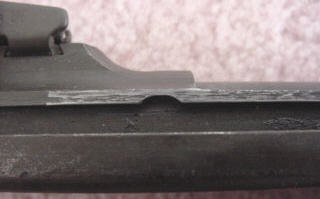
On the underside of the upper receiver there is another cutout that you need to have aligned to remove the slide.
When you have the slide aligned with the cut outs, lift the slide out of the operating cut on the top and then rotate it out of the underside cut. The slide is now removed from the upper receiver.
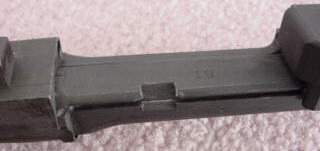
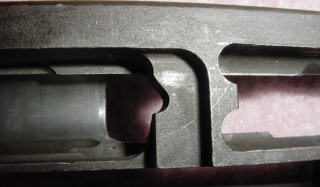
Now you have to remove the bolt. To do this you need to align the receiver cut to allow the bolt to be lifted out of it’s channel. Here’s a picture of the cut out from the underneath.
It’s that funny little area in the top center of the magazine channel. It will lift up.
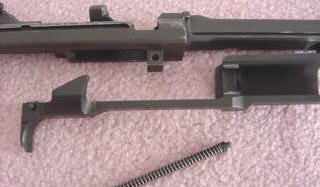
Next you need to align the firing pin with the cutout in the receiver to pull the bolt.
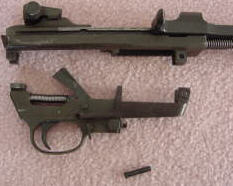
When you have removed the bolt the rifle is field stripped.
It will look like this.
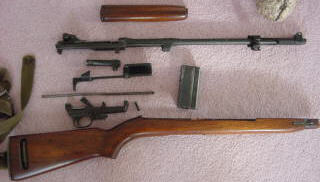
There are few problems that I know of when you’re ready to assemble the weapon. Be sure to look at the alignment points and don’t force anything. That’s about it.
Stripping the Carbine Trigger Group
Stripping the Carbine Bolt Dissassembly
Thanks for the read
serger
All materials at this site not otherwise credited are Copyright (c) 1996-2002 Trip Williams. All rights reserved. May be reproduced for personal use only. Use of any material contained herein is subject to stated terms or written permission.