By: Motorman

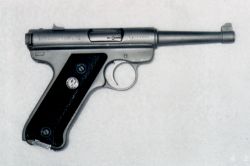
One of the local gun dealers offered me a deal that I could not pass
up. A stainless steel Ruger .22 Automatic pistol. After stopping by and
looking at the pistol it was very clear that the pistol had been bead blasted,
not stainless steel (scary isn't it?!). Since I like a challenge, I bought
the pistol. After talking to Shooter, I decided to try out Brownells Aerosol
Baking Lacquer.
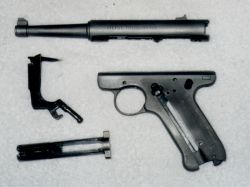
First step is to take the gun completely apart. Second step is to polish
or bead blast the parts that you want to finish (this step was already
done for me). Third step was to clean the gun real well with Acetone or
Lacquer thinner. I chose Lacquer thinner because that was what I had on
hand.
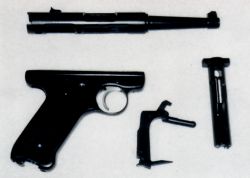
After laying down a few layers of newspapers, I laid out the parts that I wanted to refinish. Do not coat any parts that cannot withstand a temp of 300 degrees for 30 minutes( I left out all the small parts as well as any springs). Take your can and try out the spray pattern on a piece of cardboard. After testing the consistency of your pattern. You are now ready to start applying your finish.
I used a hair dryer to preheat the parts until they were warm to the touch. This helps the coats of finish dry faster, allowing you to put on additional coat sooner.
When applying the finish, spray it on in light even coats. The instructions recommended 3 coats. I applied 4 coats. If you have a run in the finish, let it dry. Then use a piece of 400 grit wet-or-dry sandpaper to lightly sand the run for the surface. Then respray the area. The finish is not completely smooth when it dries. Do not worry the finish levels out when it is baked. All you need to worry about is any larger imperfections like a run in the finish.
After allowing the finish to become dry to the touch, you are ready
to start baking you gun. Use a pie tin with several holes punched in the
bottom. Place the parts in the pie tins to keep the parts from getting
marks from the oven racks while baking. After preheating your oven to 300
degrees place the pie tin on the rack in the oven and set the timer to
30 minutes. When done turn off the oven and open the door. Let the parts
cool to the touch before handling them.
Your gun is now ready to be put back together again.
While this is not a professional finish, it is fine for a work gun or
one to be tossed in the truck. I did it mainly to save myself a few bucks
and to learn something new. It is fairly easy if you take your time, and
you should not be intimidated by trying it. This was the first time that
I have ever done anything to a gun other than stripping and cleaning one.
It was well worth the time and effort to learn this one as well as now
having a gun that I can say that I finished myself.
Motorman

All materials at this site not otherwise credited are Copyright © 2001 Trip Williams. All rights reserved. May be reproduced for personal use only. Use of any material contained herein is subject to stated terms or written permission.