*Maglight Fix 101*
By Sgt.Splatter
04 July 2004
!!!!!! WARNING THES
STEPS MIGHT HAVE DRY OR WET ACID!!!!!!
You might have to be careful so you do not get the acid in your eyes,
mouth, skin.
The batteries when they come out can get hot also.
Wash your hands after you are done!!!
We have all left the batteries in the maglight too long, at one
time or another, & the batteries have leaked. Right!!!  .
.
This will give you a big mess to clean up, so we will go into the
secret world of the MAGLIGHTS!!
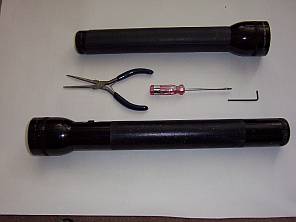
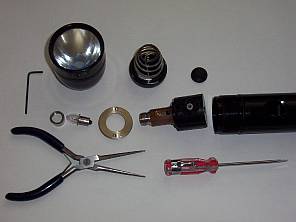
Step (1) Tools needed for the job:
1 - Maglight
(These steps can be used either for a C or a D cell Maglight as
they are made the same.)
1- small screwdriver
1- pointy nose pliers
1 - #2 Alan wrench.
1 - solution to neutralize the acid
(baking soda and water or battery terminal cleaner)
Step (2) , Strip all parts off that you can by hand:
end cap, lens cap, light bulb, the
rubber on off switch,
and the batteries, if you can, if not that is ok.

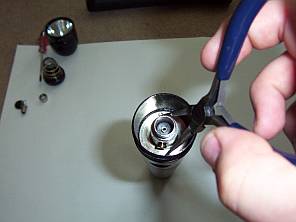
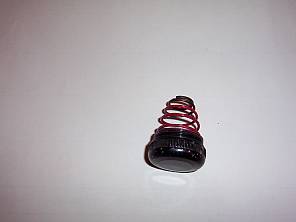
Step(3) Remove the Switch Assembly
Now the BIG
secret, To get at the Switch you have to put the alan-wrench in to the
hole in the top of
the on-off switch
then you have turn 2 to3 times counter-clock wise. This will
loosen the locking screw. 
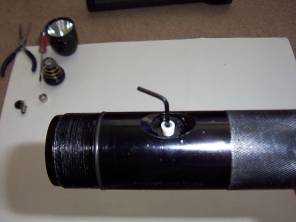

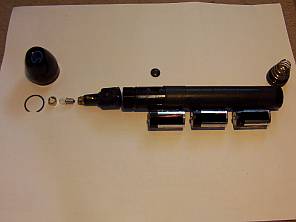
Step (4)
Before the Switch Assembly can be taken all the way out you must remove
the threaded washer from the inside via the divits.
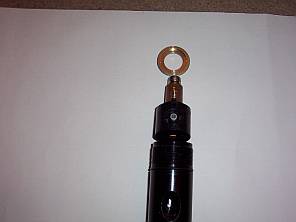
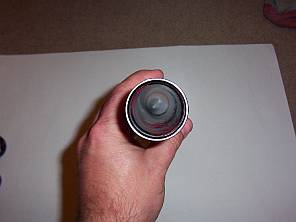
You now need to remove the threaded washer in the front of the Mag light
This you need the long pointy pliers.
Put the pliers in the divits as on pic (2).
Turn the threaded washer counter-clock wise
It will not fall out until you pull the switch out.
Pic (2)
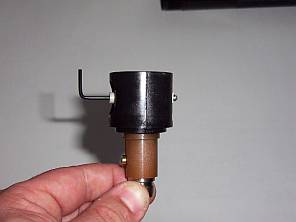
. Now push the switch in to the on position to let the switch
assembly fall out forward.
Make sure that the on and off button is push in.
The switch assembly cannot go back into the battery compartment due to
the way it has been machined out.
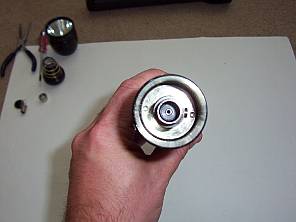
Now if you did not get the batteries out you will be able to push them
out with something long.
Step (5) Cleaning up the mess
As you can see I have some dry battery acid inside the body of
the Mag light. You can either use water and baking soda as a
paste this will neutralized the acid or I used car battery terminal
cleaner in the spray can. If you have hard acid scale on the side
this will let you use a big long screwdriver to scrape it
off. Then after it is all clean, I put in some spay
can of battery neutralizer from an automotive shop that is red to
stop the acid coming back.
I did 2 Coats

I hope this will shed some light on Mag light....LOL 
I will do one on AA Mag light to add to this.
Now you can get the parts and put them in yourself and not have to pay
the repairman to do it for you for $20.00
An Amendment to the original Article:
Now After Getting this article done I take apart a third and fourth
maglight and find there is another setup holding the internal parts
in. Must be a cheaper version that companies use to give away to
customers? These 2 maglights have a C-clip holding in the switch
instead of a threaded washer.
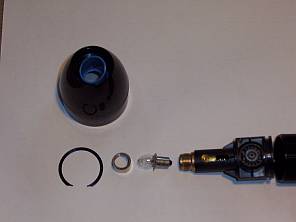
In this version of the
maglight, the battery compartment has not been machined the same
way as the first type. It is the same size as the switch assembly
compartment so the switch assembly can go out through into the battery
compartment. Be careful not to get battery acid on the switch
assembly. If so, make sure it is cleaned thoroughly and
neutralized. If you can get the batteries out then
you can push the assembly back a bit and use flat screw driver to pry
the C-clip out. Then push the switch to the on position and
remove out the front of the flashlight.
To put it back together
replace all parts in the same order but use one of the new good
batteries to push the C-clip evenly back into the slot it goes into, it
should click into place.
Sgt.Splatter
www.alpharubicon.com
All materials at this site not
otherwise
credited are Copyright © 1996-2004 Trip Williams. All rights
reserved.
May be reproduced for personal use only. Use of any material contained
herein is subject to stated terms or written permission.