Smith & Wesson M&P9
*Smith & Wesson M&P 9*
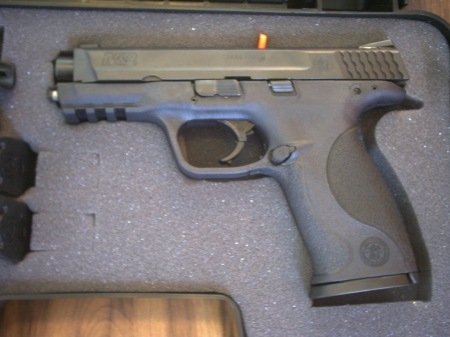
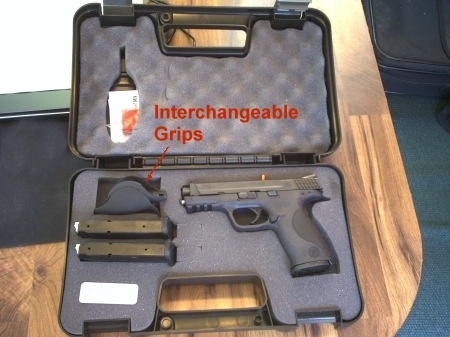
The wife bought her first pistol of her own the other day. She chose the Smith and Wesson M&P9. Since it is in the house I needed to learn its operation and breakdown so I figured I would write an article on it in case anyone had interest.
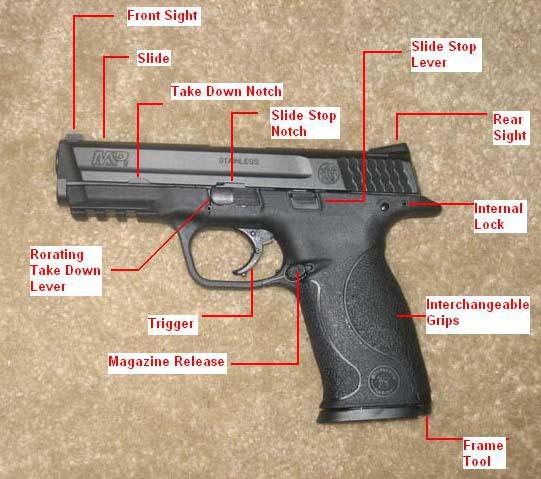
First let’s start with a picture that details the components listed in the articles procedure.
Smith & Wesson M&P9
FIELD STRIPPING DISASSEMBLY
1. Press the magazine release and remove the magazine.
2. Draw the slide to the rear to remove any round that may be in the chamber.
3. Draw the slide to the rear again this time while pushing up on the Slide Stop Lever
4. Ensure that the chamber is clear (no ammo)
5. Remove the frame tool from the bottom of the grip. Removing the tool is done by rotating it Ľ turn and pulling it downward out of the frame, this also allows the rear "Interchangeable Grips" to be removed. Note: The frame tool in my pistol was in there very tightly. When I removed it I sent it flying across the room and had to spend 15 minutes looking for it.
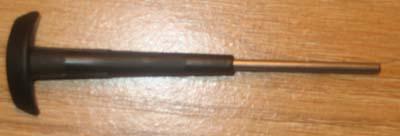
Frame Tool
6. Use the frame tool to swing the sear deactivation lever down towards the magazine well.
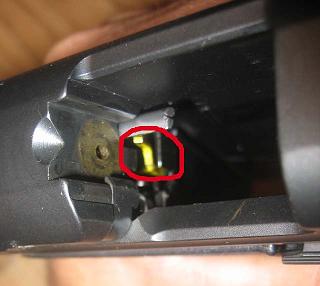
Sear Deactivation Lever location
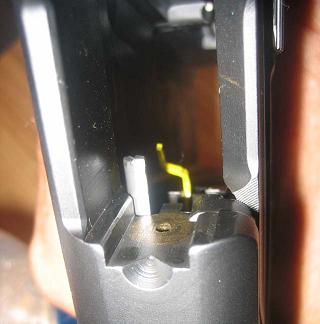
Sear lever in deactivated position
7. Rotate and hold the take down lever clockwise
8. Grab the slide in front of the rear sight.
9. Push the slide slightly to the rear.
10. Push the slide forward off of the frame.
11. Remove the recoil spring and barrel. To do this grasp the frame assemble with one hand and push the recoil spring (actually its guide rod) forward a little bit to free it from the barrel so it can be removed.
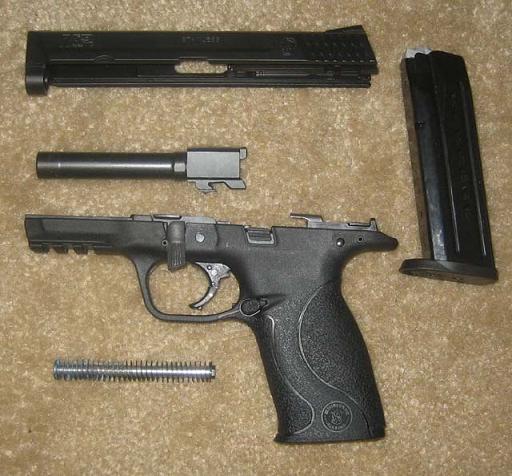
This picture shows the parts after field stripping
FIELD STRIPPING ASSEMBLY
1. Face the bottom of the slide up.
2. Slide the barrel into the slide.
3. Insert the smaller end of the recoil spring into the muzzle end of the slide.
4. Insert the larger end of the recoil spring into the notch in the barrel
5. Make sure the sear deactivation lever is still in the lowered position.
6. Hold the slide assembly in one hand.
7. Place the rear of the slide onto the front frame rails.

The front frame rail is circled in red
8. Pull the slide all the way to the rear and hold it there.
9. Move the take down lever counter clockwise.
10. Release the slide.
11. Reinsert the Frame tool into the grip of the firearm.
12. The sear deactivation lever will be moved into the proper position the next time a magazine is loaded into the firearm.
Brian
www.alpharubicon.com
All materials at this site not otherwise credited are Copyright © 1996 - 2007 Trip Williams. All rights reserved. May be reproduced for personal use only. Use of any material contained herein is subject to stated terms or written permission.