*A Simple Reactive Target*
By Kingpin
A home-built tactical training tool
"If you plan to be attacked by a 2-dimensional paper target, then train against a 2-dimensinal paper target." Louis Awerbuck "Tactical Reality"
There are few fields of training where performance is as critical, or the results for failure as severe, as defensive handgun training.
With any training, the closer the training is to the real situation, the better the training effect. This is the case with shooting. It is generally much cheaper and simpler to train on simple models, but the training effect is always reduced.
Pilots of passenger jets go through rigorous training of accurately designed simulators, to give them the chance to develop reflexive reactions to any problems they encounter.
In the field of firearms training, greater realism leads to improved abilities to deal with real conflict situations.
Flat non-moving paper targets are great for practicing trigger control, sight alignment, and follow-through, and they are also well suited to checking the intrinsic accuracy of a weapon system.
If you ever get into a fight with a scrawny drug addict with a major drug craving and a craving knife, he is highly unlikely to be standing square on to you, standing still so you can line your sights up onto his chest. He’ll be moving in, bobbing, and weaving. He might also be resistant to pain. Hitting him square in the abdomen might stop him in his tracks, but he might also decide to do a C-section on you before he passes on to his eternal reward.
How do you train for this sort of situation? Ideally you should train against live humans. This is the ultimate in training, because humans move rapidly, unpredictably, and won’t play fair. This sort of training is available with simunitions and certain paintball games, and is highly recommended.
Sometimes this sort of thing isn’t available, and you might want to get your skills up to par before joining in a scenario with all of your friends.
Kill-houses are great for training, but again, they are not available to everyone.
So you generally wind up stuck with a 2-dimensional paper target on a range. So how can we improve the realism of this training?
Making the Target look real
If you put an old T-shift or jersey over the target, suddenly your big black ring is gone. Now you have to think as you aim and choose the vital zone for yourself. If you have some padding, you can make the target even more humanoid in shape. Now turn it at an angle to you and work out where you have to shoot it to make the bullet pass through the heart and lungs. It isn’t just ‘centre of mass’ anymore, is it?
So now we have a human shaped target. What else happens when you shoot a human? He reacts! [If he doesn’t, you’re in trouble]
Making the target react realistically
A reactive target should react in the same way to a hit that a human would. Therefore a peripheral hit should NOT ‘kill’ the target. You get to choose the vital zone, and then set it up so that hits to the zone will visibly ‘kill’ the target, while other hits won’t. This will allow you to train to shoot until the target is ‘down’, rather than just firing the prescribed number of shots before packing up and going home.
Making the target move unpredictably
The best system to do this is to have a live human. The next best would be to have a human projected on a screen.
A cheap and simple solution for an outdoor range is to tie balloons to a frame and let them bob around. They make surprisingly hard targets to hit. Helium filled balloons will make the exercise even more fun This is also a good way to practise the ‘hostage situation’ for real. Tie 3 or four balloons of different colors together and lets them bob around. Choose a color at random as the ‘good guy’. Now try to take down the bad guys. Lots of fun, isn’t it. If you want to make it even more tricky, tie a rope to the frame and then around a tree, and have a bud pull on it while you try to shoot the right balloons. A moving, weaving target with a moving, weaving non-target! Lots of fun. Quite a bit like reality, except that the balloon isn’t shooting back.
Constructing a Reactive Target
In order to make a target reactive, it must be possible for the target to move when it is hit. For the target to drop down like an injured adversary would do is thankfully quite simple. There is no external power source needed, because gravity will do the work for us.
Steel reactive targets are reportedly very good, long-lasting and safe if used properly. Unfortunately I do not know anyone locally who knows how to design one, nor are my metal-working skills much god, so I decided to make my target out of wood.
My idea was to use a balloon to represent the target area. If the balloon was punctured, then the target should drop. I didn’t just want to use a balloon on its own for two reasons. A balloon is far smaller than a human, making target identification much simpler. I wanted to force myself to aim at the right area on the target to ensure that a hit that dropped the target would indeed have passed through the vital zone of a human. Secondly, by using a target where the shooter couldn’t see the balloon, it was possible to vary the vital zone. The reason I wanted to do this was to run situations where the target was ‘wearing’ body armor and thus impervious to chest hits. Of course this requires a friend to set up the target so that you don’t know whether to take the chest shot first or not. It’d be better training to shoot at the target and have to analyze my performance while still engaging it rather than simply following the "2 in the chest, 1 in the head" mantra.
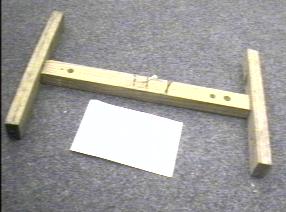
To make this target, all you need are 2 wooden poles of about 1.7 or so meters long; a section of thin, rigid board about 0.6mx1m; 4 sections of wood: 2 about 70 cm long, the other 2 about 50cm long, and each about 10cm x 5cm thick and wide; About 16 nails [At least four of which are 7cm+], some string, and a plastic cup or Tupperware container.
The base is nailed together to look like this. The two parallel sides are attached to the center section in order to make the base stable.
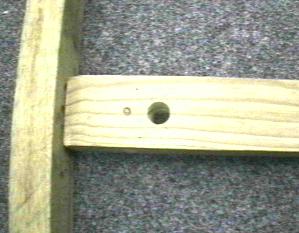
Drill a hole (with a wood bit) in the center plank, evenly spaced about 50cm apart. The hole should be smaller than the diameter of the poles you have obtained.
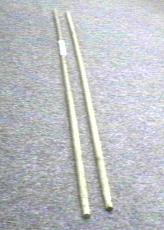
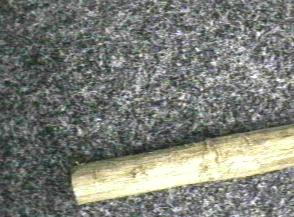
Next you must get your poles. Take the poles and using a rasp and a file trim the bottom 10 cm or so, until it just fits into the holes. It mustn’t be too loose or it’ll fall out, and it’s awkward to assemble if it’s too tight.
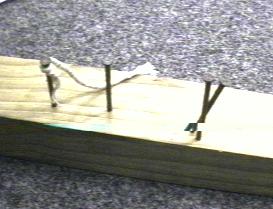
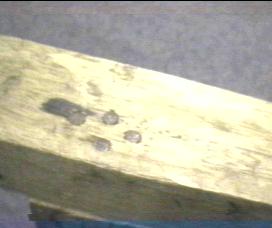
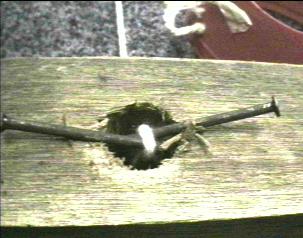
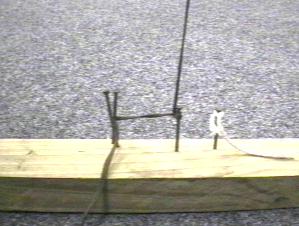
Hammer three or four nails into the center plank. The far left one isn’t strictly necessary. The two on the right are nailed so that they are in contact about half way down. This is used as a simple attachment point for the string that will hold the target up.
This is how the center target portion will look.
Drill two holes about 15 cm apart symmetrically about the middle of the remaining 60cm plank. These holes are where the string will feed through for the target holding rig.
Drill another 2, 50 cm apart. These are where the top ends of the poles will fit in. These holes should be of a diameter slightly bigger than the pole diameter, and should only be drilled about halfway into the board. [Otherwise the poles will just go right through.]
In the side of the plank that does NOT have the holes for the poles to fit in [I.e. the top end], knock two nails in per hole. They should touch in the middle, making a shallow ‘V’. This must be shallow so that the string runs smoothly through it. A pulley could also be used for this, but I didn’t have one, so the nails were used instead.
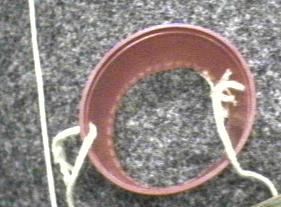
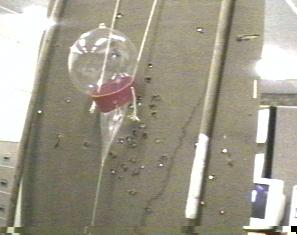
The Cup is made out of a spare plastic container. Cut the bottom off and smooth the edge with sandpaper, because any sharp edges will pop the balloons, causing the target to drop on its own in the wind. Make 2 holes in the wider edge of the cup, on opposite sides. The holes should be big enough to feed string through.
Drill two holes into the target board, about 30cm apart symmetrically about the middle. Feed a 1 meter piece of string through these holes so that you have 2 ends on the back of the target board. Now run the ends up from the bottom of the Top plank through the holes with the nails. Run the string over the ‘V’ and back down the hole, one end to each hole. The arrangement will now look almost like this:
All that remains now is to put an end of the string through each of the holes on the ‘Cup’.
You are now ready to put the target together.
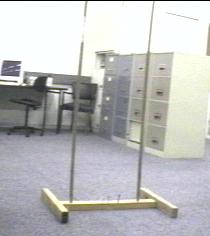
1) Put the poles into the base.
2) Hook the board and the top section on.
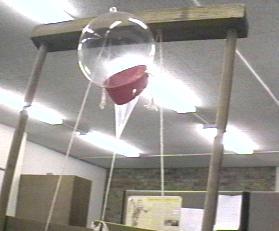
Now blow a balloon up, tie a 1m piece of string to it, and pull the string through the narrow end of the cup. This allows you to vary the size of the target by varying the balloon size. If you really want a tiny target, you might have to use a smaller cup. {And yes, for those of you that are observant, that isn’t a ‘normal’ balloon. I forgot to bring balloons with me when I brought the target to the lab to photograph. But never fear, I made a plan! There were free condoms in the ladies’ toilets! [Don’t ask how I know], so I fetched a couple. And yes, condoms do work fine for this application, but they don’t taste nice when you blow them up! :^( ]
Now adjust the height of the target board so that the balloon is opposite your target area. Don’t pull too hard on the balloon, as it might pop.
Once the board is at the right height, loop the string around one of the bottom nails and then lock it in place by pulling it between the two touching nails.
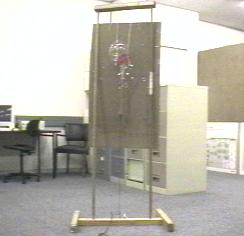
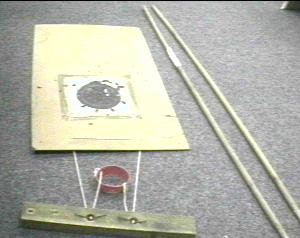
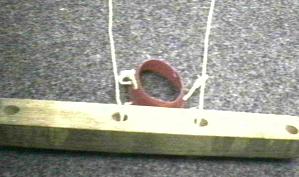
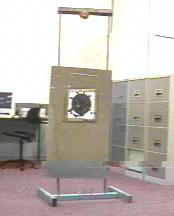
This is how the target now looks from the back. [I apologize for the fuzzy picture. My webcam doesn’t focus well]
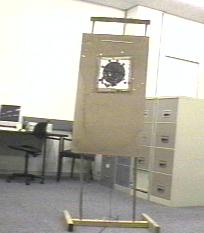
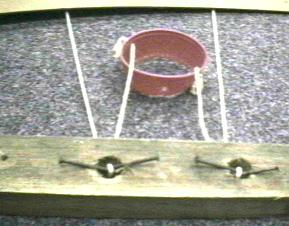
And here’s how it looks from the front.
Now if you pop the balloon, the target will drop. If you put bullets through the target anywhere other than the section you’ve chosen, then the target will not react, just like in reality. I only have one central target spot, but if you put a humanoid target on the board, you can vary the vital zone between the head and the chest by varying the length of the string.
Good luck, now go train! :^)
Kingpin
All materials at this site not otherwise credited are Copyright (c) 1996-2002 Trip Williams. All rights reserved. May be reproduced for personal use only. Use of any material contained herein is subject to stated terms or written permission.