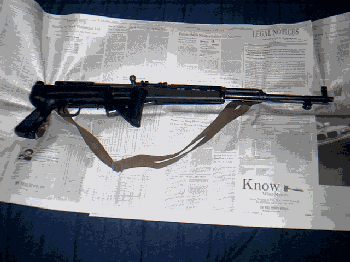
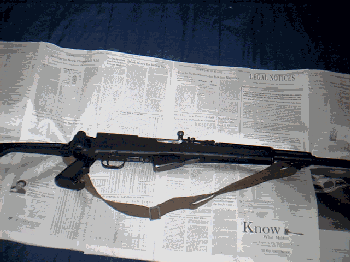
*Cleaning your SKS*
You had a good day shooting, and now are at home. Here is the part you dread the most. Cleaning all the fouling out of you weapon. Well it’s really not that hard. With the right tools, and about 10-15 minutes of your time you can ensure that your weapon will always be ready for you when you need it.
First make sure it is unloaded, more accidental deaths occur from an "Unloaded Gun".
So, be sure you visually check the chamber and magazine to ensure it’s unloaded.
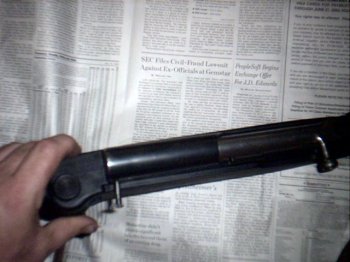
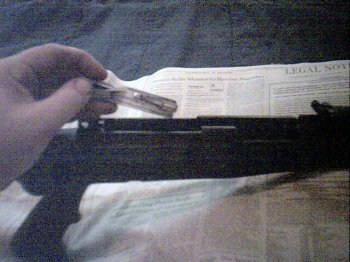
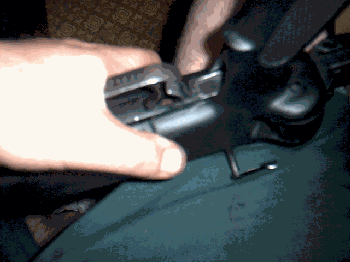
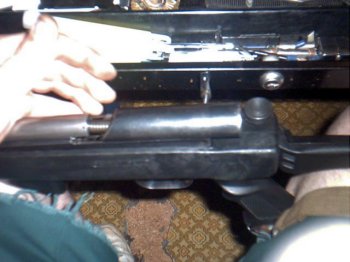
With the safety on, use a pointed tool, to push in the locking pin at the rear of the trigger group, releasing the trigger group from the stock/receiver.
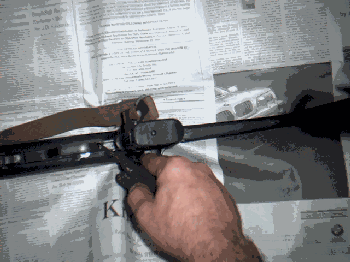
With the trigger group out of the receiver, you can remove the magazine from the stock.
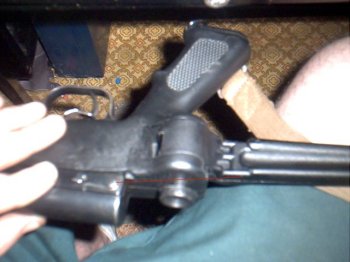
With the trigger group and magazine removed from the stock, rotate the receiver cover retaining pin upwards 90 degrees.
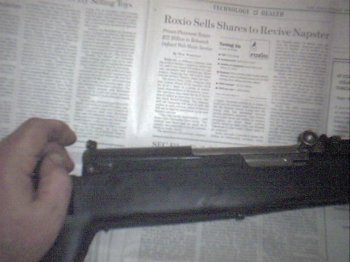
Pull the pin out from the receiver. It is a captive pin on the SKS, so you will not remove it completely from the receiver. BEWARE, on some variants the pin CAN be completely removed, without this pin your weapon will not fire, as the cover is not properly locked in.
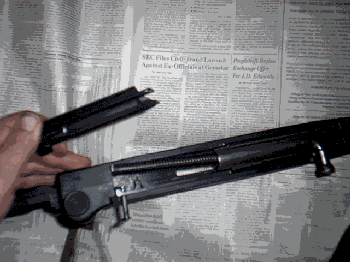
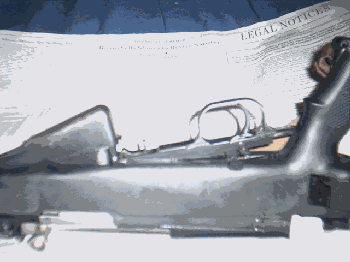
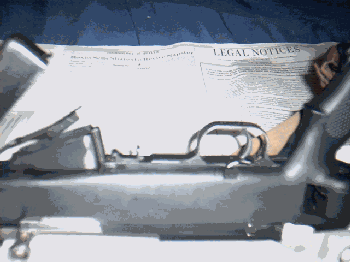
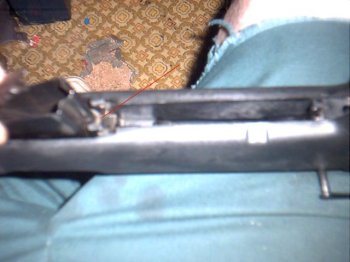
Remove the cover by sliding it back off of the receiver, you will expose the recoil spring assembly, and the bolt carrier.
Remove the recoil spring assembly from the bolt carrier and pull the bolt carrier to the rear of the receiver. Lift the carrier up and out of the reciever, exposing the bolt. Lift the bolt out of the reiever.
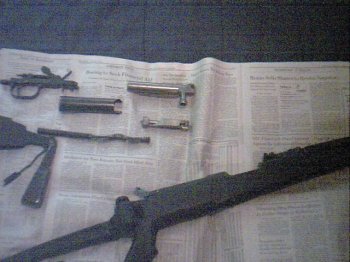
You're almost there. You should now have an assortment of parts which look like this….
Next we need to disassemble the gas system….
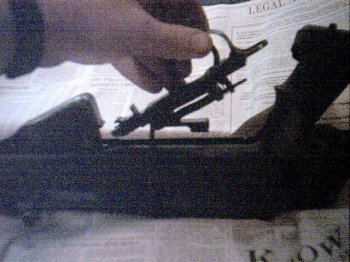
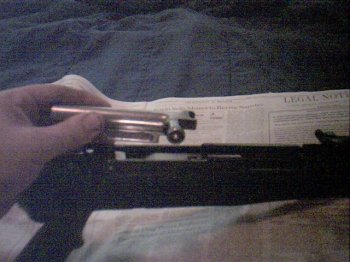
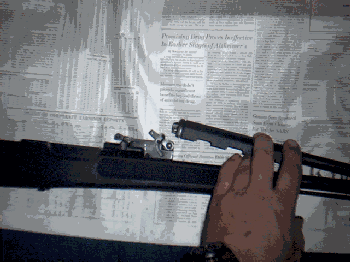
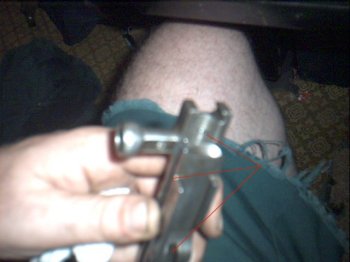
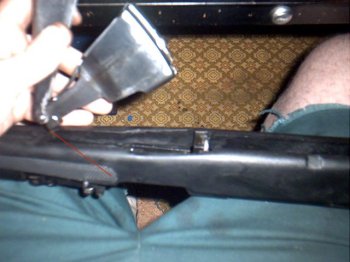
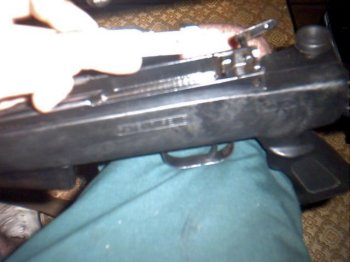
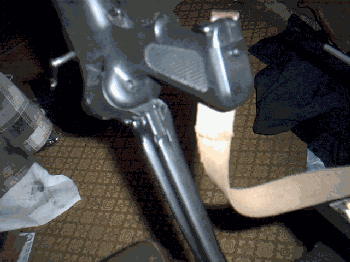
At the front of the rear sight on the right side of the weapon there is a small swivel retainer.
Rotate this retainer upward to about a 50-degree angle from the bore of the weapon.
Grasp the rear of the gas-tube and gently lift it upward, I’ve moved my hand so you can see it better in the picture.
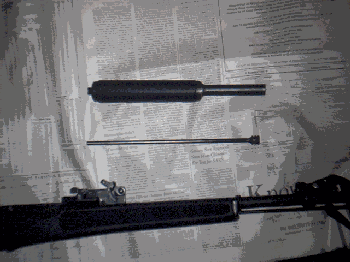
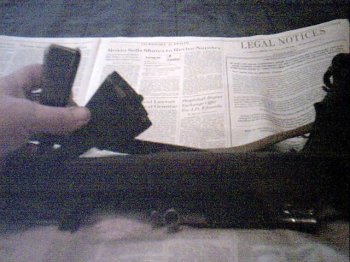
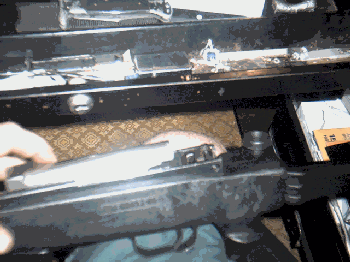
Remove the gas-tube being careful you don’t let the large piston slide out, (I’ve had to buy 2 pistons because of that. I didn’t lose them I stepped on one and bent it) After you have the gas-tube off, carefully remove the piston and set them aside.
Look at the swivel retainer, inside the receiver gas-block the retainer is holding a small piston and spring under tension, press your finger on the piston, and slowly rotate the retainer upwards to 90-degrees. The small piston will be released, and you can remove it from the receiver gas-block.
You now have your Gas System disassembled for cleaning.
Now that we have the disassembled rifle, we need to clean it. I couldn’t take pictures of me scrubbing the bore, but I can explain it.
Using a Phosphor Bronze brush in correct diameter and a good bore cleaning solution scrub the barrel from the breech (receiver) end. You can do it from the muzzle end, but without a muzzle cap, you can damage the crown, so I do it from the breech. Dip your brush in cleaning solution, and run it all the way through the barrel, until it comes out of the muzzle, and back out of the chamber, 3-4 times, then dip the brush and run it through again 3-4 times. Change to a swab tip, the little doo-dad that looks like the eye of a large needle, put a clean swab it the tip, and dip it in your cleaning solution, and run it completely through the barrel 3-4 times. DO NOT change directions part way through the barrel. Always go completely through the barrel. Put a clean swab on the tip and run it through the barrel 2-3 times and change it for clean one. You will do this until the patches come out clean. Then I switch to a cleaning Jag that looks like a round tip with a small point. Take a clean swab and soak it in solution, place it centered over the chamber of the weapon. Place the Jag in the center and run it completely through the barrel. Remove it after it has gone through. You’ll be surprised how much more fouling was still in your barrel. Repeat this 3-4 times until the patches come out clean. Now run 2 dry patches through your barrel, the second one SHOULD come out clean. If not, start over with the brush, and clean your weapon more often. After the barrel is clean we have all those wonderful little parts we still have to clean.
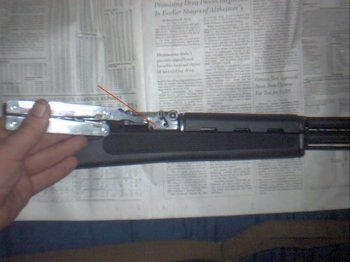
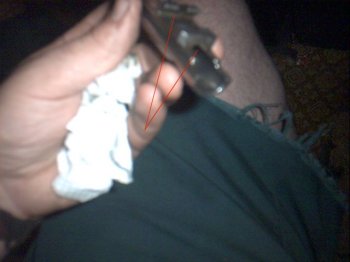
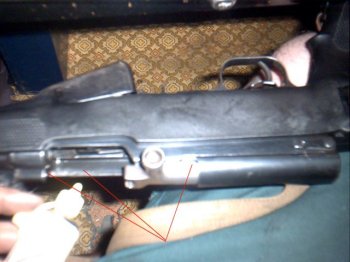
First clean your bolt carrier and bolt. You will need Bore Cleaner a toothbrush and lots of Q-tips.
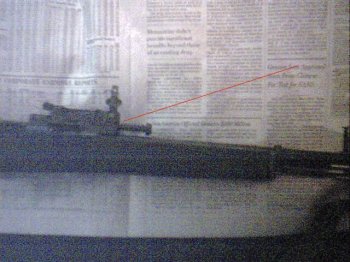
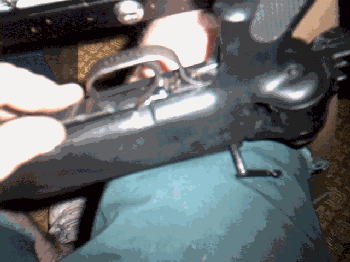
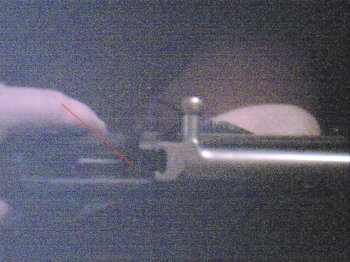
I’m not sure you can see it well in the picture but the 3 red lines point to the areas you need to clean real good. They are the top of the carrier where the small gas piston strikes the carrier to move it rearward, the carrier rails which ride in the receiver cuts, and the locking cuts, which connect the carrier to the bolt and lock them together. (Yes I know I have blinding white knees.) On the back of the Carrier you have to clean the recoil spring assembly cut, and the bolt locking cuts.
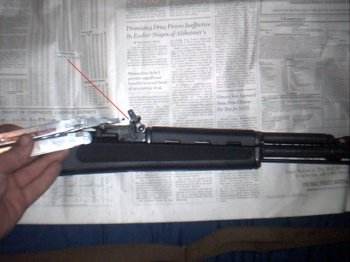
Once these areas are clean, we move onto the trigger group. Using your tooth brush bore-cleaner and lots of Q-tips remove all traces of fouling, oil, grease, whatever from the group. Keep the trigger group as clean as you possibly can at all times, After it is clean put 1-2 drops of oil on the spring, where the hammer pivots, and the trigger connects to the group. That is all the oil you need on this sub-assembly, anymore will just collect fouling, dirt and other junk. Now we need to clean the bolt. Pay particular attention to the extractor, use the toothbrush and Q-tips, and depending on how dirty it is, toothpicks, to clean under it and on the bolt face. A little bit of dirt in the wrong place here will cause a stoppage.
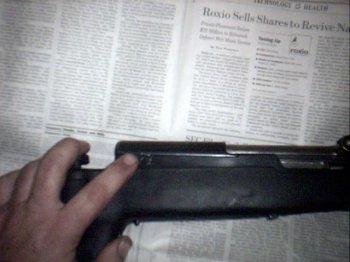
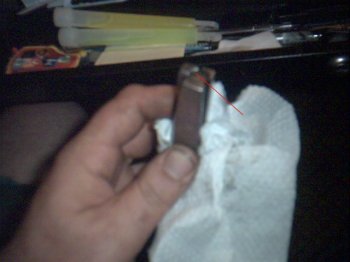
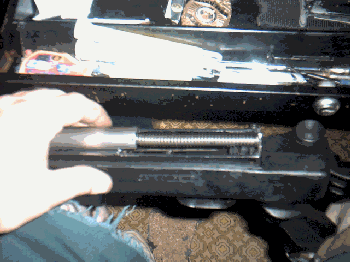
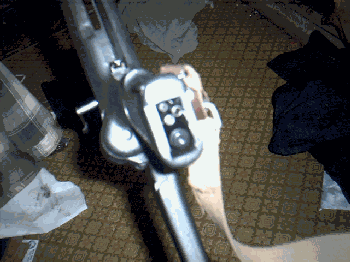
Now clean your recoil spring assembly; do not disassemble it, unless you are where you can deal with small parts. To clean it without disassembly, use your trusty toothbrush, and lots of bore-cleaner. Also clean your gas system the same way; use the Q-tips to clean the gas port in the receiver gas block and the barrel gas block

My picture of the receiver gas block didn’t come out, but the above shows the barrel gas block. Inside there is a small hole down into the barrel, which ports gases from the fired cartridge into the gas system, pushing the large gas piston back into the small gas piston, which then strikes the bolt carrier. Making your weapon cycle. You need to clean both ports, in addition to both pistons. Run several Q-tips soaked with bore cleaner through these ports, and run a bore cleaner soaked patch as far as you can through the gas tube, which the large piston moves.
Now we’re almost ready to re-assemble your weapon. Take a clean patch and put a few drops of gun oil on it, and rub down all metal surfaces of your weapon. Pay particular attention to parts, which are covered by the stock. Some people use transmission fluid for this, tranny fluid works good, but it’s your weapon, you decide. Now lets get on with reassembling the weapon.
First re-install the magazine. Be sure you place the front of the magazine in first, and that it catches on the lip on the bottom of the receiver.
After the magazine is in make sure the rear lip is under the cuts for the trigger group.
Next insert the front of the trigger group into the receiver, ensuring the pin for the magazine catch is in the cut. With the safety on, press down on the rear of the trigger guard to seat the trigger group and lock it into place.
Now flip your weapon over and insert the bolt, bolt face towards the chamber and the locking cuts upward, into the receiver. Take the bolt carrier and insert it into the receiver engaging the locking cuts on the bolt and the receiver rails.
You might have to push down the magazine follower to allow the bolt to go all the way forward.
With the bolt carrier installed, insert the recoil spring assembly into the cut in the bolt carrier, with the locking clip forward.

Push it all the way into the bolt carrier.
Now re-install your receiver cover, lining it up and pushing it all the way forward. When it is seated properly push the receiver cover retaining pin all the way in, and rotate it downward 90-degrees, until it locks into place.
Now one final step.
Lock the bolt open, and place 1-2 drops of oil on the receiver rails, and 1 drop of oil where the small gas piston enters the chamber area, and 1-2 drops of oil on the bolt carrier.
Close your bolt, and put your weapon away. You’re done cleaning. Until next time.
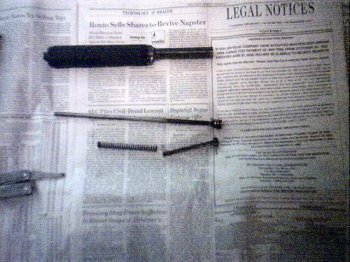
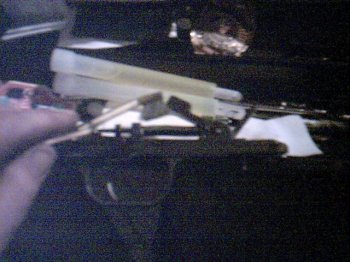
Now here are some pictures of some extras I keep around to ensure my SKS will function when I want it to. The first picture shows my spare parts for my gas system, extra sights, and my cleaning kit, which resides in the pistol grip of my stock.

From right to left. recoil spring assembly, small bag has rear sight blade, 3 neon plastic front sights, and original steel front sight, above it is the front sight tool/scraper/screw-driver, from the Hungarian cleaning kit. Next large gas piston with small gas piston and spring, above small piston is broken shell extractor, soft nylon cleaning brush from Hung. Kit. Gas-port cleaning tool, above it, is Chinese kit tube minus top and on right is Hungarian cleaning jag for really fouled bbls. The tools reside in the pistol grip of my stock.

With the cleaning rod on the rifle, plus my bore-cleaner, and gun oil, in the field it’s not a problem to clean your weapon. Just be sure, you’re not going to have to move real quick. On average it takes me 10-15 minutes to clean my weapon, depending on how much shooting I’ve done. The longest it has ever taken me was 40 minutes, when I fell into the river and had to clean mud and water out of it. There are quick and dirty ways to clean your weapon, Carburetor Cleaner being one of them, but that doesn’t get everything out which is what you need if the weapon is going to be put away for awhile. You don’t need any residue in your weapon, which will act as a magnet for moisture and corrosion.
All materials at this site not otherwise credited are Copyright © 1996 - 2003 Trip Williams. All rights reserved. May be reproduced for personal use only. Use of any material contained herein is subject to stated terms or written permission.