*REUSABLE ICE PACKS*
The most popular ice packs to use on the body come in two types – the “chemical” type and the “hold-ice” type. The advantages to the chemical type are that they are convenient, ready to use, and self contained (i.e., not messy or drip water), but they are single-use items and can be expensive. The “hold-ice” type can come in many shapes, sizes, and prices (from traditional ice packs to towels) but the downside to all of them is the same – they can be messy, they leak water, and they require ice.
An alternative to these two types of ice packs is to make a reusable ice pack out of alcohol, water, and resealable bags. The process is very simple, cheap, and you will have a reusable ice pack in your freezer whenever you need it.
The supplies you need are:
Step 1: Decide how many ice packs you want and how big you want them. You can make different sizes for different needs. Once you have number and size figured out, calculate the total volume of mixture you need to make. I recommend using a maximum of 2 1/2 cups for a 1-quart bag and 5 cups for a 1-gallon bag. When you fill the bag, you do not want them bulging.
If you are using vacuum sealer bags, the bags can be customized for any size you like. I do not recommend snack or sandwich bags; the plastic is not thick enough for this use.
| Volume Alcohol (cups) | Volume Water (cups) |
|---|---|
| 1 | 1/4 |
| 2 | 1/2 |
| 3 | 3/4 |
| 4 | 1 |
| 5 | 1 1/4 |
| 6 | 1 1/2 |
| 7 | 1 3/4 |
| 8 | 2 |
You can either make a big batch of the mixture in a bowl or other container or mix it directly in the bag. If you make the mixture in a bowl, make sure to stir the mixture thoroughly with a spoon or other utensil before pouring the liquid into the bags.
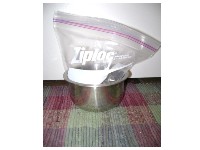
Step 3: Place the bag in a bowl or other container that will help support the bag as you pour the mixture into the bag.
Pour only enough of the mixture into the bag so that the bag stays relatively flat when sealed. Do not overfill the bag so that the bag bulges
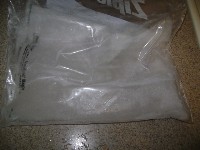
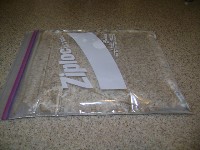 |  |
| Correctly filled bag | Incorrectly filled bag - bulging |
Once filled, remove as much air as possible and seal. Make sure that the seal is good or the bag will leak.
Step 4: Put the first bag into a second bag, remove as much air as possible, and seal. This bag is used just in case the first bag leaks.
Step 5: Place the bag into the freezer flat. Make sure the bag is flat or you will get weird lumps and bumps that could be uncomfortable when using the pack. If you do get the weird lumps, it can still be used, the lumps can be smoothed out as the mixture thaws
The amount of time needed to freeze the bag solid depends upon the volume of the mixture but will be several hours.
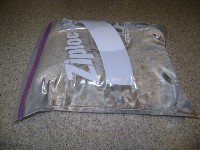
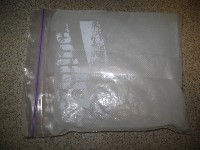 |  |
| Ice pack when put in the freezer flat | Ice pack when not put in the freezer flat. |
A few words about using these ice packs:
Overall, I am very happy with these ice packs. They have been a very cheap alternative to traditional ice packs, and I don’t need to keep lots of ice around. They are reusable, and I always have some frozen in the freezer for when I need them. I keep several sizes to accommodate different needs. The biggest concern using these bags is that they will eventually fail. I have found that if properly sealed, they last a long time and when they do fail, there is not much clean up. Also, they are easy to fix (new bags).
Could you use these packs in coolers? Sure, we have. If used in coolers though, I would caution about the need to keep food items from puncturing or ripping the bags. After all, these are just plastic bags and they do contain isopropyl alcohol.
I wish I could take credit for this idea, but I have to give credit where credit is due. The idea came from a physical therapist my mom had after her double knee replacement surgery. The packs she made worked out very well for her also.
R-squared
www.alpharubicon.com
All materials at this site not otherwise credited are Copyright © 1996 - 2008 Trip Williams. All rights reserved. May be reproduced for personal use only. Use of any material contained herein is subject to stated terms or written permission.