*Putting New Fabric on Old Chairs*
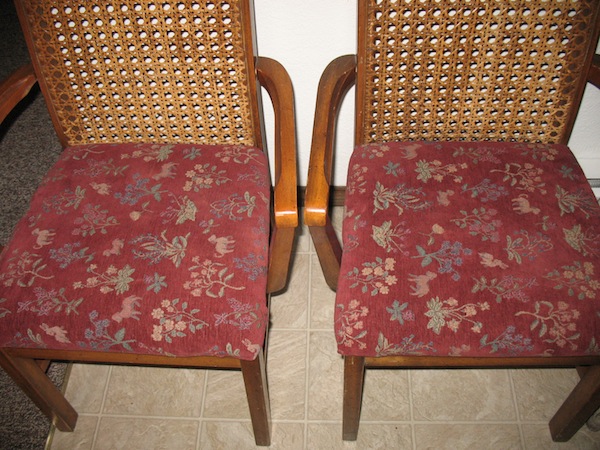
My wife and I love shopping at second hands stores. We often find items that are serviceable but need a little sprucing up. We recently found a couple of chairs that my wife liked but wanted the fabric on the seats changed to something more to her liking. Over the years I've re-upholstered several of these types of chairs and, in my opinion, you can get good results without a lot of hassle.
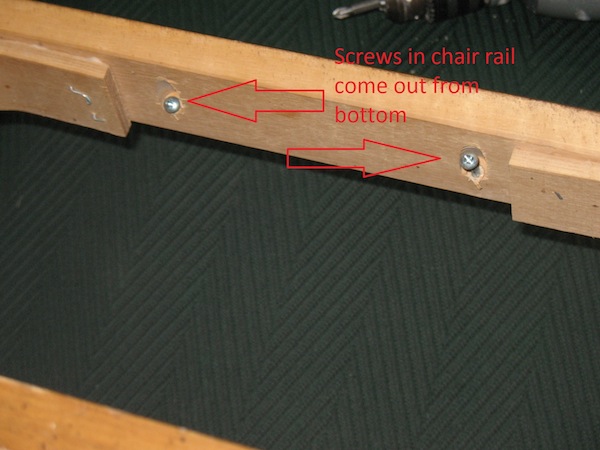
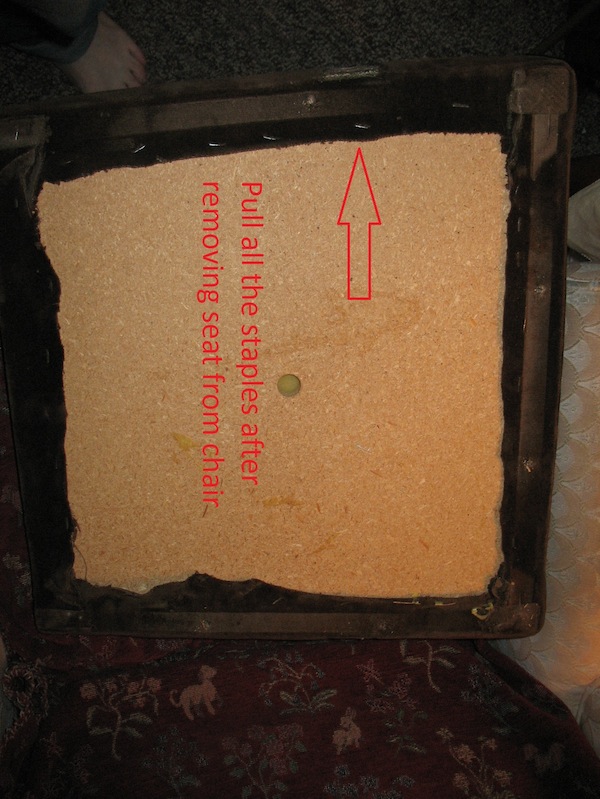
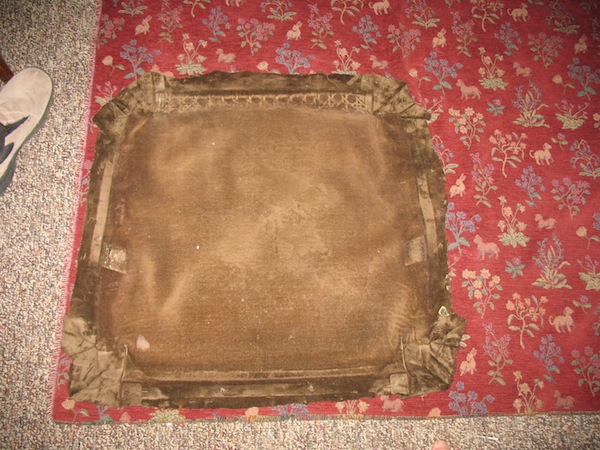
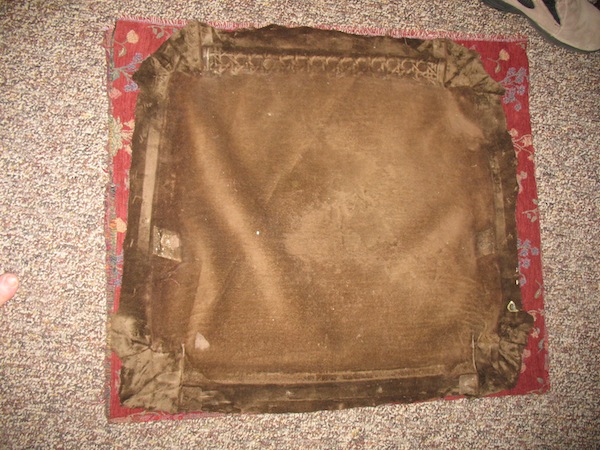
The first step is to remove the seat from the chair legs. Most are attached with a few screws from the underside. Before removing the seat, it is a good idea to mark the wooden seat front and mark the front part of the fabric as well. After you pull the seat off, flip the seat so the bottom is facing up and remove the staples that hold the fabric to the wooden bottom. Try not to tear up the fabric, because you are going to use it as your pattern for the new fabric. If you do end up with some tears, don't worry about them. You just need a general pattern. I use a flat head screw driver and pliers to work the staples out. Be careful with the screw driver; you don't want to stab yourself. If a staple breaks off, pull out the stub with pliers or hammer it in - depending on how proud the stub stands. When pulling the staples at the corners, it is a good idea to take notes or pictures of how the fabric is folded so you can do a similar fold with the new fabric.
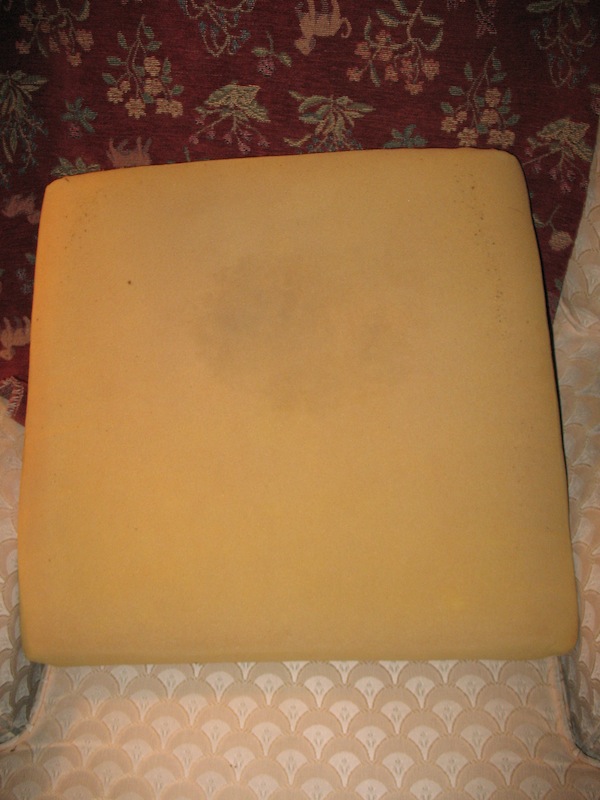
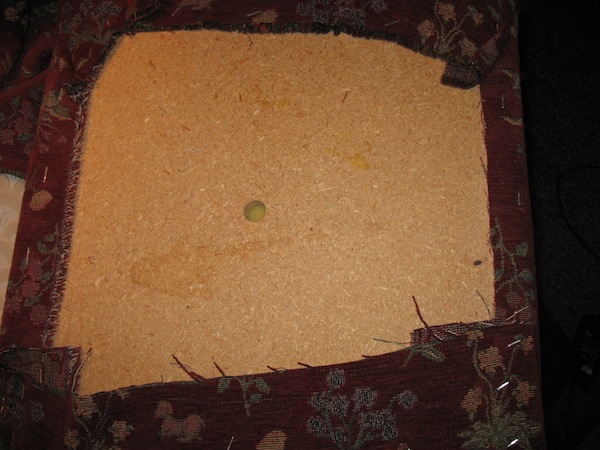
Once you have the fabric off, you will see the cushion material. It might be foam or cotton batting or (on really old chairs) even horse hair or a combination of materials. If you find horse hair padding, I would recommend re-using it because it is very durable and has a reputation for repelling fleas and bed bugs. Depending on the condition of your padding, you might want to replace it or add to it. The chairs I used had good foam padding that wasn't worn out, so I opted to re-use the padding.
You can find upholstery fabric and padding at some fabric stores, upholstery supply shops or on-line.
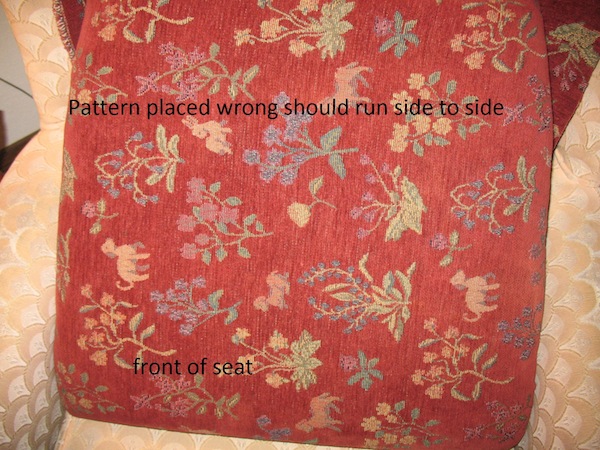
Now with the fabric off you can cut your new fabric. Hint: if your new fabric is a patterned fabric, orient the old fabric (using the marked front side) so that the new pattern on the fabric sits the way you want. I skipped this step and it shows on the chairs. Instead of the pattern running side to side as it should, it runs front to back. Oh well. You will want to cut your fabric a little large; so, instead of tracing the edge, cut about an inch or so extra all the way around. This gives you a "fudge factor". I didn't cut extra fabric on 2 sides which would have allowed me to turn the fabric so the pattern ran in the correct direction.
With the fabric cut, place it face down on your work surface. Then place the cushion material and wooden seat bottom on top of the fabric - face down as well. If your fabric has a pattern, make sure you have that pattern lined up correctly. Test-fold the fabric by holding it in place with your hands and make sure that you have enough fabric on all sides. If you do not, adjust accordingly so that you have about the same amount of fabric all the way around. Now, pick a side to start with. I usually start with the right side; then I do the left side. First, fold the edge of the fabric over the seat bottom. Next, begin stapling that side about 1 ˝-2 inches from the edge of the wooden seat - spacing staples every couple of inches along that side. Once done with the first side, work the opposite side. Be sure to pull the fabric tight, but not too tight. You don't want the fabric to pull down on the cushion too much, or it won't look quite right. Then staple the fabric down just like you did with the first side. When that is finished, I do the front side. This is where noting how the corners were folded comes in handy. I put a couple of staples in the middle and then work out to both corners - adjusting the fabric as needed so that it looks right. When I get to the corners, I fold the corners as best I can, stapling as I fold, and then trimming off the excess cloth from the corners. Following that, I do the same for the back; though not always as carefully, because the back of the chair will hide some flaws. Then I flip the seat over and check to see how it looks. If it looks good, I trim off the excess fabric on the bottom along all sides about ľ inches from the staples.
I do one seat at a time so I don't mix up the seats and chairs. This makes it easier to re-attach the seats, since the screw holes in the chair line up with the old screw holes in the seat bottom.
www.alpharubicon.com
All materials at this site not otherwise credited are Copyright © 1996 - 2013 Trip Williams. All rights reserved. May be reproduced for personal use only. Use of any material contained herein is subject to stated terms or written permission.