*Changing A Toilet Seal*
When water starts leaking from between the bottom of the toilet and the floor, itĺs time for a new seal. Letĺs do it.
I recommend wearing exam gloves unless you like sticking your hands in crap.
Step #1, Shut off the water supply to the toilet. There should be a valve in the vicinity of the tank.
Step #2, Flush the toilet and hold the handle down, this allows more water to exit the tank.
Step #3, Disconnect the supply line at the tank (do this now so you donĺt forget and try to yank a connected toilet). A little water will dribble out.
Step #4, Use a plunger and get as much water out of the bowl as possible. This makes for less mess when the seal is broke and youĺre moving the toilet around.
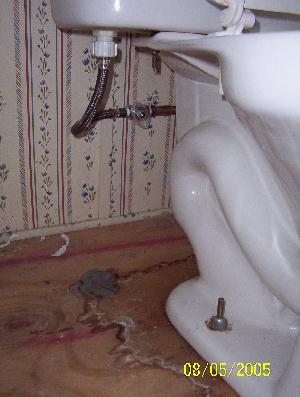
Step #5, Remove the nuts & washers from the foundation bolts. The toilet is now free. Have a small piece of rug or something handy to set the toilet on after you yank it. This will help keep your floor clean, you can put it in the bathtub too.
Removing nuts & washers
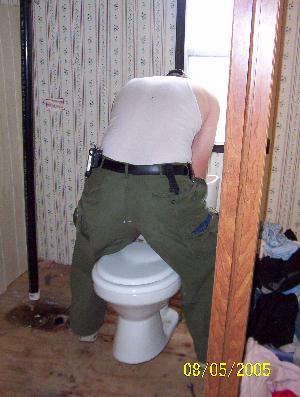
Ok, now itĺs time to yank it.
Step #6, straddle the toilet and grab on just behind where the cover bolts on. Pick it straight up and off the foundation bolts.
Ok, with any luck the seal is stuck to the flange and not to the horn of the toilet. Not a big deal, itĺs just easier to scrape it off the floor.
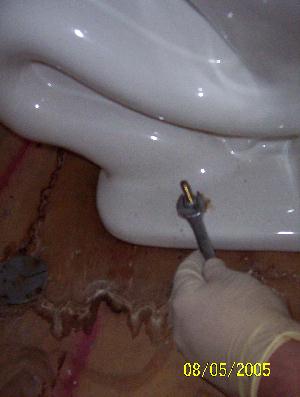
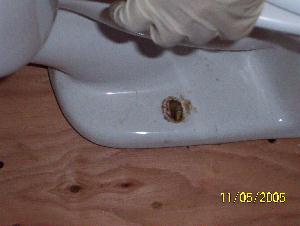
So youĺve yanked it, you should see this. Check the horn (area around the discharge hole) of the toilet to ensure itĺs clean.

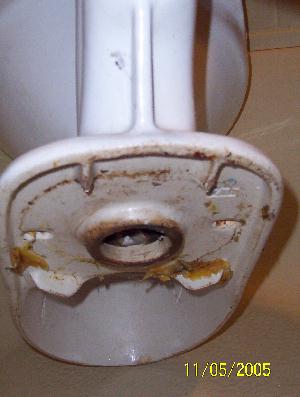
Old seal Horn
Step #7, use a putty knife and scrape the old seal off the flange. Be sure the polyethylene flange from the seal is removed also. There may be 2 seals, one stacked on the other. If there is, you will need 2 new ones.
There, 7 easy steps to toilet removal, now letĺs put it back.
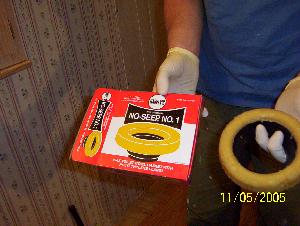
NOTE: The bottom seal should have a polyethylene flange attached to the seal. Donĺt use just a regular bees wax seal for the bottom, it could leak. A seal w/ a flange should be $5.00 or under, a regular bees wax seal w/o a flange should be a couple bux. If you need 2 seals get one of each. The flanged one on bottom and the regular on top of it.
Step #1, Peel the plastic from the new seal and set it on the metal flange. Use some light pressure and twist it slightly, this will help make the wax stick to the metal so it doesnĺt move when you mount the toilet. Youĺre ready to put the toilet back.
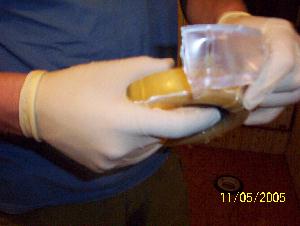

Peeling Ready to go
Step #2, Straddle the toilet like before and walk it in to position above the seal. You need to line up the 2 foundation bolts with their respective holes BEFORE, BEFORE, BEFORE dropping the toilet. Look at each hole and when theyĺre both lined up, gently set the toilet down. MAKE SURE the bolts come up through the holes. The toilet should sit on the seal, if it goes straight to the floor, one seal is not enough.
Bolt through hole, other side is the same
Ok hereĺs an up close view of the seal before being "gooshed". Plenty of seal.
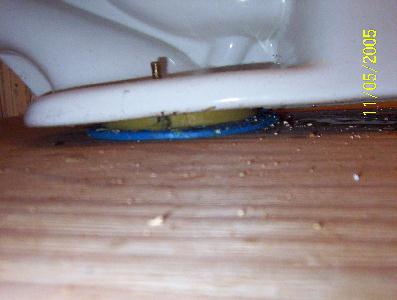
Toilet sitting on seal
Step #3, while still straddling the toilet (and after making sure that the bolts are through the holes and thereĺs enough seal), sit on it. Youĺll feel the toilet sinking to the floor as the seal gooshes. Once it hits the floor, slightly twist the bowl back and forth a couple times, then make sure the toilet is straight.
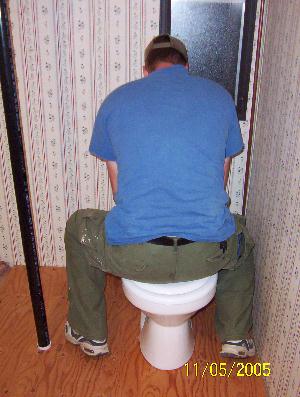
Giving it "The Goosh"
Step #4, replace the foundation washers and nuts. Tighten them evenly until snug. If you over tighten you could crack the porcelain and then you get to buy a new crapper and do most of this process all over again.
Step #5, reattach the water supply line and turn it on, let the tank fill and then flush the thing. Now for the moment of truth!!!!! Watch around the base for water seepage. If it stays dry you should be good to go!
There you have it, an easy 12 step process to becoming a master plumber :o)
Jaden
www.alpharubicon.com
All materials at this site not otherwise credited are Copyright ę 1996 - 2005 Trip Williams. All rights reserved. May be reproduced for personal use only. Use of any material contained herein is subject to stated terms or written permission.