*Homemade Food Dehydrator*
By Stryder
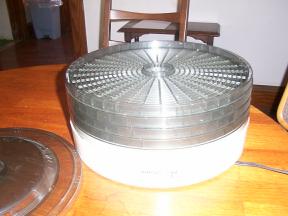
If you’re like most survival folks you’ve got a commercial dehydrator or two that you use to preserve foods. Maybe it’s to preserve your garden produce or maybe to make some lightweight backpacking foods at a reduced cost. Whatever use you make of it, it probably looks something like the one pictured above. I have three favorite ‘survival’ food books that I leaf through from time to time. They are: Putting Food By by Hertzberg, Vaughn, and Greene, Cooking in the Outdoors by Jacobson, and my absolute favorite and the one I would pick if I could only pick one food book, Stocking Up by Carole Store. Like many folks, since September we have been very busy double checking our preps and staying close to home ‘just in case’ and we have not had much time to enjoy the outdoors. So the other day I was planning a short weekend camping trip with my family and looking through Cooking in the Outdoors for some new backpacking recipes to try. The recipe I wanted to try called for some dehydrated ground beef and I didn’t have any made up. I went to get the dehydrator to make some and then just decided – what the heck – I’ll make a home made dehydrator first to make the ground beef with.
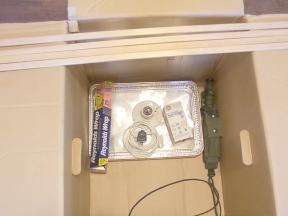
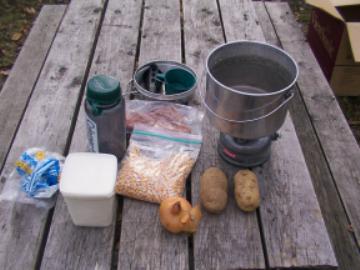
The first thing I did was round up what I needed
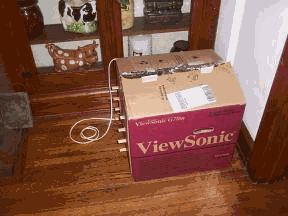
which was a heavy cardboard box (I chose one that a computer monitor had come in), some aluminum foil, masking tape, a
light socket and bulb, some lamp cord and an electrical plug, some aluminum cookie sheets, some wooden strips (I chose
some stuff in the garage I had used to fix screen doors with this past summer), and my trusty do everything tool – my Kbar.
Being a packrat I had all the stuff around the house, it was nothing special and should be easy to find or very cheap to buy.
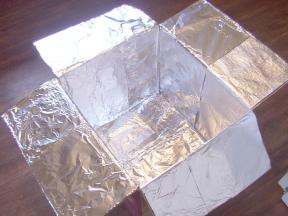
Next I lined the box with the aluminum foil and taped
it down with the masking tape. Roll the masking tape into a small loop so that you have the sticky side out and tape the foil to box without the tape showing.
After the box is lined with the foil, carefully make up the light socket and connect the lamp cord and plug.
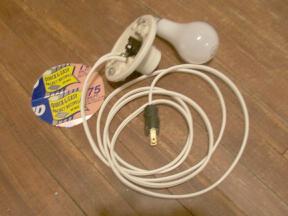
If the socket you are using is open remember to make a backing for it with cardboard because it should not be in direct contact with the foil lined box after assembly. I used a 150 watts bulb in my dehydrator because it was the biggest wattage bulb I had in the house (don’t even know why I had it!) but it seems to be absolutly right for the size of the box
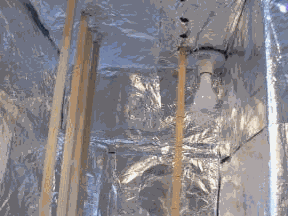
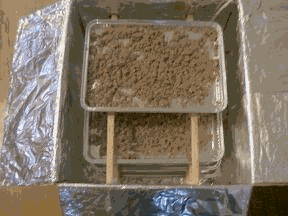
Mount the finished light fixture into a bottom corner of the box. On two opposite sides of the box measure off and cut holes to slide the wooden slats through that will hold the trays (aluminum cookie sheets) of food to be dehydrated. If you look closely at the picture you'll see that one of the slats has marks on it. I used that slat as a crude measuring stick to be sure I lined up the holes on the sides but without using any tools other than my Kbar.
The next step was to load up the trays with the ground beef I was going to dehydrate, plug in my new dehydrator, and let it do its thing.
For even faster results, a small 12VDC computer fan, attached to a 12VDC power supply, can be directed into the box to provide air circulation for more uniform dehydration.
DO NOT leave your Homemade Food Dehydrator Unattended! If your light bulb is too hot, or your box too small, you run the possibility of having a fire hazard.
What is its thing? Well ground beef for one. Just cook up your ground beef (the leaner the better) on the stove the way you normally would. When it’s cooked, drain the fat. Put the cooked beef into a strainer and run a teapot of boiling water through it. The water will drain off most of the grease, which is what causes early spoiling. It will also leach out some, but not all, of the nutrients but none of the taste. Throw it in your dehydrator for a day until it is VERY dry and crumbles into powder when you break it up in your hand. Then you can use it for soups and stews, in sauce and chili in the field. Rehydrate it by letting it sit in a plastic bag with a pint of water per pound for about an hour. It will last about 4 weeks in a zip lock bag, and it lasts a year - from one summer to the next - just sitting on a shelf if it’s vacuum sealed. About 5 pounds of dehydrated ground beef fits into a quart bag (that doesn’t leave any room to add water to rehydrate, however.)
Canned kidney beans, with or without the syrup work well too and you’ll need those for the chili. Fruit for a trail snack is easy and a common thing folks think of doing in a dehydrator – bananas are on sale often in the winter, sometimes near me they’re five pounds for a dollar. Grab them up, slice them up in ¼ inch to 3/8 inch slices, brush them with a little honey thinned ½ and ½ with water with 1 T. of lemon juice added and you’ll have cheap, great tasting trail snacks. Do up enough to last ‘till next winter – they’ll keep. Have you got Chilean winter grapes coming into your area stores? How about some homemade raisins to mix with those banana chips?
 What else can you do? Maybe some campfire corn chowder. ½ cup of dried corn, 4 strips of cooked dehydrated bacon, 1 small onion chopped (can also be dehydrated to save weight and volume), 1 medium potato diced, 2 cups dry milk, 1 tablespoon flour, 1 ½ teaspoons salt, 1/8 teaspoon pepper.
Mix the flour, salt, milk, pepper, and onion (if you decide to dehydrate it) together in a ziplock before you go. Rehydrate the corn in 1½ cups of water for 30 minutes. Place the undrained, rehydrated corn and 2 more cups of water into a pot and slow boil for 45 minutes. Add water to maintain volume as water boils off. Add potato and cook until tender. Combine the pre-measured milk, salt, pepper, and flour mix to 2 ½ more cups water and mix well. Add the milk mix to the soup pot, mix well, and add the bacon and onion. Serve with crackers or hard bread. It’s lightweight for packing but big on taste around a campfire.
Take 4 pounds of flank, rump, brisket or round steak and trim ALL the fat with a sharp knife then cut into ¼ inch strips about 6 inches long. Marinate in the refrigerator overnight in just enough water to cover mixed with 1 1/3 T salt, 1t pepper, 2 t onion powder, 1 t garlic powder, 1 t Worcestershire sauce, 12 drops Tabasco sauce and ¼ t thyme. Next morning lay it on your dehydrator trays with no overlapping, plug in the dehydrator and when you come home from work that night, 8-10 hours later, you’ll be looking at some fine beef or venison jerky.
Meals Rejected by Ethiopia have their place for sure. But with a little practice you can make some very tasty meals in the field from things that don’t have any more weight or bulk than MREs. Dehydrators also greatly add to the storage life and decrease the bulk of some of your storage foods. If you don’t have a dehydrator, you really should have one. This homemade version works as well or better than a commercial dehydrator and shouldn’t cost anyone more than $5 to put together even if you’re buying some of the parts plus an hour or less of labor. If you scavenge an old lamp, a cardboard box, and some tin foil, it costs nothing. Then use it and see the world of difference it makes in campfire meals and pack weight! Then….
Get out and train!
Stryder
All materials at this site not otherwise credited are Copyright (c) 1996-2002 Trip Williams. All rights reserved. May be reproduced for personal use only. Use of any material contained herein is subject to stated terms or written permission.