
*Improved shelves for increased Storage*
One thing I consistently here from anyone who is into prepping is I am out of space. And for some of us this is true. For the rest of you ask yourself the following questions.
Do I have stacks of things with extra air space above them? For instance you have canned corn stacked 2 high on a shelf and there is 4 inches of open air above it that you can not get another can into. This is wasted space.
Do you have odd ball shelves hung up that were just given too you? This is probably not the most efficient use of space.
Do you have floor space in the closet that is awkward? This is a good place to store stuff. Make some shelves and put what ever you can..
Try and look at what you are trying to store and see if there is a way to organize it so items of like size are together. If you have a shelf that is 12 inches high and you have stacks of 12 in high cans and another stack of 2 4.5 inch high cans you are wasting 3 inches above those cans. Can you rearrange the smaller cans onto a different shelf?
When you design your shelf lay it all out. What goes where how much will it hold etc. visualize it and then draw it. I measured all my cans and jars before I started so I could fit my shelves to what I wanted to store. Example. My bottom shelf is 15 inches high so I could fit 5 gallon buckets on the floor rather than lifting them.
Well after looking at my ratty shelves for a year since we purchased the house I decided it was time to do something about it. I wanted to be able to double the amount of storage space mainly used for food storage without actually taking up any usable floor space in the garage. I have built several shelves in this manner over the last few years and have stored everything from steel and automotive parts (heads etc) to paint and food they can easily hold of 150-200 pounds distributed and maybe more (I did have about 800 pounds on heads on one 4 foot section but tend to think that is a bit excessive.
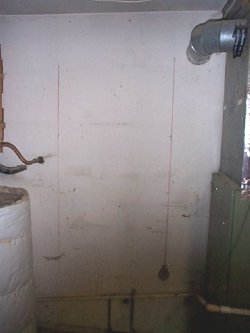
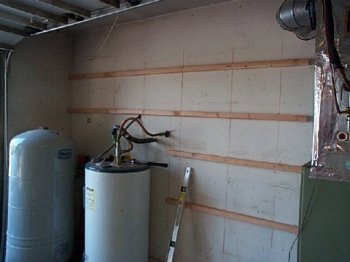
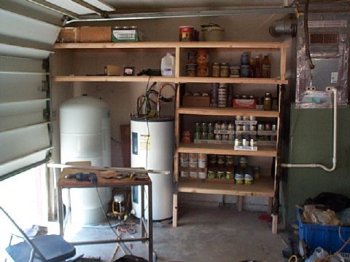
Here is what I am starting out with.
As you can sorta see there is basically room for 1 deep 2 high flats of canned veggies.The sheet is to cover it up when the garage is open. Sure it’s a little but Ghetto but no since showing the neighbors what you have.
Tips before we big Always read and understand the directions before using any power tools. Wear safty glasses and hearing protection when operating machinery and don’t e afraid to ask for help if you don’t understand.
Pre drill all holes before setting screws this helps.
Have extra bits for your screw driver
Do not try and put all these screws in with a screw driver use an electric drill and or electric screwdriver.
Know where any electrical wires are before you start drilling into the walls.
If its Hot outside DRINK WATER!
Rip out the shelves and then we start. I generally start by chalk lining out my studs. This is important as this is where you are going to attach everything for strength. Don’t assume they are 16 on center half the walls in my house aren’t. while these first two lines showed I should have another stud at 16 on center it was actually 19 on center from the left line and 13 from the right.
Cant find your studs? I make little holes. I swear I have lead lined walls in this house or something because No stud finder I have used will tell me where the studs are. Its not pretty but it works.

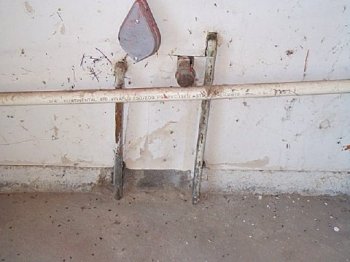
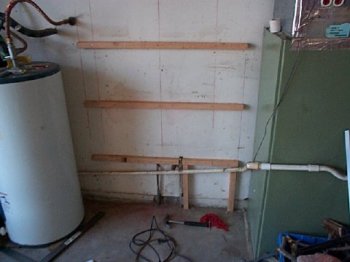
Be sure to identify anything that is going to be in the way. My bottom shelf was going to be 15 inches high to accommodate 5 gallon buckets but the pipes shown below were 16 high no worries I will build around it
After I have my studs marked I mark off level lines for the bottom of each shelf support. This gives me a guide for screwing the back supports in level.
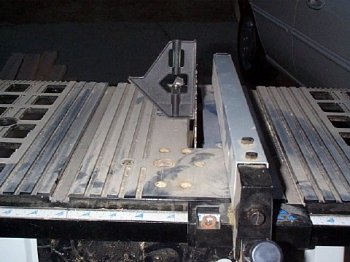
2X4’s are ripped in half length wise so they are 1 ľ don’t forget to square up your blade. I have never had much lick doing this with a circular saw and you really need a table saw to do it.
Start screwing in your shelf supports to the back wall. I use 3 in screws with one going into each stud
Remember that Pipe? Here you can see I just shortened the shelf support. The piece on the left is screwed into 2 studs but the right hand piece only had on so I shored it up.
The front of the shelves are supported by 2x4’s that have been notched to accept the 1 ľ strips I cut earlier. Really a dado blade would be best but I didn’t have one so I just made lots of little cuts on the table saw to notch them out.
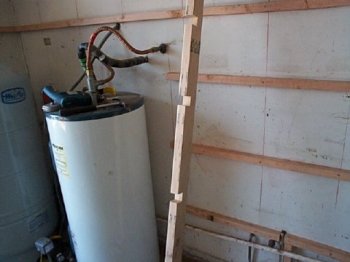
Here you can see it all coming together. The front shelf supprt is screwed to the vertical leg. And then each piece of ˝ MDF is screwed down to the horizontal shelf support. Each shelf will need to be notched to go around the 2x4 the shelfs are screwed in with 1 5/8 screws. All screw hold are predrilled.
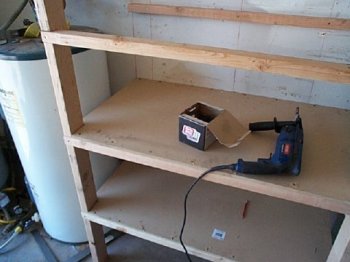
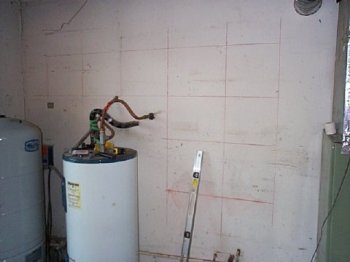
Here is the final product. I managed to greatly increase my storage as well as smarten it up, where before I could only store flats of cans 2 high by 1 deep. I managed to get 4 high by 2 deep effectively doubling the amount of these cans I could store in the garage. And so now its time to move canned foods outa the closet and into the garage and then refill the closets.
Cost was around 75 dollars dang has wood went up. I used ˝ mdf instead of 9/16 plywood due to price but I don’t know which is stronger. I prefer the plywood but for what I am putting on the shelves the mdf works. Total time from tear down to restocking was about 10 hours.
Roadgrime
www.alpharubicon.com
All materials at this site not otherwise credited are Copyright © 1996 - 2006 Trip Williams. All rights reserved. May be reproduced for personal use only. Use of any material contained herein is subject to stated terms or written permission.