*Making a Pack Stand*
My family and I have always suffered from "FSS". Itís an affliction fairly common among creative types. FSS stands for Flat Surface Syndrome. You may have experienced this yourself. If there is a flat surface around our house, something gets put there. All the flat surfaces of my shop and garage are covered with things that could be elsewhere. (Like maybe where they are supposed to be!) Itís like an old adage but different, "The amount of things I have sitting on flat surfaces is directly proportional to the flat surfaces available."
I mentioned in a post on the main board a few days ago that I have often thought of making some sort of stand to hang backpacks on so I could easily pack, revise and review the pack contents. I also thought it would be nice to store packs off the floor. Itís been raining here for a few days so I thought Iíd see what I could come up with. Iím pleased with the results.
My pack stand currently holds two packs and two rain garments (Iíll explain that evolution later) It is made of some leftover wood from a fence repair. I went into this with no particular design in mind and it sort of evolved as I went along.
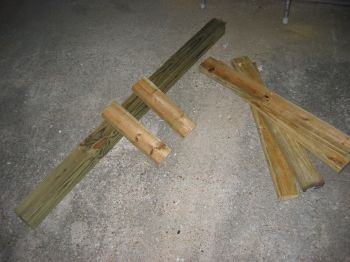
To start with I cut a 4X4 treated post to five feet and some treated 2X4ís to four lengths 32" long. For the cross pieces you will need two at 14".
If you plan to make it sturdy you can use four more pieces of 2x4 at about 14" each. These last four boards will be the 45 degree supports at the bottom.
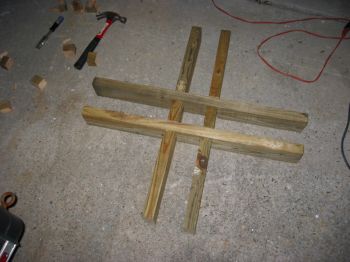
You can build this thing any way you wish. I almost hesitate to mention a specific design cause most anything will do. I measured and cut notches in the four 32" boards so they would interlock around the base of the 4x4 post. I also rounded the end corners to make it a little more "toe friendly".

If they fit together like this, you did it right.
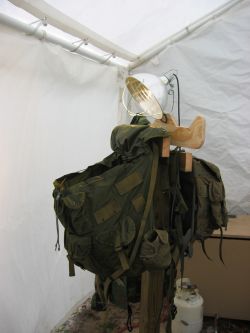
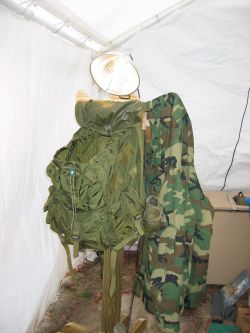
As you can see from this picture, I cut little grooves in the crosspieces so the shoulder straps would stay put. Also notice that the crosspieces are staggered for easy on and off of two packs.
The piece of ĺ" plywood at the top was an after thought and it is really what got this project going in the first place. I wanted a place to hang ponchos and rain gear to dry. When I was cutting the rounded edges of the board I glanced over and saw a clamp-on shop light so I cut the place on top so I could have convenient lighting while working with the gear. This pack stand serves as a place to store jackets or rain gear as well as a place to store BOBís or patrol gear. So far I find it very handy.
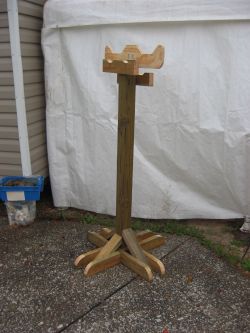
Like I said before, you can make this pack stand as simple or elaborate as you like. You can make it out of steel and weld one up or use scrap lumber that you might have around the yard. It didnít cost me anything until I started shifting supplies from a large ALICE pack to a medium ALICE and I thought it would be nice to have some wheels on the bottom so I could spin it around and move it out of the way while accessing boxes on the shelves that I keep it in front of.
Thereís enough room for two more packs on the bottom and the whole thing only uses a "footprint" of 32" around. Iíve saved space and created a handy place to check my gear. Might even save a little strain on my back! Hope you find this helpful.
RollingHitch
www.alpharubicon.com
All materials at this site not otherwise credited are Copyright © 1996 - 2005 Trip Williams. All rights reserved. May be reproduced for personal use only. Use of any material contained herein is subject to stated terms or written permission.