*Replacing A Bathroom Faucet*
My bathroom faucet started leaking. Uh oh, says I. I am NO plumber by any stretch of the imagination. But, since I live alone, a girlĺs gotta do what a girlĺs gotta do. I panicked some, then got on with business.
I turned off the water to the house. Some sinks have water turn offs under them, which is very convenient. My toilets do, but my sinks do not, so I had to turn my water off at the meter. If you have to turn your water off at the meter, be sure to take your pliers with you. You donĺt turn the knob on your meter a lot, and it can be hard to do with just your hands.
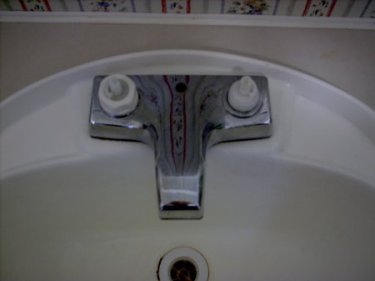
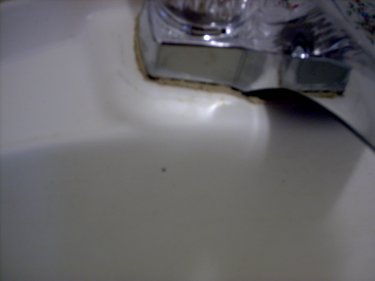
I took off the faucet handles by popping out the "C" and "H" tabs. There are screws under there, and I unscrewed those and took off the knobs.
The parts sticking up come out, leaving you with something like this:

Next, I had to get under the sink to disconnect the hose fittings from the faucet. You simply unscrew them from the threads on the underside of the faucet.
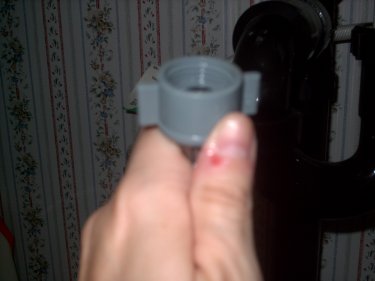
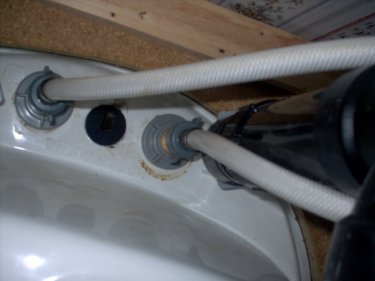
Now to actually finish detaching the faucet so I can remove it. I had to get under the sink and unscrew the wide flange holding each threaded shaft onto the sink basin.
Iĺm pointing to the flange you have to unscrew. There should be one on each side. You simply unscrew them-you may even need pliers to get them started.
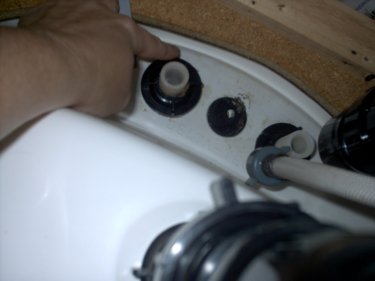
Once you remove the flanges, the rest of the faucet assembly should simply pick up from the sink basin and leave you with only the basin, looking something like this.

Now to put on the new faucet. Youĺll need some plumberĺs putty at this point. I didnĺt have any, and in my ignorance, I didnĺt know I needed any. So, after coming back from the store, back down to business. J
Of course, remove the new faucet from the box. The directions on my new faucet said to apply about a ╝" ring of plumberĺs putty around the rim of the faucet. Plumberĺs putty is like very thick Play-Doh. I didnĺt know anything else to do, so I put it on in pinches with my fingers. It came out like this.
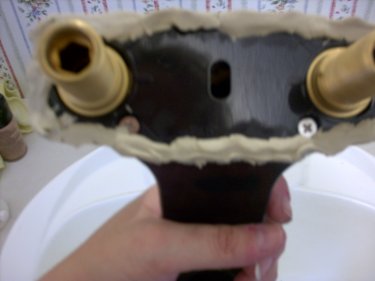
The jar of putty said that excess putty comes off easily and can be reused. After I placed the new faucet with the putty on in position, I took a butter knife and scraped the putty so it was neat along the edges, and put it back in the jar.
Now, to hook everything back up.
I had to crawl back under the sink and do everything Iĺd done to get the old faucet off in reverse. I screwed the wide flanges onto the threaded parts coming through the holes to hold the faucet to the sink. Then I screwed the hoses back onto the threads, connecting the water pipes back to the faucet.
I went out to the meter and turned the water back on. This is the finished product.
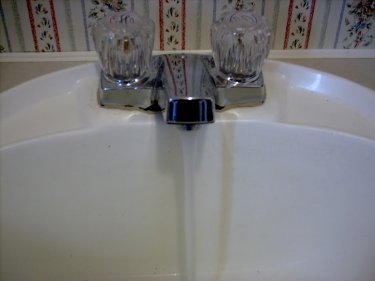
WHOO HOOO!! Success!
Be sure to check for leaks once youĺre through. Oh, and it always helps to have a Plumberĺs Helper. J

www.alpharubicon.com
All materials at this site not otherwise credited are Copyright ę 1996 - 2004 Trip Williams. All rights reserved. May be reproduced for personal use only. Use of any material contained herein is subject to stated terms or written permission.