*How to Build a Rocket Stove from Empty Cans*
By: Lindy
27 March 2012
Lets face it. If the SHTF, and you have to bug out, the fuel for your back pack stoves is only going to last so long. Then, you're going to have to use wood. The rocket stove I built uses sticks and, once the fire warms up and the wood is dry, there will be no smoke.
So, collect your cans. Get 4 to 5 soup cans and cut the bottom out of all but one. Then get a number ten can, or a coffee or paint can. Use the paper from a can to make your template to lay out for the fire chamber and for the entry hole in both the side and top of your number 10 can. You want the side hole to be 1 and 1/2 inches from the bottom.
My bug out bag has a axe awl, tin snips and a few other handy tools. I also carry a Gerber tool.
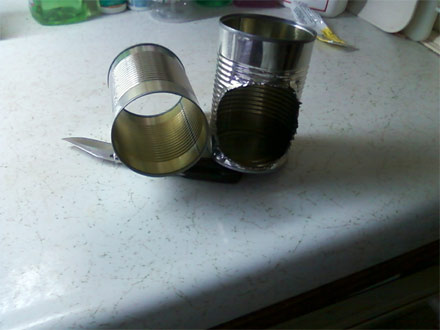
Use your awl to punch out the circle for the can to go into the burn chamber (See picture below). Once you punch it, use your can opener on your knife to finish the cut.
The hole will be a little small, which is alright. Use your pliers to bend out a little at a time to fit. Once the can will go into the burn chamber, mark the feed tube can for notching inside the burn chamber. Use tin snips to cut inward. Reinsert the can, then bend tin upward to fit (See picture below).
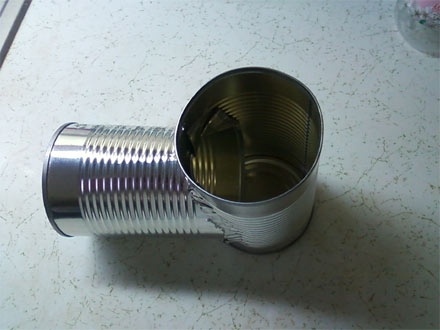
Now, you have assembled the wood/air tube to the burn chamber.
For the chimney, there are two ways from here. On my first one, I took one can and cut it lengthwise so I could fit it inside the burn camber. On my second one, I used this can on the outside of both the burn chamber and the chimney. Keep in mind that this should be one inch below the top of #10 can.
Put dirt or ashes, or even sand, in the bottom of the #10 can to the bottom of the feed hole. Then insert the feed tube through the ten can from the inside out.
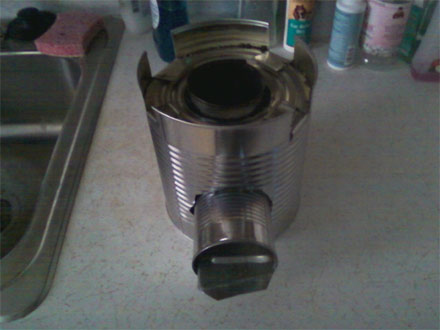
Now, cut a hole in the top tin that came off the #10 can for the chimney. Center up everything and fill the rest of the #10 can with its insulating material up to 1" below the top. Then put the top tin down to the insulating material and cut four 1" x 1" notches to bend down and hold the top. You're ready to start your fire.
See the picture below for the completed look...
Cut a piece of tin to fit in the middle of the feed tube, to hold wood on top and let the air in through the bottom. Have fun with this. You can make larger versions of this stove from ammo cans. The ammo can version can be used to make tent heaters by putting a top on it and a vent tube out the sides.
These stoves work very well and use very little wood.
Lindy
www.alpharubicon.com
All materials at this site not otherwise credited are Copyright © 1996 - 2012 Trip Williams. All rights reserved. May be reproduced for personal use only. Use of any material contained herein is subject to stated terms or written permission.