* Vegetable Dehydration *
By serger
Saving the garden for later
One of the easiest ways to put food by for later use is the process of dehydration. The way it works is to remove enough water from the produce the bugs and bacteria quit eating on it. The produce is then packaged and saved for later.
Here in Podunk we find dehydration works exceptionally well because it’s already real dry and goodies we put up this way don’t care if they are frozen. That is a concern because we have freezing temperatures to contend with from mid September until the end of April. The rule of thumb here is not to plant before Mothers’ Day( mid May) because the stuff will be frosted and if you don’t get frost before the week after Labor Day (first of September ) you’ve had a good year. The off chance of freezing the canned in glass foods due to possible breakage concerns me and because of that my family tries to minimize the amount of canning we do.
In the past we had screened in boxes that we used and set outside and let the bountiful wind do the work of drying the produce. As we’ve gotten older we’ve acquired electric dehydrators and now have one I feel is the top of the line.
But I wanted to have a pictorial article on the process and what we do. Unfortunately this week is the week of the dreaded zucchini plant and we’ve been putting up dried zucchini and because of that those are the pictures you’ll see.
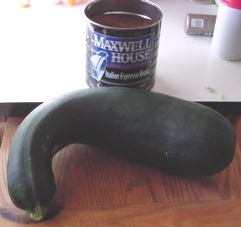
Without getting into the nasty jokes here is one Zuke with a three pound coffee can behind it to show relative size. This one weighs in the 5 pound range and when dry will be less than 8 ounces of material. We chunk them up and place them in the dehydrator by various means. But in the case of this vegie you have to remove the seeds
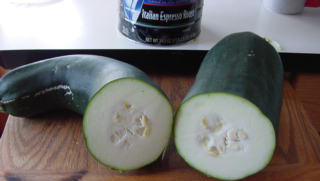
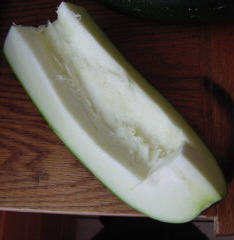
The Picture on the left is the split Zuke and you can see the seeds. We pull those out and what you get in this case is the picture on the right. The reason for pulling the seeds is to make processing easier and to produce a nice not tough product. For some reason the seeds always get hard.
Since today we are going to make bread using the Zucchini the shredder has to be used.
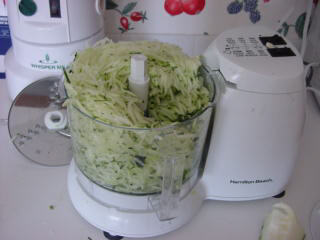
The shredder blade works fast. In the past I did the deed with a four-sided cheese grater. On some of the textures of this plant you can also use the Kraut cutter you make Sour Kraut with, but not today.
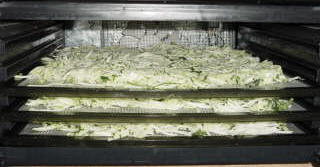
Once we get done with the shredding I then place the pieces on the drying trays for the dehydrator. The machine I have takes all 5 trays to use for a Zuke as big as the one in the picture. The picture has only three of them installed.
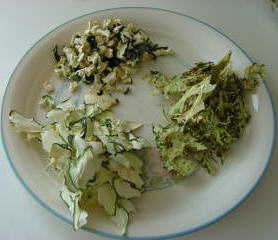
After they are dried then what you get is the produce that looks like this. Not the different configurations of the plant. The square chunks make good stews. The slices that look like wood shavings make excellent casseroles. The stuff that looks like pencil shavings are what we were drying today. They make excellent Zucchini bread.
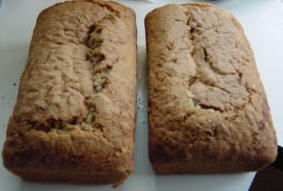
This is what the bread looks like when it’s done. Can you tell the difference between the fresh bread and the stuff made with the dried Zucchini? The answer is the loaf on the right is made from dried and left one is the fresh. We can’t tell the difference in taste or texture. That’s the best part of dehydration; if it’s done right the stuff can’t be differentiated from fresh out of the garden foods.
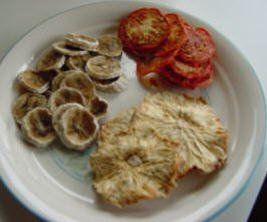
Lastly, I wanted to show you a picture of some of the other goodies we dry. The picture is one of Tomatoes, Pineapple, and Bananas. If you’ve never had spaghetti with dried tomatoes in it you haven’t had spaghetti. And the dried tropical fruit is a good trail snack.
Dehydrating foods is easy and we have had no problems with it. I also use the dehydrator to make jerky but that is a different article.
Thanks for the read.
serger
All materials at this site not otherwise credited are Copyright (c) 1996-2002 Trip Williams. All rights reserved. May be reproduced for personal use only. Use of any material contained herein is subject to stated terms or written permission.