I believe that there are two groups of people in the world when it comes to elderberries. Those who love the elderberry jelly and syrup we make, and those who haven’t tried it yet. So, that more of you might try some elderberry jelly or syrup, I am including a sample at the end of this article. Well, not really, but by then you will be able to make your own.
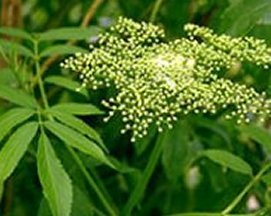
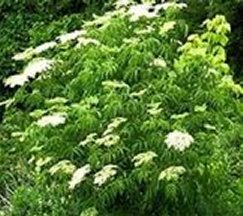
One of the biggest challenges to making anything with elderberries is finding a source of berries. You can grow cultivated elderberries in your garden or you can harvest wild berries. We have planted shrubs in our garden, and maybe in a few years we will be able to harvest our own berries. Until then we will enjoy the hunt for wild ones. Here in western NYS elderberries can be found growing wild, and others very seldom use them. They tend to prefer sandy or loamy soil rich in humus and nitrogen. Full sun or partial shade. Once you know what they look like you will find yourself watching for them as you drive around your AO. The time that I find it easiest to spot elderberry bushes is early summer when they are in bloom. Look for shrubs about 6’ – 12’ in height with white flower heads about 6”- 8” in diameter. If you look close you will find a saw-tooth edged leaf, and a multi-stemmed flower head.
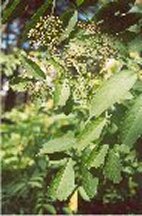
Now, remember where you found those elderberries. As the summer ends, you will notice that the white flower heads develop into bunches of small bb sized green berries.(see left below) In our AO the berries turn deep purple and ripen in late August / early September. When ripe, the berry heads droop with their weight.
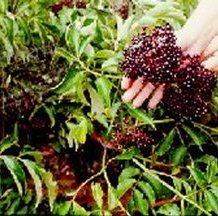
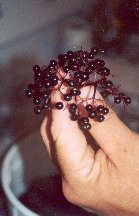
I find that the easiest way to harvest the berries is with a pair of scissors and a plastic shopping bag. I’m right handed, so I put my left arm through one handle loop then cut the whole berry heads off and drop them by the hand-full into the bag. Don’t stuff them too full. Now is NOT the time to squish out the juice!
The next step in the process of turning the berries into a tasty treat is to get the berries off the stems. Now you can pick them off the stems individually. This method has the advantage of keeping all of the stems out of the berries. If you are a bit anal, this method is for you. However it takes a long time. We use a fork and just comb the berries off the stems. You will get some small bits of stems in with the berries, but don’t worry; they won’t make it to the jelly.
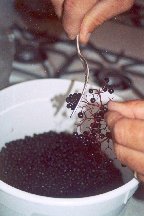
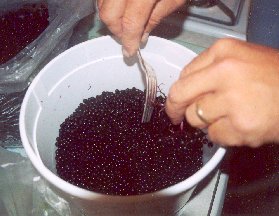
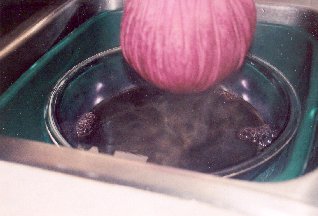
Even using a fork and having help, this process takes a while if you have many berries. Once you have combed the last berries from their stems, rinse them with cool water. We actually submerge them in water and watch for any bugs that may have gotten into the berry bucket. You should remove these.
After draining the berries place them in a big pot with enough water to just cover them. Bring them to a boil and then simmer them for about 20 minutes. We use a potato masher during the last few minutes to help masticate the mash.

Now every year when we are ready to strain the mash, my wife brings up the point that the proper way to strain the berries is with cheese cloth. We never have any, so we always end up using a square of clean sheet material. I cannot therefore attest to whether or not cheese cloth would actually work. If you try it and it doesn’t work, don’t blame me. Anyways, you will need about a 3’ square of whatever material you have. Spread this out in a large bowl. The placement of this bowl is critical. It needs to be under something to which you can tie a string that will hold up the weight of the berry mash and your cloth. I put a 2x4 across the space between upper cabinets over our kitchen sink area. This allows us to put the large bowl right in the sink.
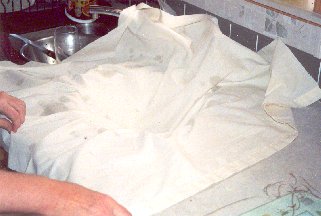
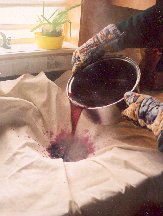
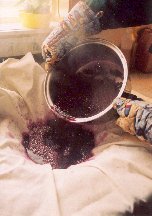
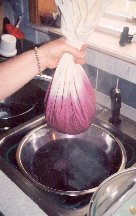
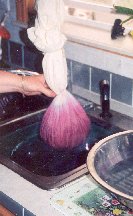
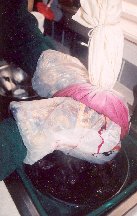
Now, gently pour the mashed up berries and the water into the cloth. Don’t spatter, the juice is very staining! Gather the corners of the cloth and tie with string so you can suspend the cloth “bag” over the bowl while the juice drains. Once the mash cools some, put plastic bags over your hands (and pot holders if still hot) and squish out all of the remaining juice. I want to build a wooden “juice squisher” for next year (like a grape press) so if you have plans send them along to me. Discard the skins, seeds and stem pieces.
At this point you have a bowl of elderberry juice. If you want to put off making the jelly/syrup right away, or if you haven’t collected enough juice for a batch (3 cups) the juice can be frozen for future use.
Decision time!!! What do you want to make?? We make jelly, good on toast, and syrup, my favorite for pancakes & waffles! The syrup is also used widely as a very good cough syrup. Wine is also an option, but we have not tried to make wine yet, and so have no recipes.
Well today we started off making jelly. You will need some glass jars, some seals and some lids. You will also need some “Sure-jell”, some lemon juice and a whole lot of sugar. The receipt we used for our elderberry jelly is the cook method receipt that is listed in the “Sure-jell” package. We did double batches, and this is the receipt: (Note: you can double the receipt, but not triple it.)
6 cups juice
¼ cup lemon juice
2 boxes sure-jell
9 cups sugar
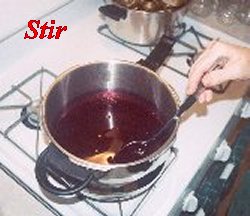
We put the elderberry and lemon juice and the sure-jell into a large heavy pot and brought it to a roiling boil. We then added the sugar and brought it back to a roiling boil. We boiled it for one minute and then removed the heat. The receipt calls for stirring the juice as it boils for the last minute. In reality you should stir the juice often right from the start to avoid burning the juice.
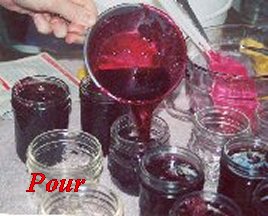
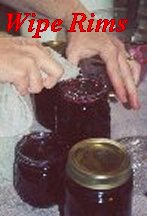
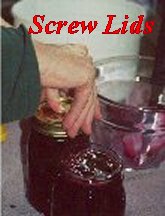
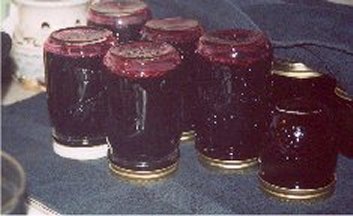
Every batch produces about five pints of jelly. We poured the jelly into either pint or ½ pint jars. A serria cup worked well for pouring the smaller jars. Make sure to clean any jelly from around the rim before you put on the lid and screw cap. The lid should be boiled and left in the hot water until you place them on the jars. As soon as you screw the lids on tight, place them upside down on a towel and cover them for five minutes. Then turn them upright and cover again. You will hear the lids pop as they cool and seal.
This afternoon we proceeded on to the syrup production. The ingredients are the same except you don’t add sure-jell and the amounts are a bit different.
5 cups juice
¼ cup lemon juice
7 cups of sugar
Put all of the ingredients into the large pot and bring to a roiling boil. Remember to stir! When the juice is boiling at the point that you can’t knock it down by stirring, time it for two minutes more and then remove heat. Pour into jars, wipe rims, place hot lids and screw tight. This won’t seal the same way that the jelly does. You have to use a hot bath canner. Put the jars of hot syrup into a hot bath canner with the jar tops covered with water. Bring this to a boil and boil for 10 minutes. Remove from the bath and cover well until cool. Do not tip these jars.
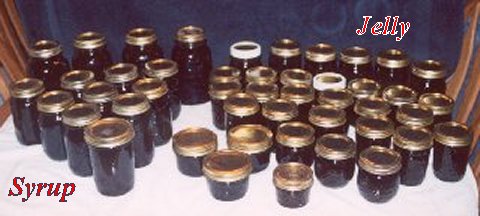
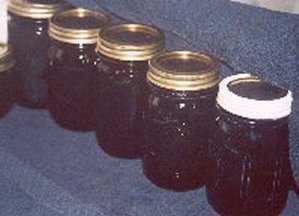
All in all, we had a pretty producive day. From a start with just under 3 gallons of elderberry juice, we finished up with 5 pints, 23 ½-pints of jelly, and 4 quarts, 10 pints of syrup. Sure will taste good on those cold winter mornigs that are coming!
Navigator & wifey
www.alpharubicon.com
All materials at this site not otherwise
credited are Copyright © 1996-2003 Trip Williams. All rights reserved. May be
reproduced for personal use only. Use of any material contained herein is
subject to stated terms or written
permission.