*An Improved Alcohol Stove Design*
This alcohol stove features several improvements over what have become conventional designs:
it only requires one can to construct
the construction is simplified and less time consuming
the greater heat wick surface area provides improved performance and rapid priming
This design is slightly more fragile than some others, but the best pop can stoves are hardly robust.
This size and type of stove is particularly well suited to boiling water for preparing a foil pouch of dehydrated food. It is lightweight and easy to use. The construction is simple and it can be put together quickly at little to no cost.
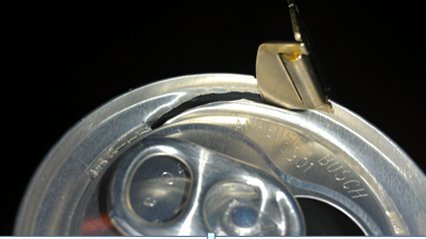
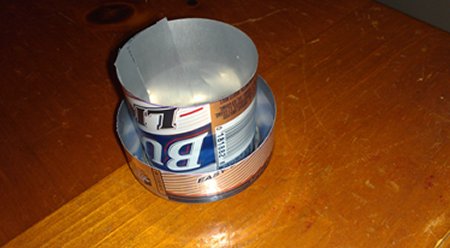
First, starting with an empty and clean can, cut out the top of the can along the rim. A P-38 can opener, properly sharpened, makes this easy.
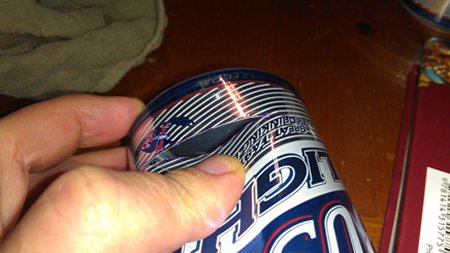
Next, about one inch up from the bottom of the can, mark and then score the body of the can. Score it deeply over several passes, making sure that a clean score line is made.
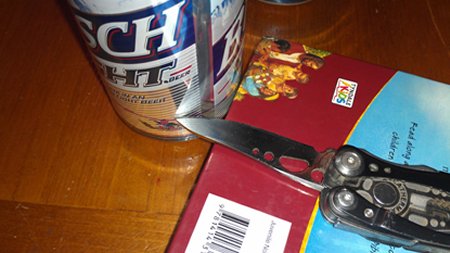
Gently press along the score line and the metal will begin to crack. This may be aided by use of the tip of your knife. Slowly walk the crack around the circumference of the can. Be careful not to crease it.
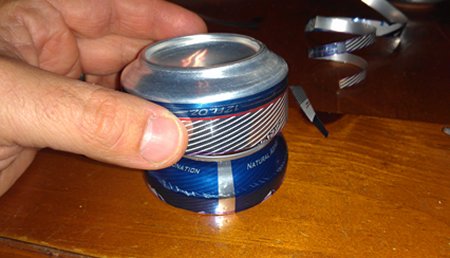
Using scissors or scoring the can as above, cut off the top part of the can at about 3/4". Save the center section of the can to make the center support/inner wall. Place the top portion open side down and the bottom portion over it. Press lightly and the lower portion will slip tightly over the top. It may wrinkle slightly, but this can usually be smoothed out and does not materially weaken the stove.
Make the center support/inner wall by trimming the remaining can wall material into an even rectangle between 1 1/2" and 2". Cut slots on the opposing long sides of the piece so that when locked together with the ends on the inside a cylinder is formed. Space the slots such that the assembled cylinder fits closely with the opening in the upper portion of the stove body but still rests in the groove in the bottom. Cut small notches along what will be the bottom of the cylinder to allow fuel to flow from the inner to outer chamber once assembled.

Carefully puncture the upper stove body inner surface. I used an ice pick, but a small drill or push pin work well. Take care not to puncture the outer wall. Light pressure and a twisting motion work well and help to maintain control. Eight equally spaced holes worked well for me.
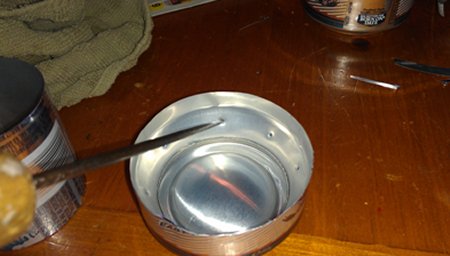
Put the center support/inner wall into the stove body and you're done. Construction took less than 15 minutes, using only a pocketknife, scissors and an ice pick.
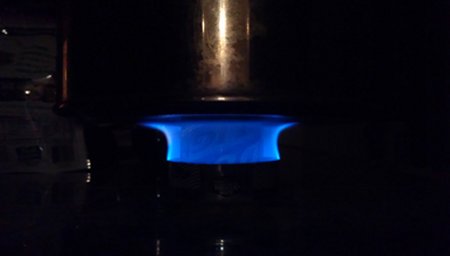
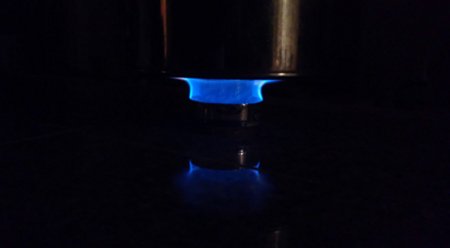
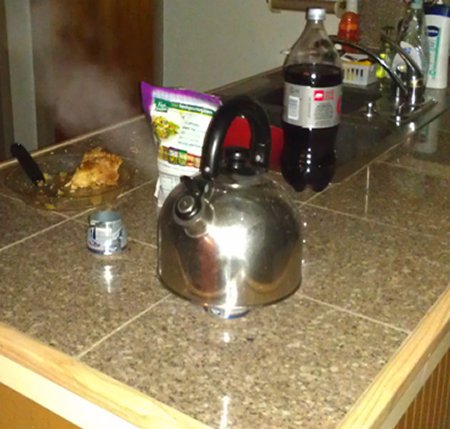
Using a quarter inch (about 30mL) of SLX denatured alcohol, I test ran this stove using a heavy bottomed kettle and 2 cups of cold tap water. In the field, a smaller and lighter vessel and a windscreen would be advisable. From room temperature to a full, rolling boil with the whistle screaming was just under five minutes. There was still fuel remaining. Take care to balance the pot evenly. Some test run pictures:
A good alternate fuel is yellow bottle HEET gas line antifreeze. Isopropyl doesn't burn nearly as well, but works. I have not tested straight ethanol.
Note: The center support can be strengthened by adding another layer, though that requires a second can and is unnecessary if due caution is used.
Note: this stove is nearly silent in operation and does not smoke at all. There is a slight alcohol odor.
Note: Methanol is toxic and can be absorbed through the skin. Minimize contact and do not ingest.
Grundy
www.alpharubicon.com
All materials at this site not otherwise credited are Copyright © 1996 - 2013 Trip Williams. All rights reserved. May be reproduced for personal use only. Use of any material contained herein is subject to stated terms or written permission.