*Secret Storage Places*
Creative Storage
By: Vikis
23 February 2011
It seems that you can never have enough storage space, but there really is more space available than you probably think. You have to remember, it's not what you put in your available space, but how you put there.
It doesn't matter if you live in an apartment, mobile home, house, or McMansion - the space you need is potentially there, you just have to be a little creative and break free from the ordinary!
For prepper's, getting organized is a huge challenge. You've got to keep up with where you are putting everything and then you have expiration dates to worry about too. Not to mention, you've got many times the "normal" amount of any one item to deal with!
So, let's talk about how to get-it-together!
#1 All this stuff!
- I know we've all heard it before, "You've got to declutter before you can organize." This is the hardest part for anyone to do but you've got to let-go of stuff that you have no need for. You can't start moving in new items if you have no space and no clue what you're going to do with it!
- If you try to declutter your whole house at once, it will overwhelm you and you'll stop, so take baby steps. Do one room at a time and start with the smallest room in your house.
- Start in one corner of the room and work your way around until you are back at your starting point. This way you won't miss anything! Remember, at this step you're only worried about getting rid of stuff you don't need, don't use, don't like and never plan on using again. Don't forget to go through furniture drawers, closets and under the bed!
- My suggestion for the old stuff is to put it on Craigslist! I've gotten rid of everything from antiques to junk this way and it never ceases to amaze me what other people really want. Just be sure and practice safety when allowing total strangers into your house. I normally try to have the items outside of the house.
- Just remember, decluttering is an endurance test! It takes patience and goal setting to get it done.
#2 Everything has a place - put it there!
- This is pretty simple. Now that you have all the old, used and unwanted items out of your house, you need to go back through and put things where they belong and try to consolidate. At least try to get items in the room they belong in.
- For example, if you're like me, you have at least 2 drawers of t-shirts that could be combined into one. Your working stock of TP doesn't really belong in the kitchen pantry; it goes in the bathroom or under a bed. Do you really need two night stand drawers with only one or two books/magazines in them? Could you possible move all the extra blankets to the top shelf in the linen closet instead of one blanket on each shelf? I think you see where I'm going with this step.
- A little side note here: You'll soon notice that I like repurposing things.
#3 Get Creative and have a "Duh-Moment!"
- For some unknown reason the little plastic bags that grocery stores use have always annoyed me, but one day they could come in very handy!
- I could never figure out the best practical way to store them and they ended up all crammed in the back of a cabinet - taking up space! The solution: an empty paper towel roll.
- Stick them in and forget about it!
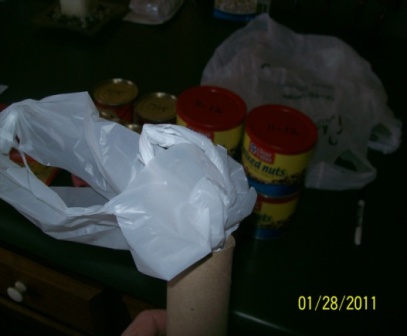
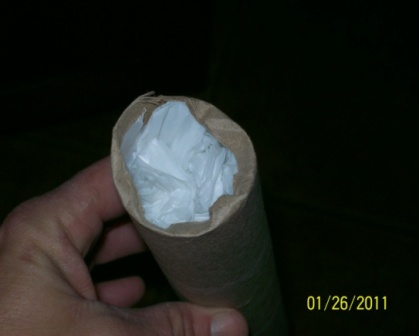
- No more mess! The rolls fit perfectly in the cabinet and you can get about 12 bags in one roll. The picture below is one-quarter of a bottom kitchen cabinet and there are approximately 72 little plastic bags stored there, in paper towel rolls. You'd never guess that would you?
- This cabinet was full of plastic bags at one time. I've gained 75% of my cabinet back and I can see the appliances I have stored away.
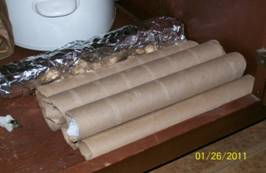
In the back of the photo directly above is how I store used aluminum foil that was only used to cover food or something simple. I simply take the used foil and wrap it around an empty paper towel roll too. Stores nicely like this.
Due to the fact my kitchen does not have a panty, I've spent a while trying to figure out another way to make a "working pantry." I really don't have a lot of cabinet space and then, I had a "duh-moment!"
I've not completely got this system in place yet, but I've made it through the cleaning out, consolidating and practicing the methodology.
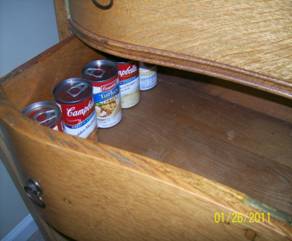
This dresser sits in a spare bedroom adjacent to the kitchen so it's a perfect place for canned goods! How many cans (the small ones, not #10's) do you think you can store away in a dresser? Well, in my case, 225 and that's just in the bottom three drawers.
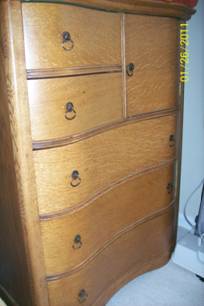
Once my preps start outgrowing the storage room, this is where I'll be bringing my "working pantry" items. New items will go to storage and I'll bring the latest dated items to the dresser and work out of it.
Rotation will be simple using the dresser method by marking the expiration date on the top of the can and rotating by:
- Removing the can in the left front corner
- Slide remaining cans in that row forward
- The last (or farthest back) can in the second row goes across to the end of the first row
- Slide all second row cans back
- Repeat through all the rows of cans in drawer
- New cans get added to the last row furthest to the right
Simple rotation is accomplished by using the S method. One drawer will hold 75 cans and that's enough for 1 meal a week with that particular item. I can mark that food item off my one year list when the drawer is full. As long as the drawer stays full, my one year goal is accomplished. When I start running low in the storage room I'll replenish.
An entertainment center can also be used as an out-of-the-way storage place. To friends and family it looks like any other entertainment center, but…
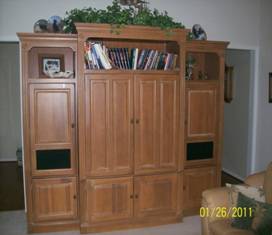
to me it is more storage!
Forty cans will fit on each shelf pictured. And the nice thing about entertainment centers is the shelves are normally adjustable and the doors close. So, I know I have enough storage, behind the bottom four cabinet doors, for a minimum of 320 cans of food. This only includes the shelves, not the very bottom area (where the Bible is in this picture.)
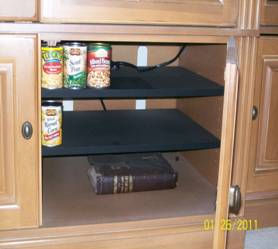
The easiest way to make this type system work is:
- Keep like items together. Soup should be in one drawer/shelf, green beans in another, etc. This way your inventory sheet is easy to maintain.
- Cans stored on shelves - it's easy to maintain rotation if you mark the expiration date on the label, facing out.
- If you really don't want to see what you've got stored away, put like items with like expiration dates in boxes. Make sure the box will hold an even number of cans. Close the box, label the goods that are inside and write the expiration date on the box
By utilizing 2 pieces of furniture that have been decluttered and consolidated, I have gained enough space to hide-away a total of 545 cans of food.
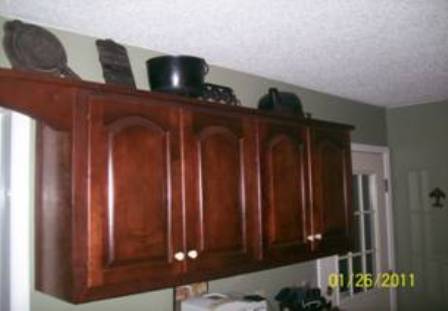
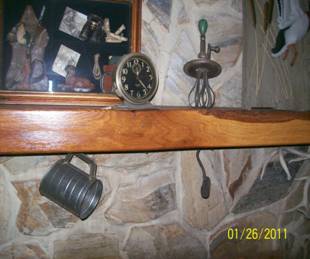
And finally, my favorite storage places are in the wide open. Most of our cast iron and some of our long-term manual kitchen items are displayed in the house. They fit the decor, so why not?
Other quick tips to consider:
- Beds - under the bed is perfect for products that don't have to necessarily be rotated; paper towels, tp, feminine products, paper plates, etc. Some paper products store just fine in their own packages and others are better if you repackage to consolidate. A cardboard box will usually suffice.
- Door-shoe-hangers - these aren't just for shoes. You can hang them in your pantry for spices or use them in your bathroom for towels and washcloths. In both of these cases, by using the door for the everyday items, you will gain space in your cabinets or on shelving areas.
In Part 2 I'll show you easy ways to get the main storage area organized and how to keep a running list of it all!
Being prepared starts with getting prepared; declutter, consolidate, and get creative! You'll be amazed at how much space you can find!
Vikis
www.alpharubicon.com
All materials at this site not otherwise credited are Copyright © 1996 - 2011 Trip Williams. All rights reserved. May be reproduced for personal use only. Use of any material contained herein is subject to stated terms or written permission.