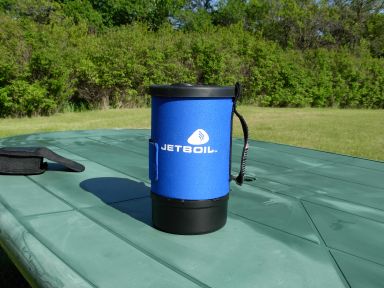
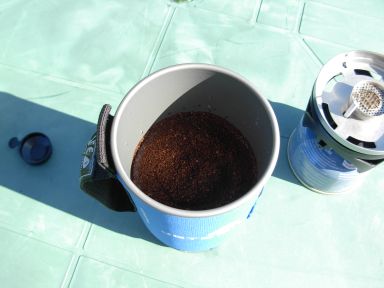
I had the opportunity to purchase the jet boil just before Summer. What I got was the mug and stove combo; this is easier to carry. I found this unit compact. The whole thing will fit into the mug. Boiling water in it is quite easy and fast and you can even fit in an MRE to heat it up. This made it easier for faster clean up too.
The first time at home that I thought I'd make a coffee I found out why they named it "Jet Boil". As you're about to see, the action holds up to the name! We had coffee boiling in two minutes... actually we had a volcano of coffee in under two minutes, LOL, but let's get down to what it can do and what we have inside the little kit.
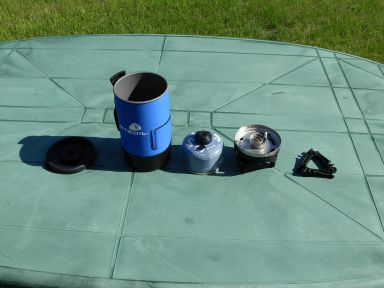
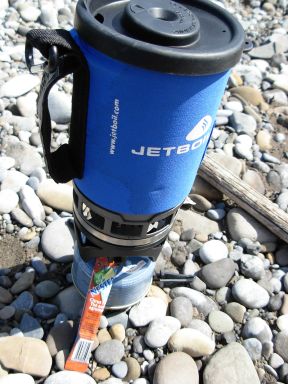
For starters we have a mug with a plastic lid. The outside of the mug has an insulating neoprene cover, and a handle. This makes it easy to pour, but the neoprene cover kind of worries me as I'm afraid it might just burn off if I leave it on there while the stove is lit, so I don't. Before you say "Neoprene is hard to burn", keep in mind that the name of this stove is "Jet Boil".. this is not some weak little alcohol flame you're about to boil water over!
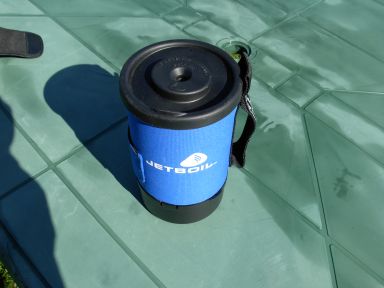
On the bottom of the mug there is a black cup which is to protect the base of the mug. This also acts as a measuring cup and a cup-cup. There are some fins that act as a wind screen, and spread the heat a little which allows the unit to boil quicker (I don't think it needs much help boiling quicker!)

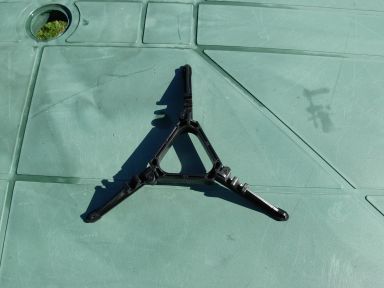
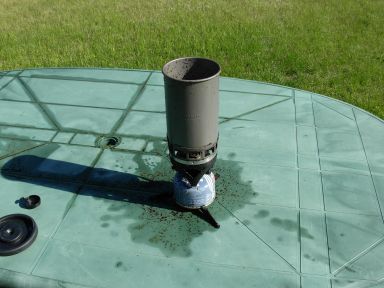
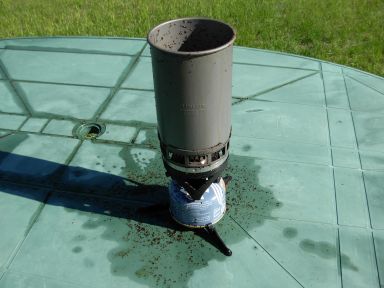
When you pop off the lid you will see a black "Tri-Stand" sitting on top of the stove
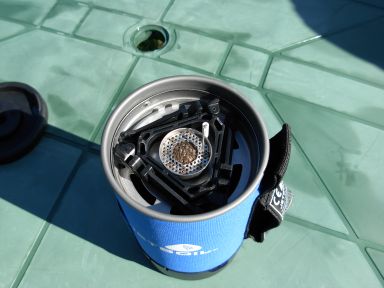
Then the stove
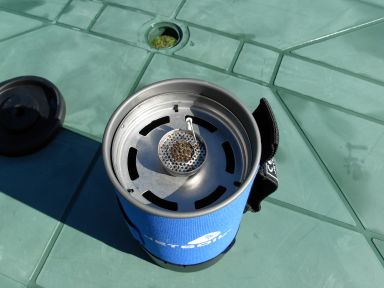
And finally at the bottom, a Butane fuel canister
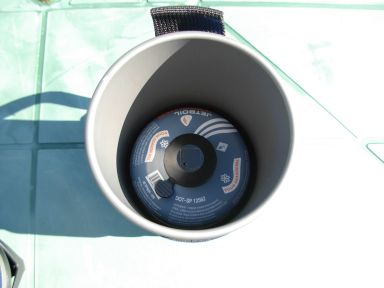
As we can see in this pic, here's everything standing and lined up the way it goes into the mug.
The tri-stand snaps onto the fuel bottle's body very nicely. This gives you a good solid base.
The weight of the fuel can is 3.5 ounces; You can go bigger and use different models of fuel, but if you want it to fit everything like it does now you probably need to stick to 3.5 ounce fuel.
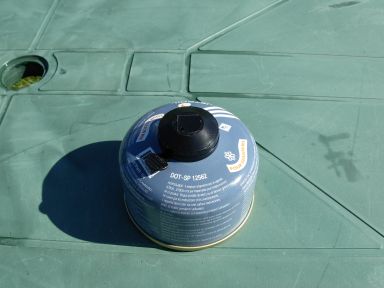
Attaching the fuel canister to the burners is quite simple. There is a black safety cap that just pops right off the top of the fuel canister. You keep this to put back on the fuel canister, this protects the threads and keeps dirt out.
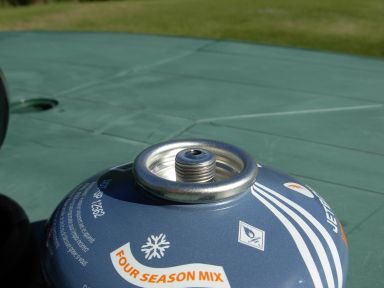
To install connect and turn counterclockwise.
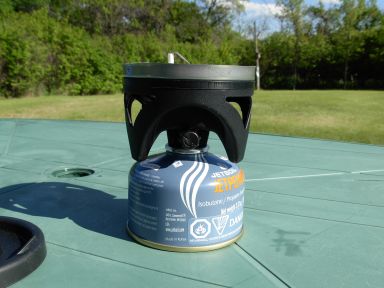
This burner has a self-contained lighter, so all you do is push the button to ignite.
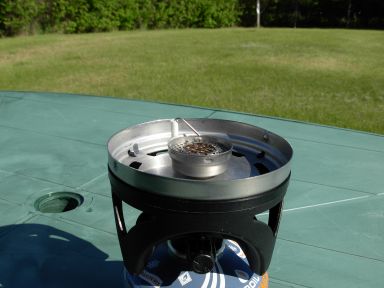
To attach a mug you have three inserts on the side of the mouth... turning clockwise locks the mug into the stove.

Now we're ready to add 1 cup water and make the coffee... this will boil water in one to two minutes. There is a line on the mug for the fill point.
Like I said, I pulled off the Neoprene cover because I wasn't sure if it would hold up to the heat. The way the mug is made the heat doesn't affect it, but the cover might be a different story.
I tried making a pot of coffee on the lowest setting, but when it started to boil it just basically kept on boiling over
After all was said and done I did get a cup of coffee out of it. Overall you want to cook on low heat unless you're trying to boil some water quickly. The way the coils on the bottom are set up it gets quite hot very fast. Over the Summer I could cook meals nicely, and the way the mug lid is made you can have a coffee mug ready to go at the same time. Overall this will be in my pack from now on for hiking and camping trips, and for my long road trips. If I'm stuck on the side of the road I can always have a coffee or warm up something.
Here are some links for you to look at if you're interested in more info, recipes, and some accessories.
http://www.jetboil.com/