*Battery Lug Crimper*
Soldering lugs to heavy gauge wire is possible, but takes some skill, some specialized equipment to do a good job, and a fair amount of time. There are some pros/cons to this method. On the upside, soldering gives an excellent electrical bond. The downside is the solder can melt if the connection is overheated, causing the wire to pull free of the lug. Crimping has an excellent mechanical bond, but not quite as good an electrical bond. If you decide you want to do both, you must crimp first, as solder will prevent a proper crimp.
You could buy the recommended crimper, as suggested by Anderson Connectors. It gives a hex crimp around the entire circumference of the connector. Excellent mechanical and electrical bond, but that crimper is $300, far more than I can justify.
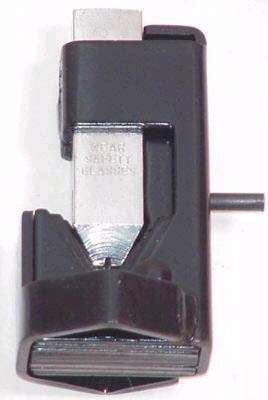
This is a Lenco brand Swedg-on Tool model 840 CM-20 crimper. Purchased on Ebay for $14.50, plus $10.50 for shipping. The Ebay seller was gobatelli. It will crimp wire from #8 to 4/0. Per the instructions: " Raise square driver to admit terminal cable. Place them between the driver and anvil. Downward spring pressure will hold terminal cable firmly against anvil, and a hammer blow on the drive will complete the crimp. Gauge on the driver indicates the proper depth of the crimp."
Now for some FNV...

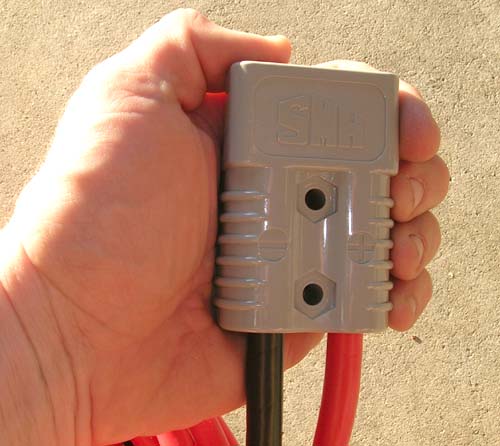
I plan on using Anderson SB-175 connectors on my battery bank, allowing me to easily disconnect, or reconfigure the setup. This will also allow me to use the battery bank to jump start a BOV, or use my BOV to recharge the battery bank (from driveway). Simple plug-n-play operation. These type of connectors are typically seen on golf carts and electric forklifts. These 2 gauge pins are HUGE. Anderson requires these lugs to be crimped in two locations.
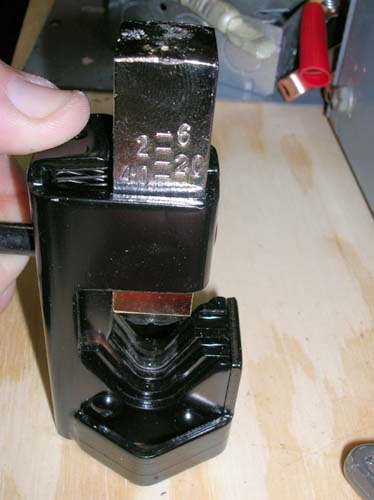
Depth of crimp indicator:
I used a 2.5# hammer:

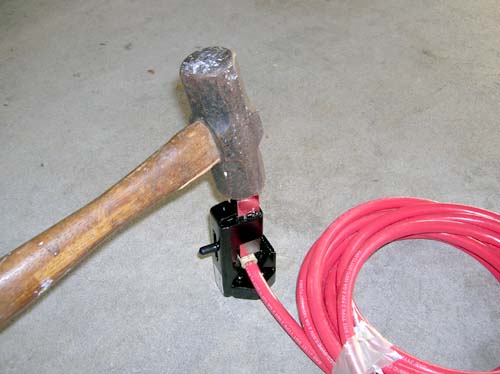
I set the crimper on my garage concrete floor. A couple of good whacks at each location did the trick. It was hit so hard that the concrete under the crimper smoked (dust). The crimper had more of a distinctive ring when the proper depth was reached (versus a dull thud). If it had been placed on a softer surface (wooden workbench), it likely would have taken more hits to get the same result.
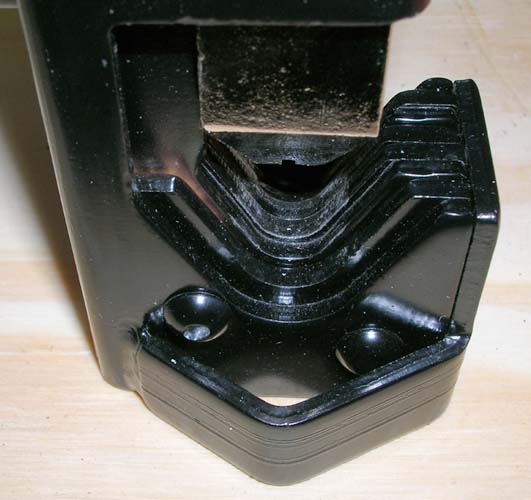
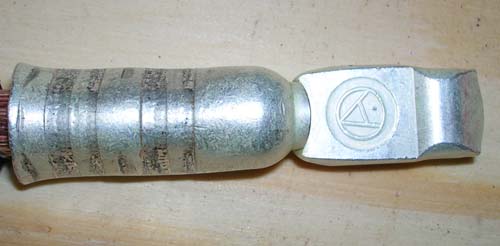
Crimped in two locations on the bottom:

Top of the lug after crimping. I tried pulling it apart to test the mechanical bond. The insulation started to pull back, but the conductor never budged.
To finish the Anderson connector, simply push the red or black wire in the appropriate side, and it snaps into position:
Now I can crimp large lugs with ease. Only takes a few minutes to make up a connector. Total cost $25.
2manytoyz
www.alpharubicon.com
All materials at this site not otherwise credited are Copyright © 1996 - 2008 Trip Williams. All rights reserved. May be reproduced for personal use only. Use of any material contained herein is subject to stated terms or written permission.