*Beefing up the Bug Out Trailer*
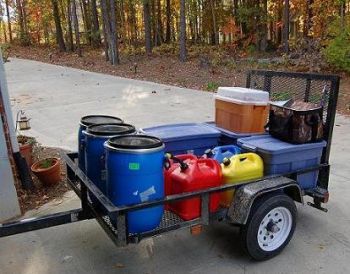
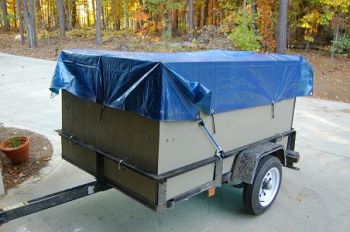
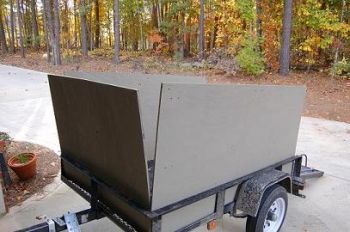
First of all, let’s take a look at the two trailers below us. Which one is going to attract more attention traveling down the road? Which one is maybe going to attract the wrong kind of attention, the kind that might want to follow such a prepared individual and see where they are going and what other goodies might be at the destination?
One trailer can haul more stuff. One trailer protects the things being hauled from not only curious eyes, but weather and wind.
The trailer was converted by the clock in fifteen minutes, and at the end of this article I’m going to share a brainstorm that hit me that should knock at least five more minutes off that brief set up time.
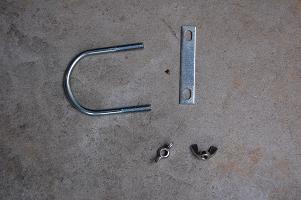
The cost of this project was about $70 total. Below is the material used.
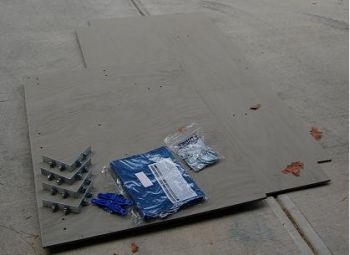
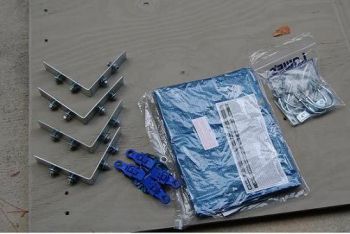
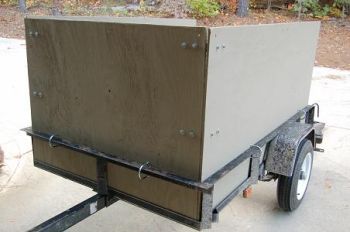
The walls are made from 5/16" plywood, about $10 per sheet at the local Lowes. The thin material was used so it’s light to move from storage to the trailer when setting it up. To weatherproof the plywood, I bought a "wrong color" can of stain at Lowes for $5. They usually have a table in the paint department of paints and stains that were mixed to the wrong color for someone, and they sell it cheap! This gallon of stain usually goes for $30!! The tarp is a 6x10 lightweight, there are some U-bolts and four angle brackets with nuts and bolts to attach them to the plywood and form the leading corners.
Assembly is very quick.
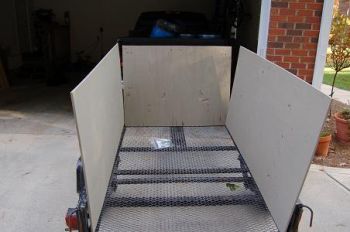
Step 1: Place the plywood pieces in the trailer.
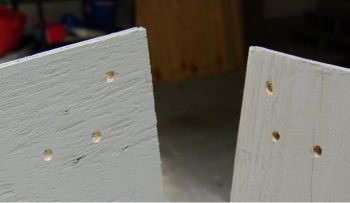
Step 2: I used drilled holes to make sure I lined up the front piece with the appropriate side piece so the angle brackets would match the pre-drilled holes. Then the angle brackets are bolted into position finger tight.
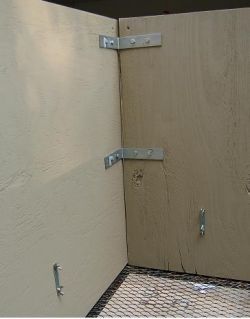
Step 3: The u-bolts were attached around the frame, and through the plywood where they were affixed with wing nuts. The u-bolts were cut down a bit so that the ends of the bolts wouldn’t damage any of the material being moved in the trailer
Behold, the walls are complete, tighten down the corner bolts and the plywood is now quite rigid and well attached to the frame of the trailer at the bottom at six points.
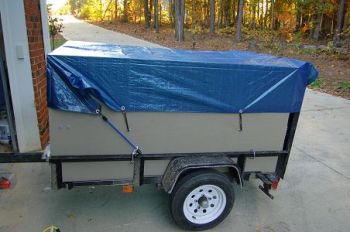
Step 4: Attach tarp. Note that in this picture, attachment points have been screwed into the plywood on the sides (and in the front) to attach bungee cords to tension the tarp. Apply other bungees as needed to wind-proof the tarp. Loading can be done after the tarp is on in case of bad weather. Then close ramp, drape tarp over it and bungee.
Since I had it out, I added a few extras to the trailer to make it a bit more friendly.
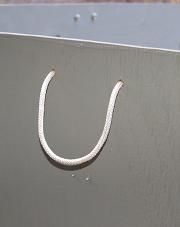
Rope handles attached to
each piece of plywood to
make them easier to carry
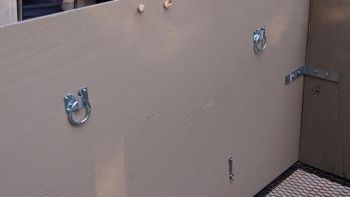
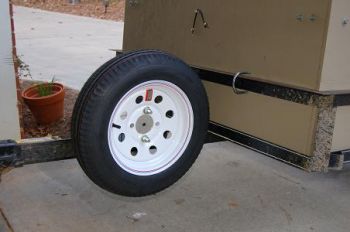
and hang up. Mounting rings inside to help secure loads. Spare tire!!
And that’s it!
THE TIME SAVER. - The u-bolts can be the most frustrating part of assembly. Cutting them short does help protect the loads inside, but plywood likes to bend, and this can make getting enough of the bolt through to catch it with the wing nut tricky, especially if you are putting this together solo. It hit me that HVAC chase zip-ties would do the exact job and would be very much faster to affix. These ties can be found at Lowes or any home improvement / hardware store. They are about 36" long and 3/8" wide. They are amazingly strong! Thread one or two from the outside through the top hole for each mounting point. Then go in the trailer and run all the zip ties back out through the lower hole, and then go back out of the trailer to fasten all of the ties. This will quickly secure the walls, and you’re done!
Ahab
www.alpharubicon.com
All materials at this site not otherwise credited are Copyright © 1996 - 2006 Trip Williams. All rights reserved. May be reproduced for personal use only. Use of any material contained herein is subject to stated terms or written permission.