*Improved Fan In A Can*
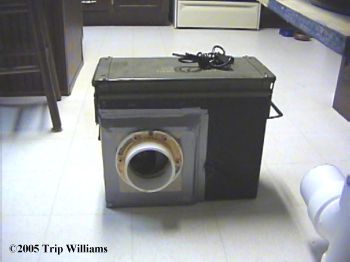
This is our third Fan In A Can, it incorporates all the design mods from our original Fan In A Can, like the removable cord, etc.
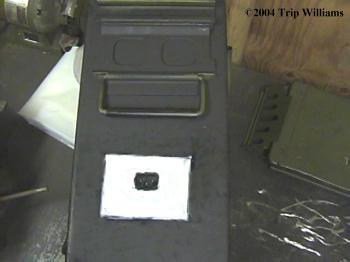
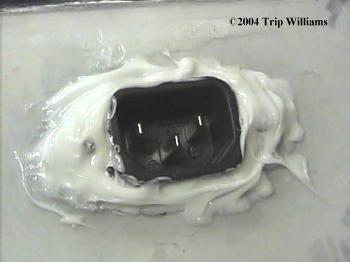
BE SURE that you seal up the tiny gaps between the metal contacts and plastic housing in the plug shown above! The gaps may not be easy to see, but they ARE there! That's why we cover the back of the plug with silicon also, inside the can where the internal power wires are connected to the plug. Apply your silicon so that as you cover the back of the plug housing it forces silicon sealant into those tiny gaps and it'll take care of the problem.
Even with ALL of the parts on hand, having ALL of the tools needed, and having made several of these before, it still took 5 hours to make. It's NOT something you can slap together at the last minute, especially if you haven't made one before. Tolerances are CLOSE and precision is needed.
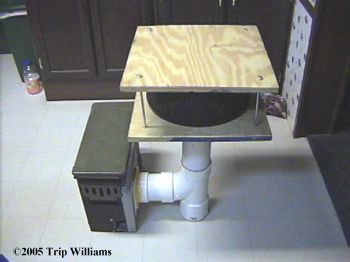
The basic design is this:
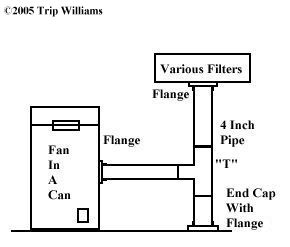
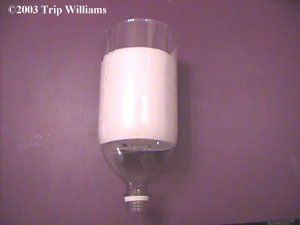
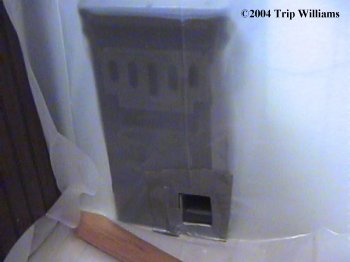
It's made by attaching a flange to the can after you cut a hole the correct size in the can, If you get a swivel-head flange, it must be glued down WELL, no gaps! While I was making the fan I sealed the wood used and let it dry.
After I glued the flanges solid I added weather stripping to the side of the can, then silicon sealant, Then bolted the flange to the can, and then used good quality duct tape. It's a guaranteed seal.
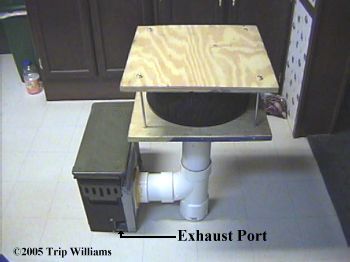
Then using 4 inch PVC I made the rest of it as shown below, Care must be taken to make your measurements EXACT so that the Filter stack unit stands on a flat end-cap without being wobbly:
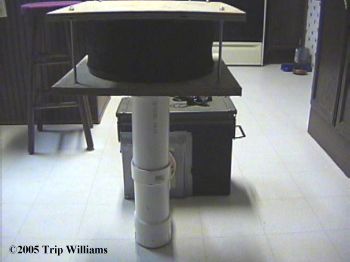
All the attached joints are well glued, and then joints are covered in Silicon sealant.
The removable sections will be coated in a thick, non-drying sealant before use, and then duct taped with silver "Aluminum Duct Tape"... Being able to break it down helps with storage.

The neat part is the filter holder. It will accept the Round HEPA filters from our Honeywell (We're well stocked in those), and It'll also accept the flat "Holmes HAPF 600" type filters, or the Flat cartridge types. Basically, ANY HEPA filter you can scrounge, you can use with this assembly.
We use a "Two Filter Method". The Outer Filter is a Honeywell Ring HEPA filter, and the Inner Ring is a Round ULPA filter. We added 2 inch wide weather stripping to the top and bottom of both filters to help make a perfect seal (Yes, weather stripping will make a circle if you're careful ;).
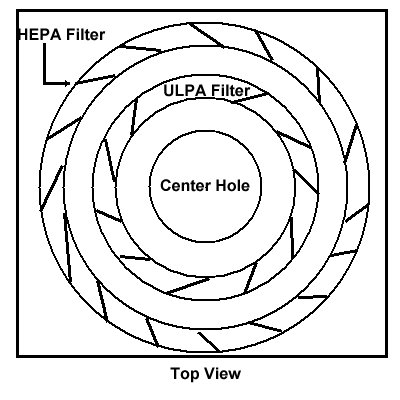
With an adapter I made, you can even use the "Two liter Toilet paper filters" in a pinch... Don't laugh, these filter down to 0.5 microns or more
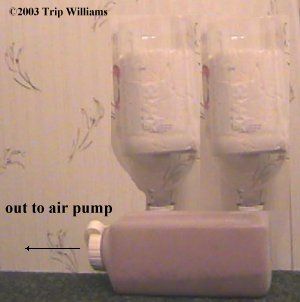
It moves a LOT of filtered air, and is very quiet. The majority of the Noise from one of these is the can rattling on the floor, and with the extra weight and footprint of the added PVC and filter stack, it stops the vibration.
I used a more powerful Squirrel Cage Fan on this one, 400CFM at 0.500 Static inches, it'll put a positive pressure on the entire house in under 5 minutes on "Medium". Remember that a squirrel cage fan for this purpose MUST be rated against a static pressure to be able to handle the extra stress of pulling air through a filter! It's powerful, yet small enough that we can power it indefinitely as long as the sun shines for a few hours every few days.
I tested the Joints and filter housing using smoke, NO leaks... Remember, even the tiniest leak is a potential death sentence, you'll be trapped in a sealed room that's being supplied with Virused air!
You can set an open bottle of Vanilla Extract beside the filter, and NONE of the smell even get's through.. neither did cigarette smoke.. that means that we're good down past 0.3 microns EASY, and probably down to around 0.01. The Filter on it now is Rated to 0.01, But if we find a better filter It's EASY to hook it into the system, Only takes about 2 minutes.
The Filter being up high means that "Heavier than Air" chemicals that pool along the floor aren't sucked into the filter, nor is dust from the floor.. we cut several lengths of pipe for it, so we could actually get the filter up near the ceiling if needed.
Changing the filter is fast and easy. We have another filter stack made up already with a flange mounted on it. We simply Suit up in Bio-gear, go out of the Saferoom's Airlock, cut the duct tape at the removable PVC joint, yank the old stack off and put the new one on, takes less than 30 seconds. While we're suited up in Bio-gear, we discard the old filter and bring the filter adapter back into the decontamination air lock and decon it while we're deconning ourselves. Once back inside the safe area we put a new filter on the adapter and it's ready when we need to change out filters again.
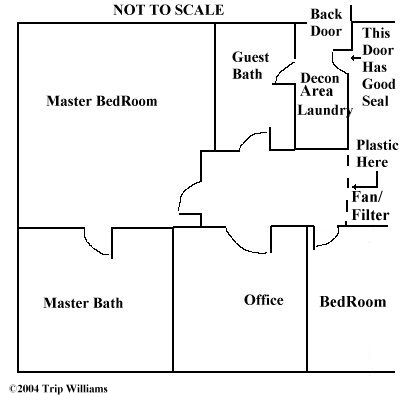
The front of the Fan In A Can can be taped to the plastic sheeting of your saferoom, or a hose can be run from the exhaust port into the saferoom
We've made three of these for ourselves now, and several others for other Rubies... So why haven't you made yours yet?
Warlord
www.alpharubicon.com
All materials at this site not otherwise credited are Copyright © 1996 - 2005 Trip Williams. All rights reserved. May be reproduced for personal use only. Use of any material contained herein is subject to stated terms or written permission.