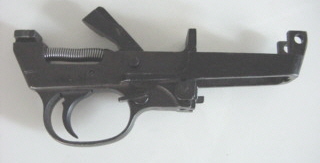
*M1 Carbine trigger housing disassembly *
By serger
27 October, 2002
Before I begin talking about the carbine trigger group safety needs to be addressed
I would suggest you read through this before you proceed. Be sure of what it is you want to do before starting. That way when you are done you’ll have the trigger housing apart and back together without having to visit your gunsmith with a shoebox full of parts and lame excuse of how your dog ate your homework, or in this case why you messed up.
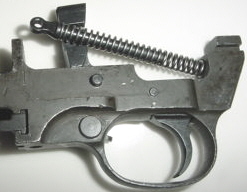
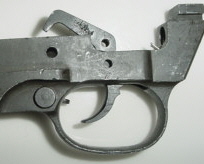
Here is an exploded drawing of the trigger housing assembly.
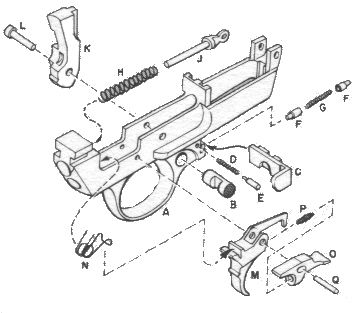
A. Trigger housing B. Safety C. Magazine release. D. Magazine release spring E. Magazine release spring plunger
F. Safety detent plungers(2 of them) G. Safety detent plunger spring. H. Hammer spring J. Hammer spring plunger
K. Hammer L. Hammer pin M. Trigger N. Trigger Spring O. Sear P. Sear spring Q. Trigger Pin
To begin detail stripping the trigger group, first place the safety in the fire position.
Next, while holding the hammer so you can control it pull the trigger. The hammer will go to the fire position.
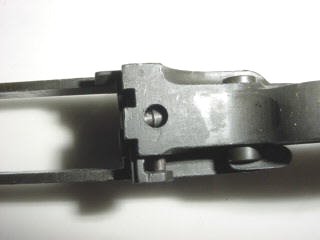
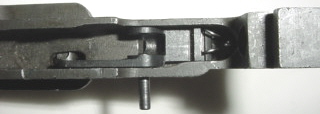
When you rotate the trigger housing you will see the cutout where the hammer spring plunger has to clear to remove it from the housing.
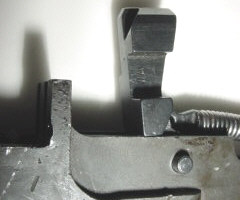
Take a small screwdriver or 1/8th inch punch and put it into the hole of the plunger. Push the plunger back to clear the detent on the hammer. You should be able to allow the spring and plunger to go forward. It will look like this.
Next, Remove the hammer spring and plunger. Then push out the hammer pin. Feel the tension where the sear presses against the hammer? You will have to overcome that tension to replace the hammer.
You next press out the trigger pin. The sear spring will try and make the sear jump out so control it with your hand.
When the pin clears the trigger group you can shake out the sear and sear spring. Next you push the trigger up and out of the trigger group. This will take a little wiggling to get it done.
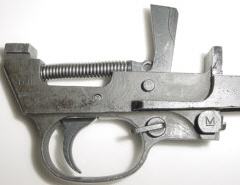
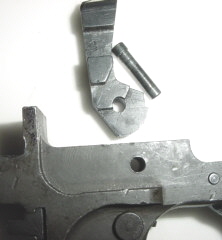
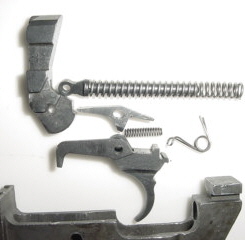
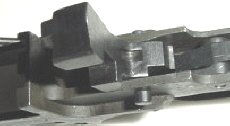
There is a trigger spring in back of the trigger. It will pop out when you remove the trigger. The fire control parts relative position looks like this. I’ve left out the hammer and trigger pins in this photograph.
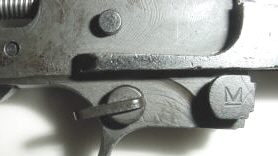
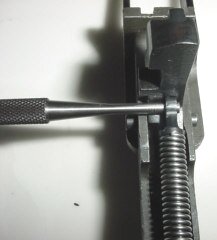
Now to finish the trigger group tear down you have to remove the safety and magazine release. To do this, depress the safety detent and slide the magazine release out. The safety detent is the thing in the hole. You push it toward the trigger guard.
Once you’ve pressed it the magazine release will slide under spring pressure a little bit then you will have to pull it out.
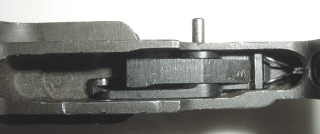
When the magazine release clears the trigger group the safety detent assembly and magazine release spring and plunger will come out. You can then pull the safety out of the trigger group.

The parts lay out more or less in those relative positions within the trigger group.
Now you have it torn down. To put it back together you start here and work backwards. To place the bottom parts back in is no big deal so I will proceed to the fire control group stuff for additional information. Note: Be sure you have the safety in the fire position so the trigger won’t give you additional headaches during assembly.
When you start putting the fire control components back into the trigger housing you may need to use some dental floss through the trigger spring. You put the floss through the loop on the back of the spring going through the hole in the trigger housing and as you gently pull it you can place the trigger back into the housing. Once the trigger is back in you will have to align the trigger pin holes with the trigger and sear. I’ve found it is much easier to start the pin and get it flush with the thick sidewall of the trigger.
Then you can drop the sear spring into the hole in the trigger. You will then have to place the sear in place and press it toward the butt stock end of the trigger housing and have the back of the sear on top of the trigger step. At this point you will be able to put the trigger pin all the way through.
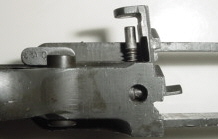
You next put the hammer in its place. You will have to push slightly on the sear spring resistance to get it to go. Leave it in the fire position. When it is there note the cut out it has for the hammer spring plunger
The plunger has to go into this spot. When you compress the hammer spring you will have to align it into the hole in the back of the trigger housing. When you’ve done that the plunger will fall in place.
That is about all there is to do to reassemble the M1 carbine Trigger housing assembly.
Thanks for the read
serger
All materials at this site not otherwise credited are Copyright (c) 1996-2002 Trip Williams. All rights reserved. May be reproduced for personal use only. Use of any material contained herein is subject to stated terms or written permission.