By: Trigger
12-17-02
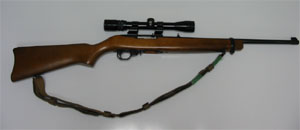
The Ruger 10/22 is probably one of the most used and abused weapon in the survivalist battery. This reliable and useful .22LR carbine will cycle pretty much any brand of ammo you give it. Even though it has all these qualities, most owners like to customize their firearms to their own liking, and the 10/22 is no exceptions. This article concentrates on (field) stripping and the rifle. This rifle has many parts and I would not recommend doing this in the field as it is too easy to loose parts. It would be safer to do this in a well lit room with a table/bench.
Before stripping the rifle make sure it is UNLOADED!!!
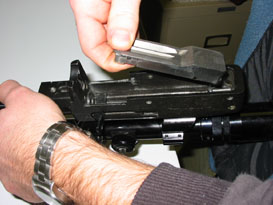
Removing the Stock
The first thing to do is to remove the stock. Most models will have
a take-down screw near the magazine well and a barrel band.
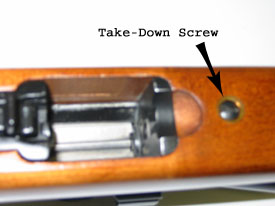
(Remove the take-down screw)
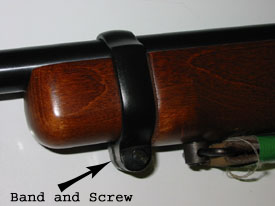

(Remove the screw from the barrel band and slide the band over to the
end of the barrel.)
When removing the barrel band, be careful not to separate the ends too much as it may break. Once the take-down screw and barrel band have been removed, put the safety on in the middle position between the "on" (safe) and "off" (fire) position. Once this is done, the stock should be able to slide off the rifle.
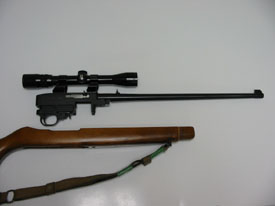
(The assembly slides straight out of the stock.)
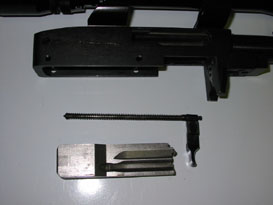
Removing the Trigger Assembly
The trigger assembly can be removed by removing two cross pins which
holds it to the receiver. This can be done by pushing the pins through
the other side with a small screwdriver of other similar tool.
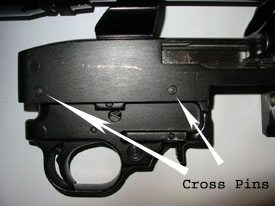
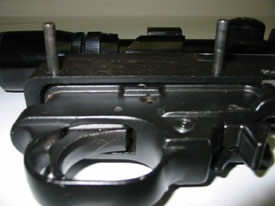
(The two Cross Pins being removed)
Click Here to see how
to strip the trigger assembly
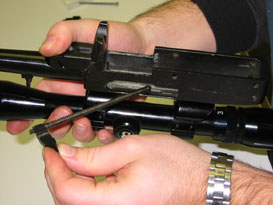
Removing the Bolt Assembly
Once the trigger assembly has been removed from the receiver, the bolt
assembly can be removed by first removing the bolt stop pin by pushing
it through to the other side with a screwdriver of similar.
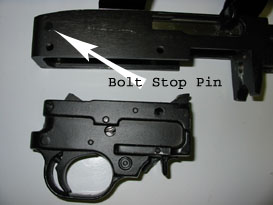

(The bolt stop pin is removed the same way we removed the cross pins
above)
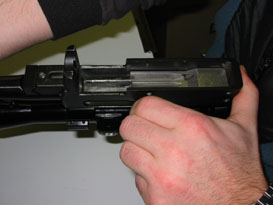
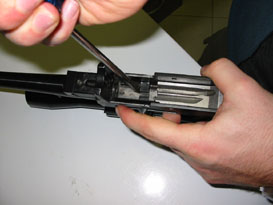
Once the bolt stop pin has been removed, the bolt assembly can be removed by pulling the bolt handle to the back, this will cause the bolt assembly to follow. When it reaches the back of the receiver, the bolt assembly can be lifted out of the receiver.
(The bolt assembly is now at the back of the receiver...ready to be
pulled out.)
When you lift the bolt assembly out, make sure you keep tension on the bolt handle and bring bolt handle back forward slowly (as I am doing in the above picture with my left hand. Failing to do so will cause the bolt handle to slam forward and may break.
(I have brought the bolt handle forward and now I'm lifting the bolt
assembly out.)
(The bolt handle and bolt assembly)
When reassembling the bolt assembly, redo the above steps backwards however you will need a screwdriver to assist you. You will need to insert the bolt handle first then place the bolt assembly into place. The two will need to lock together before the bolt can properly fit in its place.
(Insert bolt handle through the side of the receiver)

(With a screwdriver, push the bolt handle to the back until it snaps
into the bolt assembly.)
You will know that the two have snapped together as the bolt assembly will be able to go forward and follow the bolt handle with ease. Once this is complete, you may reinstall the bolt stop pin back into its place.
Click Here to view the second part of this article, the trigger assembly.
Trigger
All materials at this site not otherwise credited are Copyright © 1996 - 2002 Trip Williams. All rights reserved. May be reproduced for personal use only. Use of any material contained herein is subject to stated terms or written permission.